
In iOS 13 at WWDC 2019, Apple introduces a fast, easy way to sign in to apps and websites i.e. Sign In with Apple. Sign In with Apple allows you to set up a user account in your application with name, verified email address, and unique stable identifiers that allow the user to sign in to your app with their Apple ID.
Sign In with Apple works on iOS, macOS, tvOS, and watchOS. You can also add Sign In with Apple to your website or versions of your app running on other platforms. Once a user sets up their account, they can sign in anywhere you deploy your app.
As you might remember, last year in iOS 12 Apple introduced Password AutoFill, Automatic Strong Password, and Security Code AutoFill for modern security and privacy necessity. Sign In with Apple is one more step towards security and privacy.
Note - Complete working sample project available on Github with Keychain integration. So, you can download/clone the sample project from Github to directly jump into the code.
1. Configure Project
- First of all, let's create an new project and set development team in the Signing & Capabilities tab so Xcode can create a provisioning profile that. If you've already created project and provisioning profile then ignore this.

- Add the Sign In with Apple capability in your project. This will add an entitlement that lets your app use Sign In with Apple.

2. Add Apple LogIn Button
AuthenticationServices framework provides ASAuthorizationAppleIDButton to enables users to initiate the Sign In with Apple flow. Adding this button is very simple you just need to create an instance of ASAuthorizationAppleIDButton and add a target for touchUpInside action. After that you can add this button in your view.
let authorizationButton = ASAuthorizationAppleIDButton()
authorizationButton.addTarget(self, action: #selector(handleLogInWithAppleIDButtonPress), for: .touchUpInside)
loginProviderStackView.addArrangedSubview(authorizationButton)

3. Handle Login Button Press
Now on the press of Sign In with Apple Button, we need to use a provider (ASAuthorizationAppleIDProvider) to create a request (ASAuthorizationAppleIDRequest), which we then use to initialize a controller (ASAuthorizationController) that performs the request.
We can use one or more of ASAuthorization.Scope values in the requestedScopes array to request certain contact information from the user. Here the complete implementation of handleLogInWithAppleIDButtonPress action which we used in last step -
@objc private func handleLogInWithAppleIDButtonPress() {
    let appleIDProvider = ASAuthorizationAppleIDProvider()
    let request = appleIDProvider.createRequest()
    request.requestedScopes = [.fullName, .email]

    let authorizationController = ASAuthorizationController(authorizationRequests: [request])
    authorizationController.delegate = self
    authorizationController.presentationContextProvider = self
    authorizationController.performRequests()
}
4. Existing Account Setup Flow
There are huge posibility of user meight already logged in with your application. For that, we need to use both ASAuthorizationAppleIDProvider and ASAuthorizationPasswordProvider provider to create the request, which we then use to initialize a controller (ASAuthorizationController) that performs the request.
ASAuthorizationPasswordProvideris a mechanism for generating requests to authenticate users based on their Apple IDASAuthorizationPasswordProvideris a mechanism for generating requests to perform keychain credential sharing.
private func performExistingAccountSetupFlows() {
    // Prepare requests for both Apple ID and password providers.
    let requests = [ASAuthorizationAppleIDProvider().createRequest(), ASAuthorizationPasswordProvider().createRequest()]

    // Create an authorization controller with the given requests.
    let authorizationController = ASAuthorizationController(authorizationRequests: requests)
    authorizationController.delegate = self
    authorizationController.presentationContextProvider = self
    authorizationController.performRequests()
}
This function we can call from the LoginViewController viewDidLoad:.
5. Handle ASAuthorizationController Delegate and Presentation Context
On success, the ASAuthorizationController delegate receives an authorization (ASAuthorization) containing a credential (ASAuthorizationAppleIDCredential) that has an opaque user identifier.
5.1 ASAuthorizationController Delegate
authorizationController(controller: didCompleteWithError:) tells the delegate that authorization failed, and provides an error to explain why.
func authorizationController(controller: ASAuthorizationController, didCompleteWithError error: Error) {
    //Handle error here
}
authorizationController(controller: didCompleteWithAuthorization:) tells the delegate that authorization completed successfully.
// ASAuthorizationControllerDelegate function for successful authorization
func authorizationController(controller: ASAuthorizationController, didCompleteWithAuthorization authorization: ASAuthorization) {
    if let appleIDCredential = authorization.credential as? ASAuthorizationAppleIDCredential {
        // Create an account in your system.
        let userIdentifier = appleIDCredential.user
        let userFirstName = appleIDCredential.fullName?.givenName
        let userLastName = appleIDCredential.fullName?.familyName
        let userEmail = appleIDCredential.email

        //Navigate to other view controller
    } else if let passwordCredential = authorization.credential as? ASPasswordCredential {
        // Sign in using an existing iCloud Keychain credential.
        let username = passwordCredential.user
        let password = passwordCredential.password

        //Navigate to other view controller
    }
}
5.2 ASAuthorizationController Presentation Context Providing
presentationAnchor(controller:) Tells the delegate from which window it should present content to the user. Required.
func presentationAnchor(for controller: ASAuthorizationController) -> ASPresentationAnchor {
    return self.view.window!
}
6. Configuring your Apple Developer Account
When you try to sign in, you'll see an AUTH_ALERT_SIGN_UP_NOT_COMPLETED error message. Signing in won't work in your application until you create a key with Sign in with Apple enabled in your developer account.
To enable Sign In with Apple in your developer account you need to create an Auth Key with Sign In with Apple.

If you don’t see the Sign in with Apple listed when you create a key the you're probably in an Enterprise team. Just creating the key should sufficent for now, you will only need to download it when you want to support Sign in with Apple from somewhere other than your application.
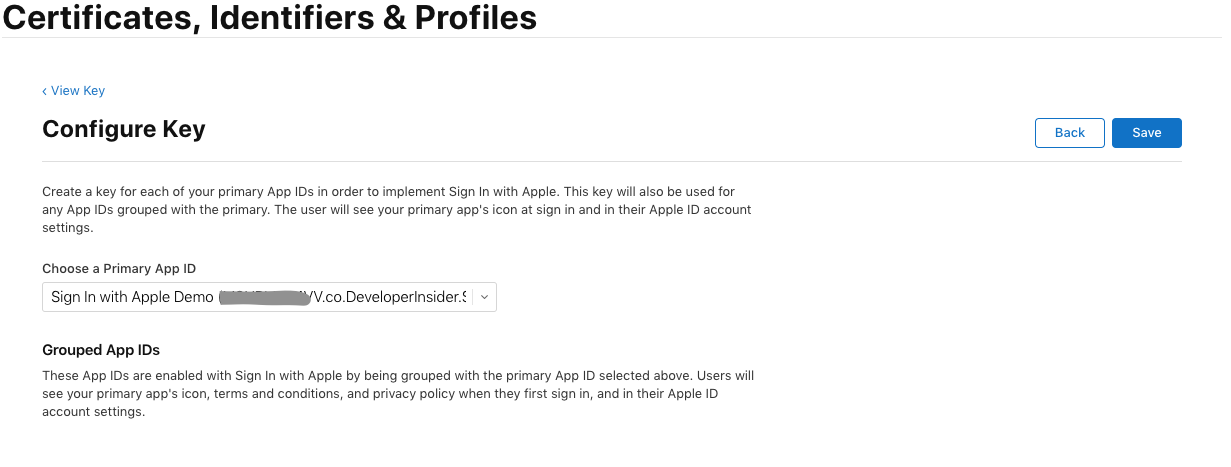
If you're creating a key for grouped app then create a key for your primary App ID in order to implement Sign In with Apple. This key will also be used for any App IDs grouped with the primary. The user will see your primary app's icon at sign in and in their Apple ID account settings.
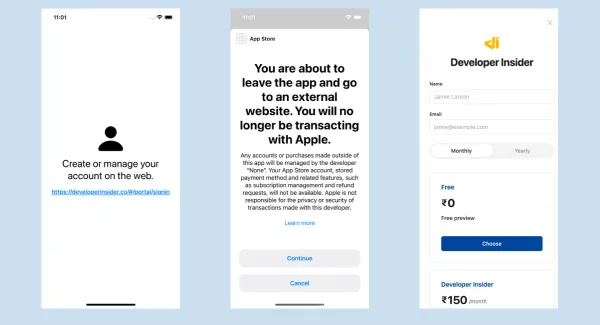
Here the complete flow of LogIn with Apple.

7. Reset an Existing Account
If you need to reset an existing account to test the first Sign In experience again then open the Settings app of your iOS device, tap your account in the Apple ID header, proceed to Password & security. Find your application under Applications using your Apple ID and swipe to delete it.
8. Check Credential State
We can use that userIdentifier which we got from ASAuthorizationAppleIDCredential object in last step to check the user credential state. We can get credential state for an userIdentifier by calling the getCredentialState(forUserID: completion:) method:
let appleIDProvider = ASAuthorizationAppleIDProvider()
appleIDProvider.getCredentialState(forUserID: userIdentifier) { (credentialState, error) in
    switch credentialState {
    case .authorized:
        // The Apple ID credential is valid. Show Home UI Here
        break
    case .revoked:
        // The Apple ID credential is revoked. Show SignIn UI Here.
        break
    case .notFound:
        // No credential was found. Show SignIn UI Here.
        break
    default:
        break
    }
}
9. Register Domains and Emails for communication
In order to contact users that use Apple's private email relay service, you need to register domains and email addresses that your organization will use for communication. To config this, open your Apple Developer Account. Now, click on More side menu on the Certificates, Identifiers & Profiles page. If you More menu item not available then you're probably in an Enterprise Team. Here the direct link to configuration page - https://developer.apple.com/account/resources/services/configure.

References