
Note - Mobile Center is Invite Only! Please request an invitation or use this App Secret.
Demo App Secret - 7dfb022a-17b5-4d4a-9c75-12bc3ef5e6b7
Contents
- Mobile Center Installation
- Create New App on Mobile Center
- Integrates SDK
- Integrate Mobile Center Analytics
- Integrate Mobile Center Crashes
- Integrate Mobile Center Crashes (Advanced Scenarios - MSCrashesDelegate)
- Other APIs
- References
1. Introduction
The Mobile Center iOS SDK lets you add Mobile Center services to your iOS application. Each service comes with their own module and you can quickly add the services that interests you to build your first class iOS app.
The SDK supports the following services:
Analytics: Mobile Center Analytics helps you understand user behavior and customer engagement to improve your iOS app. The SDK automatically captures session count, device properties like model, OS version etc. and pages. You can define your own custom events to measure things that matter to your business. All the information captured is available in the Mobile Center portal for you to analyze the data.
Crashes: The Mobile Center SDK will automatically generate a crash log every time your app crashes. The log is first written to the device’s storage and when the user starts the app again, the crash report will be forwarded to Mobile Center. Collecting crashes works for both beta and live apps, i.e. those submitted to App Store. Crash logs contain viable information for you to help resolve the issue.
Minimum supported OS and Xcode version
The table below shows the minimum supported versions of iOS and Xcode for Mobile Center services.
| SERVICES | IOS | XCODE |
|---|---|---|
| Analytics | 8.0 | 8.0 |
| Crashes | 8.0 | 8.0 |
2. Mobile Center Installation
You can either install the MobileCenter SDK by adding it's binaries to your Xcode project (Step 2.1), or by using Cocoapods (Step 2.2).
2.1 Integration by copying the binaries into your project
- Download the Mobile Center SDK frameworks provided as a zip file.
- Unzip the file and you will see different frameworks for each Mobile Center service. There is a framework called MobileCenter, which is required in the project as it contains the logic for persistence, forwarding,....
- Create a folder in your projects directory in Finder and drag it to Xcode:
- Let's create a folder called Vendor (if it doesn't exist) inside your project directory to include all the 3rd-party libraries.
- Once created, drag this Vendor folder into Xcode. A dialog will appear. Select "Create groups" and set the checkmark for "Add to targets" for your target. Then click Finish.
- Add the SDK frameworks to the project in Xcode:
- Make sure the Project Navigator is visible (⌘+1).
- Now drag and drop
MobileCenter.framework,MobileCenterAnalytics.framework, andMobileCenterCrashes.frameworkin the Vendor folder in Xcode using the Project Navigator on the left side. Note thatMobileCenter.frameworkis required to start the SDK. So make sure it's added to your project, otherwise the other modules won't work and your app won't compile. - A dialog will appear again. Make sure that "Copy items if needed", "Create groups", and your app target are checked. Then click Finish.
Now that you've integrated the frameworks in your application, it's time to start the SDK and make use of the Mobile Center services.
2.2 Integration using Cocoapods
-
Add the following to your
podfileto include all services into your app. This will pull inMobileCenter,MobileCenterAnalyticsandMobileCenterCrashes. Alternatively, you can specify which services you want to use in your app. Each service has it's own subspec and they all rely onMobileCenter. It will get pulled in automatically.# Use the following line to use all services. pod 'MobileCenter' # Use the following lines if you want to specify the individual services you want to use. pod 'MobileCenter/MobileCenterAnalytics' pod 'MobileCenter/MobileCenterCrashes'

NOTE: If you are using the individual subspecs, you don't need to include MobileCenter/MobileCenter separately as the other subspecs will pull in this as a dependency anyway.
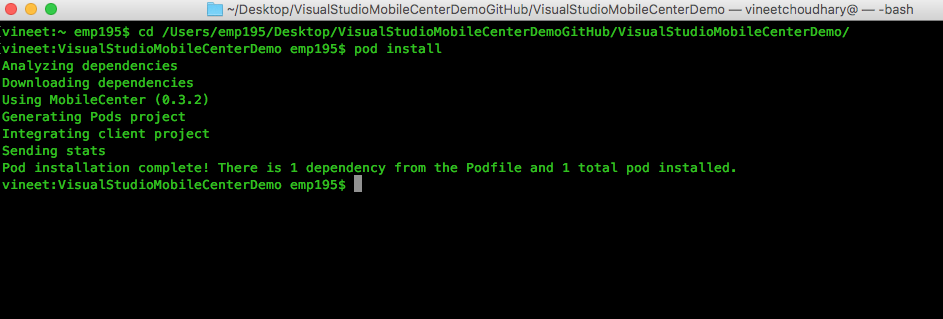
- Run
pod installto install your newly defined pod, open your.xcworkspaceand it's time to start the SDK and make use of theMobile Centerservices.
3. Create a New App on Mobile Center
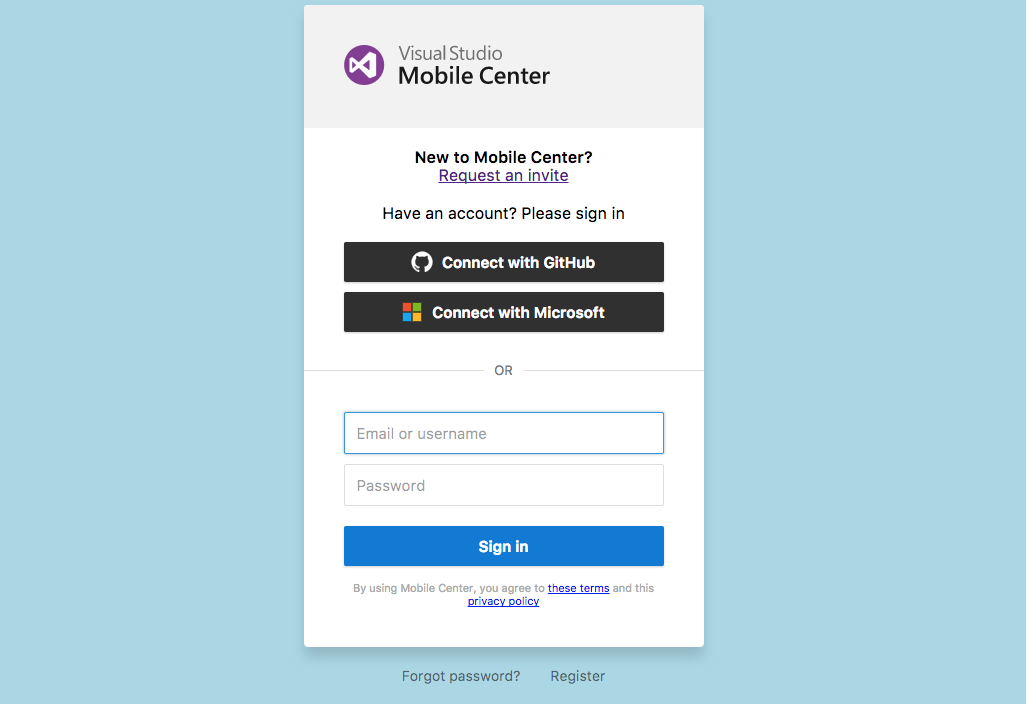
- If you don’t already have a Mobile Center account, sign up and create a new Mobile Center Account.
- Once you're registered on Mobile Center, click on the "Add new app" button in the top title bar of the web page.

- Now, Enter a "App Name", "Description (Optional)" and choose a "OS" and build "Platform" for your app. When completed, click on "Add new app".

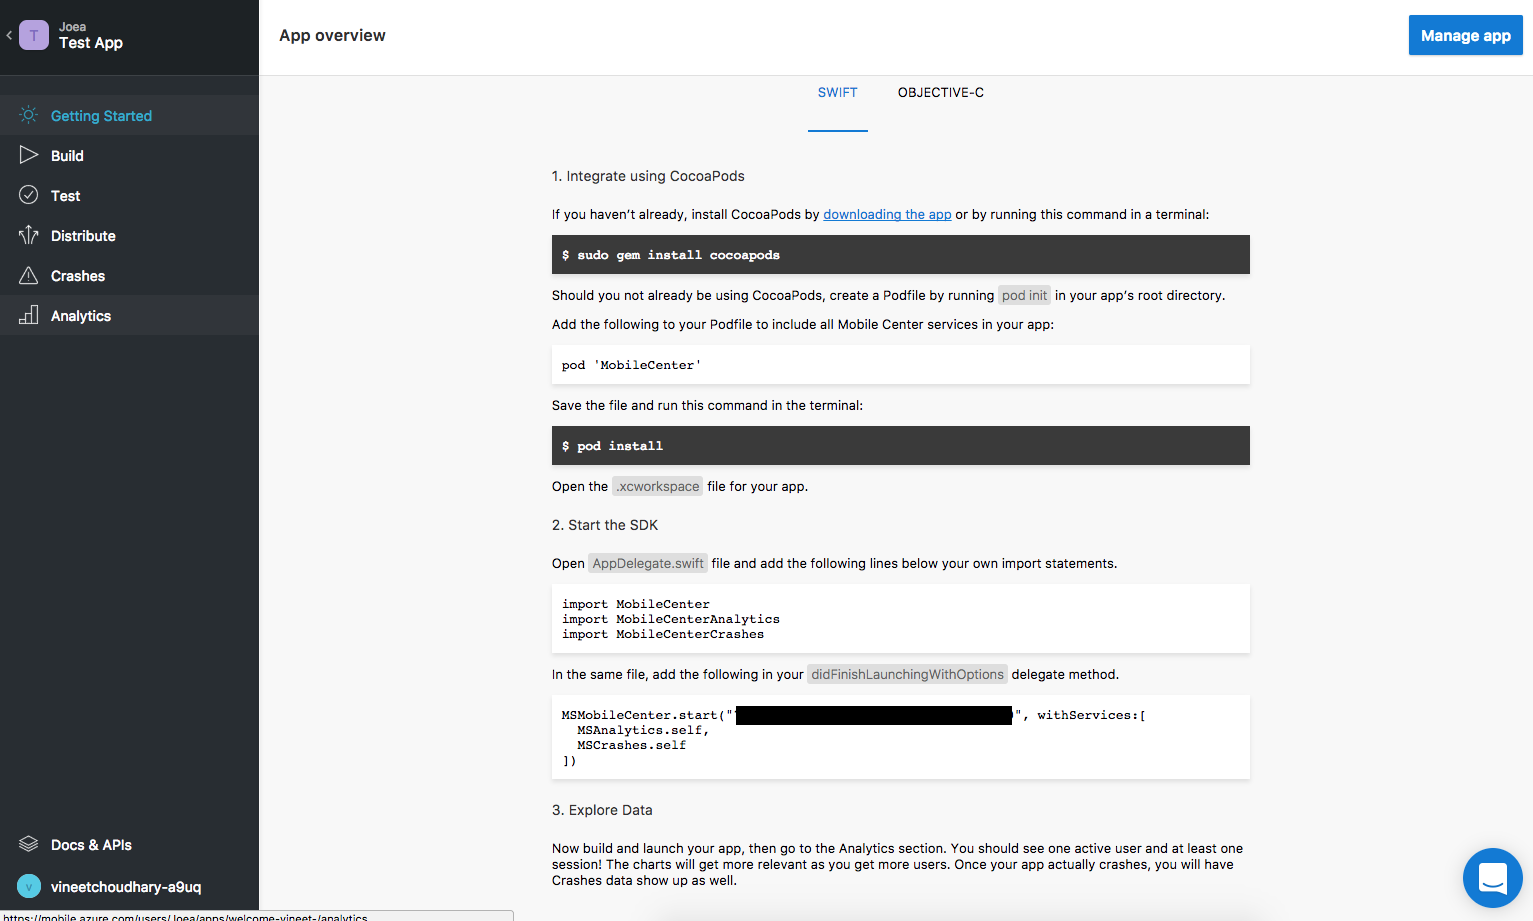
- You will be redirected to a "Getting Start" page. Your App Secret are available in this page.
- You can change "App Name", "Description" any time by click on the "Manage app" button in the top title bar of the "App Getting Start" web page. You can also add "COLLABORATORS" here. Don't forget to click on the "Save changes" button after changing anything.

4. Integrate SDK
To integrate the Mobile Center SDK in your app, follow these steps:
4.0 TL;DR
4.1 Add import statements
You need to add import statements for MobileCenter, MobileCenterAnalytics and MobileCenterCrashes modules before starting the SDK. If you have chosen to only use a subset of Mobile Center's services, just add the import for MobileCenter and the one for the service that you want to use.
Objective-C
Open your AppDelegate.m file and add the following lines at the top of the file below your own import statements.
@import MobileCenter;
@import MobileCenterAnalytics;
@import MobileCenterCrashes;
Swift
Open your AppDelegate.swift file and add the following lines.
import MobileCenter
import MobileCenterAnalytics
import MobileCenterCrashes
4.2 Start the SDK
Mobile Center provides you with three modules to get started: MobileCenter (required), MobileCenterAnalytics and MobileCenterCrashes (both are optional). In order to use Mobile Center services, you need to opt in for the module(s) that you'd like, meaning by default no modules are started and you will have to explicitly call each of them, both Analytics and Crashes, when starting the SDK.
Objective-C
Add the following line to start the SDK in your app's AppDelegate.m class in the application:didFinishLaunchingWithOptions: method.
[MSMobileCenter start:@"{Your App Secret}" withServices:@[[MSAnalytics class], [MSCrashes class]]];
Swift
Insert the following line to start the SDK in your app's AppDelegate.swift class in the application(_:didFinishLaunchingWithOptions:) method.
MSMobileCenter.start("{Your App Secret}", withServices: [MSAnalytics.self, MSCrashes.self])
You can also copy paste the start method call from the Overview page on Mobile Center portal once your app is selected. It already includes the App Secret so that all the data collected by the SDK corresponds to your application. Make sure to replace {Your App Secret} text with the actual value for your application.
The example above shows how to use the start method and include both the Analytics and Crashes module. If you wish not to use Analytics, remove the parameter from the method call above. Note that, unless you explicitly specify each module as parameters in the start method, you can't use that Mobile Center service. Also, the start API can be used only once in the lifecycle of your app – all other calls will log a warning to the console and only the modules included in the first call will be available.
5. Integrate Mobile Center Analytics
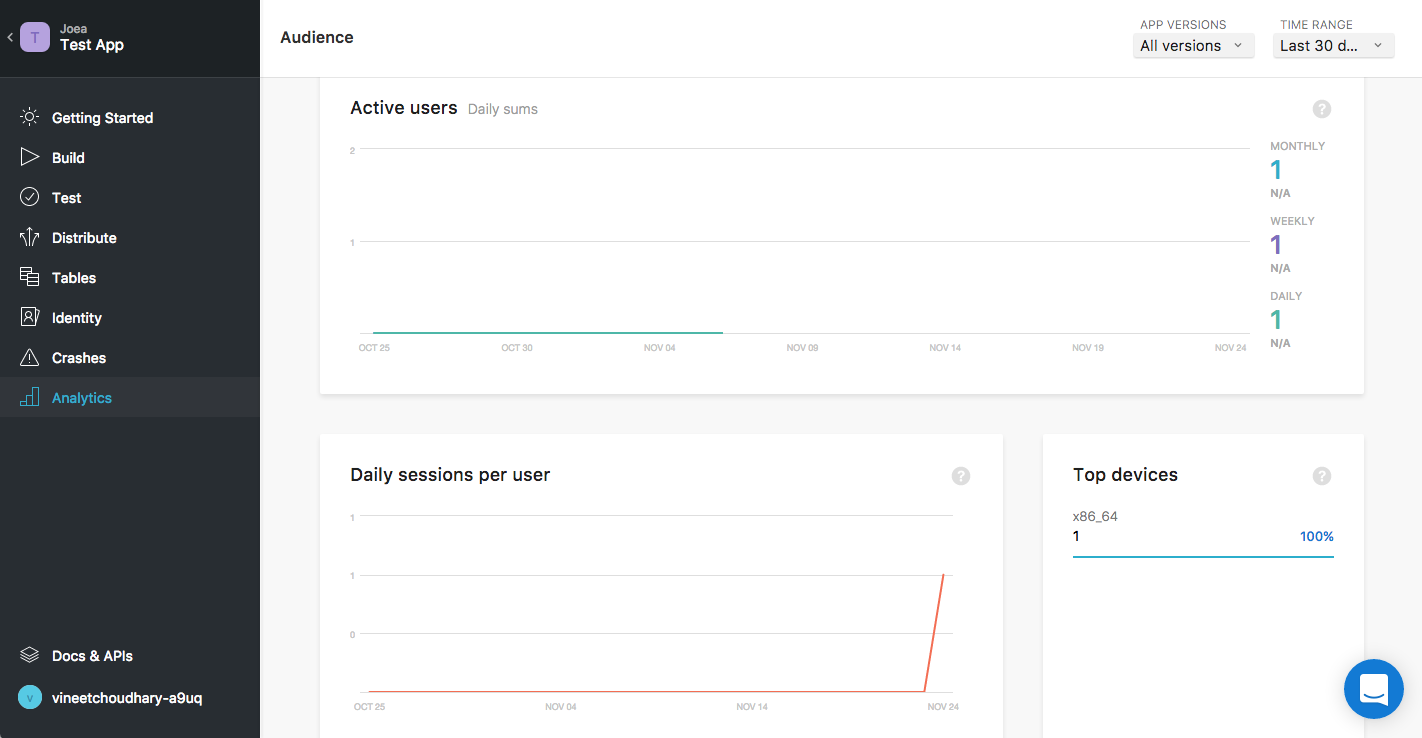
5.1 Track Session, Device Properties
Once the Analytics module is included in your app and the SDK is started, it will automatically track sessions, device properties like OS version, model, manufacturer etc. and you don’t need to add any additional code. Refer to the section to Start the SDK if you haven't done so already.
5.2 Track Custom Events with Properties
You can track your own custom events with specific properties to know what's happening in your app, understand user actions, and see the aggregates in the Mobile Center portal. Once you have started the SDK, use the trackEvent method to track your events with properties.
Objective-C
NSDictionary *properties = @{@"Category" : @"Music", @"FileName" : @"favorite.avi"};
[MSAnalytics trackEvent:@"Video clicked" withProperties: properties];
Swift
MSAnalytics.trackEvent("Video clicked", withProperties: ["Category" : "Music", "FileName" : "favorite.avi"])
5.2 Track Custom Events Only
Properties for events are entirely optional. If you just want to track an event use this sample instead:
Objective-C
[MSAnalytics trackEvent:@"Video clicked"];
Swift
MSAnalytics.trackEvent("Video clicked")
All your event will be available in Mobile Center Dashboard inside Analytics -> Events

5.3 Enable or disable Analytics
You can change the enabled state of the Analytics service at runtime by calling the setEnabled method. If you disable it, the SDK will not collect any more analytics information for the app. To re-enable it, pass true as a parameter in the same method.
Objective-C
[MSAnalytics setEnabled:NO];
Swift
MSAnalytics.setEnabled(false)
You can also check if the service is enabled or not using the isEnabled method:
Objective-C
BOOL enabled = [MSAnalytics isEnabled];
Swift
var enabled = MSAnalytics.isEnabled()
Mobile center automatically log all the app flow in raw format inside Analytics -> Log flow

6. Integrate Mobile Center Crashes
Once you set up and start the Mobile Center SDK to use the Crashes service in your application, the SDK will automatically start logging any crashes in the devices local storage. When the user opens the application again after a crash, all pending crash logs will automatically be forwarded to Mobile Center and you can analyze the crash along with the stack trace on the Mobile Center portal. Refer to the section to Start the SDK if you haven't done so already.

6.1 Generate a test crash:
The SDK provides you with a static API to generate a test crash for easy testing of the SDK:
Objective-C
[MSCrashes generateTestCrash];
Swift
MSCrashes.generateTestCrash()
Note that this API will only work for development and test apps. The method will not be functioning once the app is distributed through the App Store.
6.2 Did the app crash in the last session?
At any time after starting the SDK, you can check if the app crashed in the previous session:
Objective-C
[MSCrashes hasCrashedInLastSession];
Swift
MSCrashes.hasCrashedInLastSession()
6.3 Details about the last crash
If your app crashed previously, you can get details about the last crash:
Objective-C
MSErrorReport *crashReport = [MSCrashes lastSessionCrashReport];
Swift
var crashReport = MSCrashes.lastSessionCrashReport()
6.4 Enable or disable Crashes
You can disable and opt out of using Crashes by calling the setEnabled API and the SDK will collect no more crashes for your app. Use the same API to re-enable it by passing YES or true as a parameter.
Objective-C
[MSCrashes setEnabled:NO];
Swift
MSCrashes.setEnabled(false)
You can also check if the service is enabled or not using the isEnabled method:
Objective-C
BOOL enabled = [MSCrashes isEnabled];
Swift
var enabled = MSCrashes.isEnabled()
7. Integrate Mobile Center Crashes (Advanced Scenarios - MSCrashesDelegate)
If you are using the Crashes service, you can customize the way the SDK handles crashes. The MSCrashesDelegate-protocol describes methods to attach data to a crash, wait for user confirmation and register for callbacks that inform your app about the sending status. To register delegate -
Objective-C
[MSCrashes setDelegate:self];
Swift
MSCrashes.setDelegate(self)
The SDK provides the following delegate methods.
7.1 Should the crash be processed?
Implement the following delegate methods if you'd like to decide if a particular crash needs to be processed or not. For example - there could be some system level crashes that you'd want to ignore and don't want to send to Mobile Center.
Objective-C
- (BOOL)crashes:(MSCrashes *)crashes shouldProcessErrorReport:(MSErrorReport *)errorReport {
  return YES; // return YES if the crash report should be processed, otherwise NO.
}
Swift
func crashes(_ crashes: MSCrashes!, shouldProcessErrorReport errorReport: MSErrorReport!) -> Bool {
    objectivecreturn true; // return true if the crash report should be processed, otherwise false.
}
7.2 User Confirmation
If user privacy is important to you, you might want to get a user's confirmation before sending a crash report to Mobile Center. The SDK exposes a callbacks where you can tell it to await user confirmation before sending any crash reports. This requires at least one additional step.
Step 1: Set a user confirmation handler.
Your app is responsible for obtaining confirmation, e.g. through a dialog prompt with one of these options - "Always Send", "Send", and "Don't Send". You need inform the SDK about the users input and the crash will handled accordingly. The method takes a block as a parameter, use it to pass in your logic to present the UI to confirm a crash report. As of iOS 8, UIAlertView has been deprecated in favor of UIAlertController. MobileCenterCrashes itself does not contain logic to show a confirmation to the user, but our Demo include a reference implementation which will be used in the following code snippets. For a full implementation, clone this repo and check out our apps Puppet and Demo and copy MSAlertController to your app.

Objective-C
 // Use MSAlertViewController to show a dialog to the user where they can choose if they want to provide a crash report.
MSAlertController *alertController = [MSAlertController alertControllerWithTitle:@"The app quit unexpectedly."
                                                                         message:@"Would you like to send an anonymous report so we can fix the problem?"];

// Add a "No"-Button and callthe notifyWithUserConfirmation-callback with MSUserConfirmationDontSend
[alertController addCancelActionWithTitle:@"Don't Send" handler:^(UIAlertAction *action) {
    [MSCrashes notifyWithUserConfirmation:MSUserConfirmationDontSend];
}];

// Add a "Yes"-Button and callthe notifyWithUserConfirmation-callback with MSUserConfirmationSend
[alertController addDefaultActionWithTitle:@"Send" handler:^(UIAlertAction *action) {
    [MSCrashes notifyWithUserConfirmation:MSUserConfirmationSend];
}];

// Add a "No"-Button and callthe notifyWithUserConfirmation-callback with MSUserConfirmationAlways
[alertController addDefaultActionWithTitle:@"Always Send" handler:^(UIAlertAction *action) {
    [MSCrashes notifyWithUserConfirmation:MSUserConfirmationAlways];
}];

// Show the alert controller.
[alertController show];

// 2. You could also iterate over the array of error reports and base your decision on them.

return YES; // Return YES if the SDK should await user confirmation, otherwise NO.
}
Swift
MSCrashes.setUserConfirmationHandler({ (errorReports: [MSErrorReport]) in

    // Present your UI to the user, e.g. an UIAlertView.

   var alert = MSAlertController(title: "The app quit unexpectedly.", message: "Would you like to send an anonymous report so we can fix the problem?")

    alert?.addDefaultAction(withTitle: "Send", handler: { (alert) in
        MSCrashes.notify(with: MSUserConfirmation.send)
    })
    alert?.addDefaultAction(withTitle: "Always Send", handler: { (alert) in
        MSCrashes.notify(with: MSUserConfirmation.always)
    })
    alert?.addCancelAction(withTitle: "Don't Send", handler: { (alert) in
        MSCrashes.notify(with: MSUserConfirmation.dontSend)
    })
    alert?.show()
    return true // Return true if the SDK should await user confirmation, otherwise return false.
})
Step 2: If you are using a different approach than the MSAlertController to present UI to your user.
The code above already calls the MSCrashes-API to notify the crashes service about the users decision. If you are not using this implementation, make sure to return YES/true in step 1, present your custom UI to the user to obtain user permission and message the SDK with the result using the following API. If you are using a UIAlertView for this, you would call it from within your implementation of the alertView:clickedButtonAtIndex:-callback.
Objective-C
// Depending on the users's choice, call notifyWithUserConfirmation: with the right value.
[MSCrashes notifyWithUserConfirmation:MSUserConfirmationDontSend];
[MSCrashes notifyWithUserConfirmation:MSUserConfirmationAlways];
[MSCrashes notifyWithUserConfirmation:MSUserConfirmationSend];
Swift
// Depending on the user's choice, call notify(with:) with the right value.
MSCrashes.notify(with: MSUserConfirmation.dontSend)
MSCrashes.notify(with: MSUserConfirmation.send)
MSCrashes.notify(with: MSUserConfirmation.always)
7.3 Attaching data to crashes
If you'd like to attach text/binary data to a crash report, implement this callback. Before sending the crash, the SDK will add the attachment to the report and you can view it on the Mobile Center portal.
Objective-C
- (MSErrorAttachment *)attachmentWithCrashes:(MSCrashes *)crashes forErrorReport:(MSErrorReport *)errorReport {
  return [MSErrorAttachment attachmentWithText:@"Text Attachment"
                                  andBinaryData:[@"Hello World" dataUsingEncoding:NSUTF8StringEncoding]
                                       filename:@"binary.txt" mimeType:@"text/plain"];
}
Swift
func attachment(with crashes: MSCrashes!, for errorReport: MSErrorReport!) -> MSErrorAttachment! {
    let attachment = MSErrorAttachment.init(text: "TextAttachment", andBinaryData: (String("Hello World")?.data(using: String.Encoding.utf8))!, filename: "binary.txt", mimeType: "text/plain")
    return attachment
}
7.4 Sending status
If you want know the status of the crash sending, maybe to present custom UI like a spinner, the Crashes services offers 3 callbacks to notify the host app about the sending status.
Before sending a crash report, this callback will be invoked just before the crash is sent to Mobile Center:
Objective-C
- (void)crashes:(MSCrashes *)crashes willSendErrorReport:(MSErrorReport *)errorReport {
   // Your code, e.g. to present a custom UI.
}
Swift
func crashes(_ crashes: MSCrashes!, willSend errorReport: MSErrorReport!) {
   // Your code, e.g. to present a custom UI.
}
This callback will be invoked after sending a crash report succeeded:
Objective-C
- (void)crashes:(MSCrashes *)crashes didSucceedSendingErrorReport:(MSErrorReport *)errorReport {
    // Your code, e.g. to hide the custom UI.
}
Swift
func crashes(_ crashes: MSCrashes!, didSucceedSending errorReport: MSErrorReport!) {
    // Your code, e.g. to hide the custom UI.
}
```swift

This callback will be invoked after sending a crash report failed:

**Objective-C**

```swift
- (void)crashes:(MSCrashes *)crashes didFailSendingErrorReport:(MSErrorReport *)errorReport withError:(NSError *)error {
    // Your code, e.g. to hide the custom UI.
}
Swift
func crashes(_ crashes: MSCrashes!, didFailSending errorReport: MSErrorReport!, withError error: Error!) {
    // Your code, e.g. to hide the custom UI.
}
8. Other APIs
8.1 Logging
You can control the amount of log messages by the SDK that show up. Use the setLogLevel API to enable additional logging while debugging. By default, it is set to MSLogLevelAssert for App Store environment, MSLogLevelWarning otherwise.
Objective-C
[MSMobileCenter setLogLevel:MSLogLevelVerbose];
Swift
MSMobileCenter.setLogLevel(MSLogLevel.Verbose)
8.2 Get Install Identifier
The SDK creates a UUID for each device once the app is installed. This identifier remains the same for a device when the app is updated and a new one is generated only when the app is re-installed. The following API is useful for debugging purposes:
Objective-C
NSUUID *installId = [MSMobileCenter installId];
Swift
var installId = MSMobileCenter.installId()
8.3 Enable/Disable the Mobile Center SDK
If you want the Mobile Center SDK to be disabled completely, use the setEnabled method. When disabled, the SDK will not forward any information to Mobile Center.
Objective-C
[MSMobileCenter setEnabled:NO];
Swift
MSMobileCenter.setEnabled(false)