
If your home internet is behind CGNAT, you can't port-forward. Here's how to set up a WireGuard tunnel between your Omada Router (with/without Omada Controller) and a VPS so you can access your HomeLab from anywhere.
Architecture
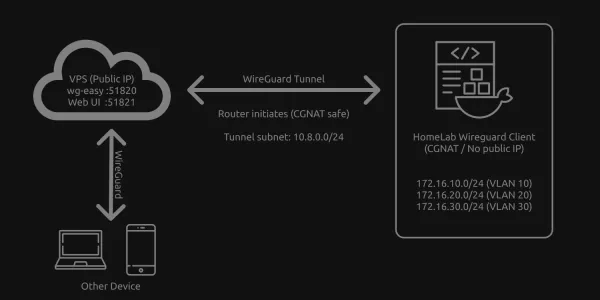
The router connects outbound to the VPS (bypasses CGNAT). Other devices like Mobile connect to the VPS. Traffic flows: Other Device (like Mobile) → Wireguard → VPS → Wireguard Tunnel → Omada Router → VLANs.
┌─────────────────┐         WireGuard Tunnel         ┌──────────────────────────────┐
│      VPS        │◄────────────────────────────────►│   Omada Router (Gateway)     │
│  (Public IP)    │   Router initiates (CGNAT safe)  │   (CGNAT / No public IP)     │
│                 │                                  │                              │
│  wg-easy :51820 │   Tunnel subnet: 10.8.0.0/24     │  172.16.10.0/24 (VLAN 10)    │
│  Web UI  :51821 │                                  │  172.16.20.0/24 (VLAN 20)    │
│                 │                                  │  172.16.30.0/24 (VLAN 30)    │
└────────┬────────┘                                  └──────────────────────────────┘
         │ Wireguard
    ┌────┴────┐
    │ Other   │  Connects to VPS via WireGuard
    │ Device  │  → reaches HomeLab VLANs via tunnel
    └─────────┘
Using a router is better than running a separate container in your homelab. The router already handles inter-VLAN routing, so you avoid Docker networking complexity, masquerade rules, and DOCKER-USER chain issues. Below is a comparison between the Docker container and router approaches:
| Docker container | Router | |
|---|---|---|
| Inter-VLAN access | needs masquerade/static routes | works natively (router is the gateway) |
| iptables hacks | DOCKER-USER chain workaround | none needed |
| Always on | depends on Docker daemon | router is always on |
| Complexity | high | low |
What You Need
- A VPS with a public IP like on Digital Ocean
- An Omada Router with/without Omada Controller (Omada Software Controller or Omada Hardware Controller) with WireGuard support (ER605/ER7206/ER8411 etc.)
1. Install Docker
Follow the Docs here: https://docs.docker.com/engine/install/ and install Docker on your host.
2. Setup and Start wg-easy
2.1 Create wg-easy config directory
Create a directory for the configuration files (you can choose any directory you like):
sudo mkdir -p /etc/docker/containers/wg-easy
cd /etc/docker/containers/wg-easy
2.2 Create compose file
sudo nano docker-compose.yml
services:
  wg-easy:
    image: ghcr.io/wg-easy/wg-easy:15
    container_name: wg-easy
    restart: unless-stopped
    cap_add:
      - NET_ADMIN
      - SYS_MODULE
    sysctls:
      - net.ipv4.ip_forward=1
      - net.ipv4.conf.all.src_valid_mark=1
      - net.ipv6.conf.all.disable_ipv6=0
      - net.ipv6.conf.all.forwarding=1
      - net.ipv6.conf.default.forwarding=1
    environment:
      - INSECURE=true
      # - DISABLE_IPV6=false  # Keep IPv6 enabled for VPS if supported
    volumes:
      - /etc/docker/containers/wg-easy:/etc/wireguard
      - /lib/modules:/lib/modules:ro
    ports:
      - "51820:51820/udp"
      - "51821:51821/tcp"
    networks:
      wg:
        ipv4_address: 10.42.42.42
        ipv6_address: fdcc:ad94:bacf:61a3::2a

networks:
  wg:
    driver: bridge
    enable_ipv6: true
    ipam:
      driver: default
      config:
        - subnet: 10.42.42.0/24
        - subnet: fdcc:ad94:bacf:61a3::/64
2.3 Start wg-easy
sudo docker compose up -d
2.4. Setup Firewall
sudo ufw allow 51820/udp
sudo ufw allow 51821/tcp
2.5. Setup wg-easy
Open http://YOUR_VPS_IP:51821, create an admin account, set your VPS public IP as the host, and set the port to 51820.
3. Create HomeLab client in wg-easy
-
Add Client → Name:
HomeLab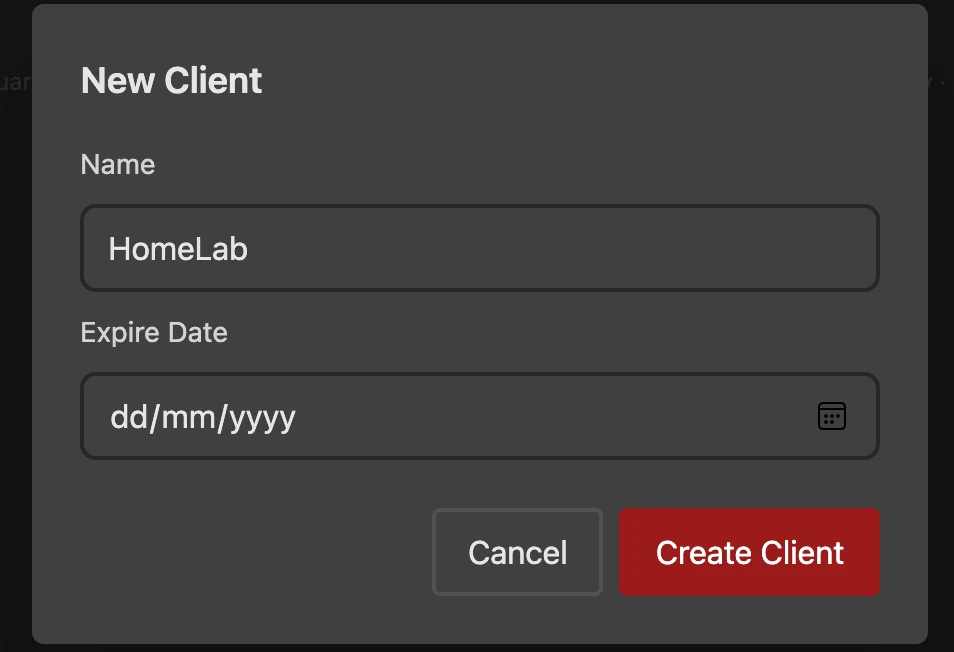
-
Click Edit
-
Set Server Allowed IPs to your VLAN subnets:
172.16.10.0/24
172.16.20.0/24
172.16.30.0/24
172.16.50.0/24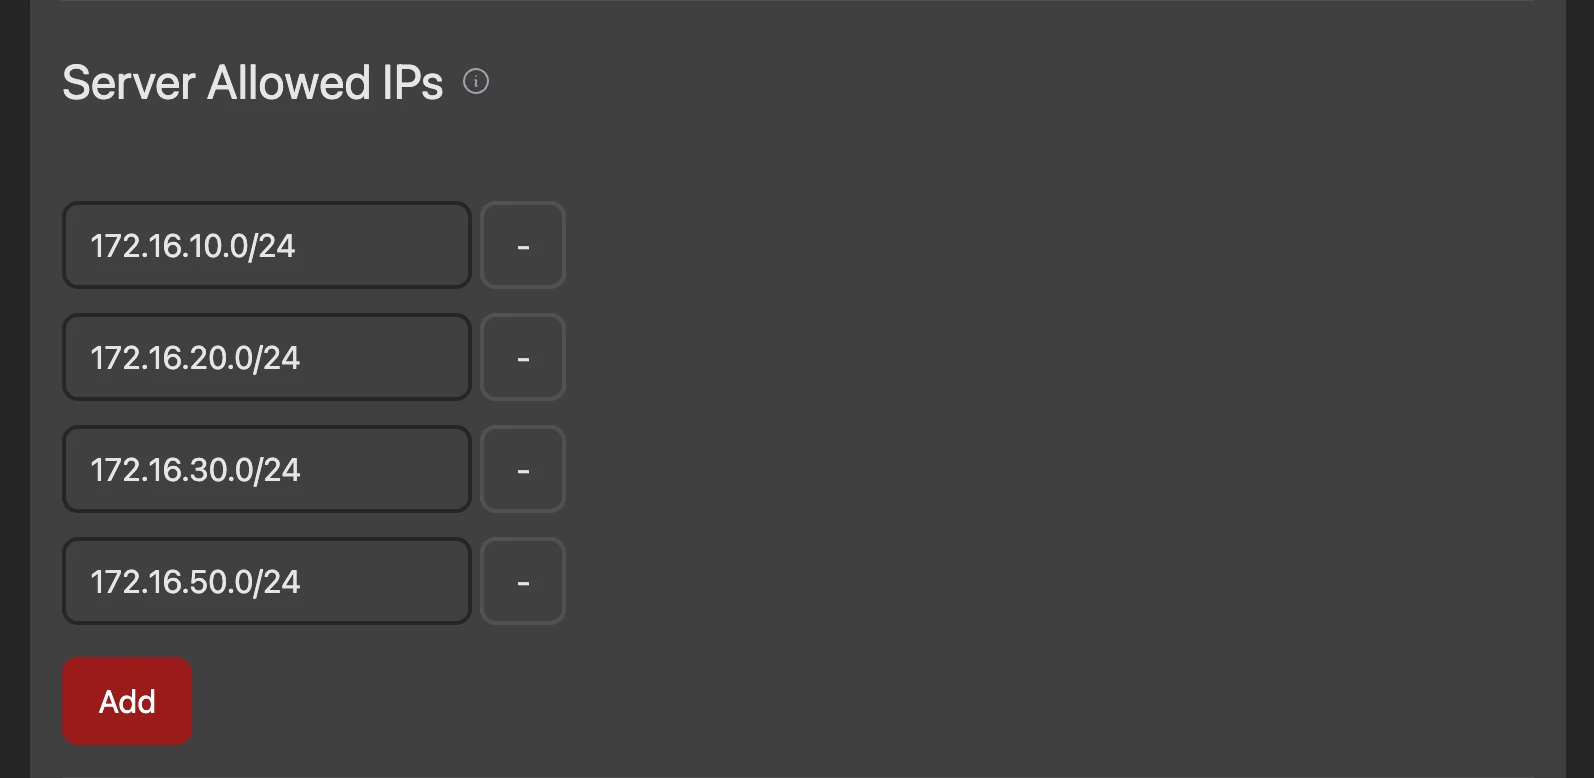
-
Set MTU to
1420and Persistent Keepalive to25. Setting Persistent Keepalive to 25 is critical for CGNAT to keep the tunnel alive.
-
Save changes
-
Restart the container (required for system routes):
sudo docker compose down && sudo docker compose up -d -
Download the configuration file. You'll need the keys from it
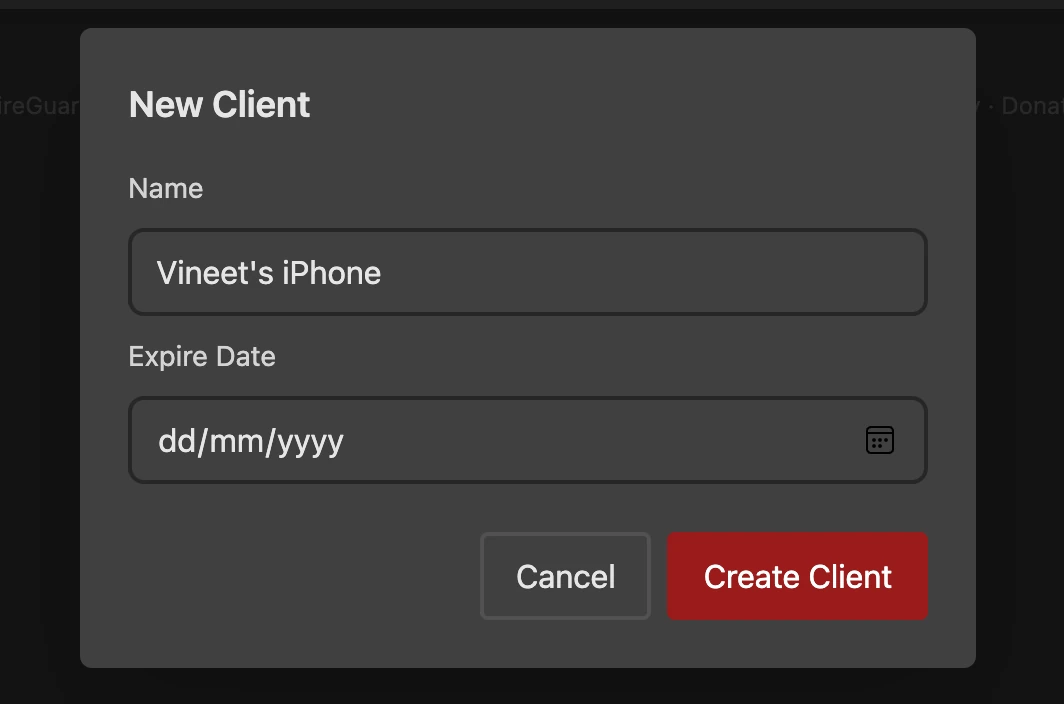
4. Create additional clients in wg-easy
Create additional clients, such as those on your mobile devices, that you can use to access your homelab via a VPS server.
-
Add Client
-
Click Edit
-
Set Allowed IPs to
0.0.0.0/0,::/0for a full tunnel, where all internet traffic from your device routes through the VPS, or to10.8.0.0/24,172.16.0.0/16for split tunneling, where only homelab traffic goes through the VPS. -
Keep Persistent Keepalive to
0 -
Save changes
-
Scan the QR code using the WireGuard app on your mobile device, or download and import the configuration file if you can't scan the QR code.
5. Configure WireGuard on the Omada Controller
Open your Omada Controller and navigate to the WireGuard VPN settings (or access the router's standalone UI).
5.1 Create a WireGuard Interface
On the WireGuard tab, create a new interface:
| Field | Value | Notes |
|---|---|---|
| Name | wg-vps |
Any name you like |
| Status | Enable | ✅ |
| MTU | 1420 |
Match wg-easy |
| Listen Port | Leave it default | Not listening because of client mode |
| Private Key | Copy from downloaded config | The PrivateKey value |
| Address | 10.8.0.2 |
The Address from downloaded config (IPv4 part only) |


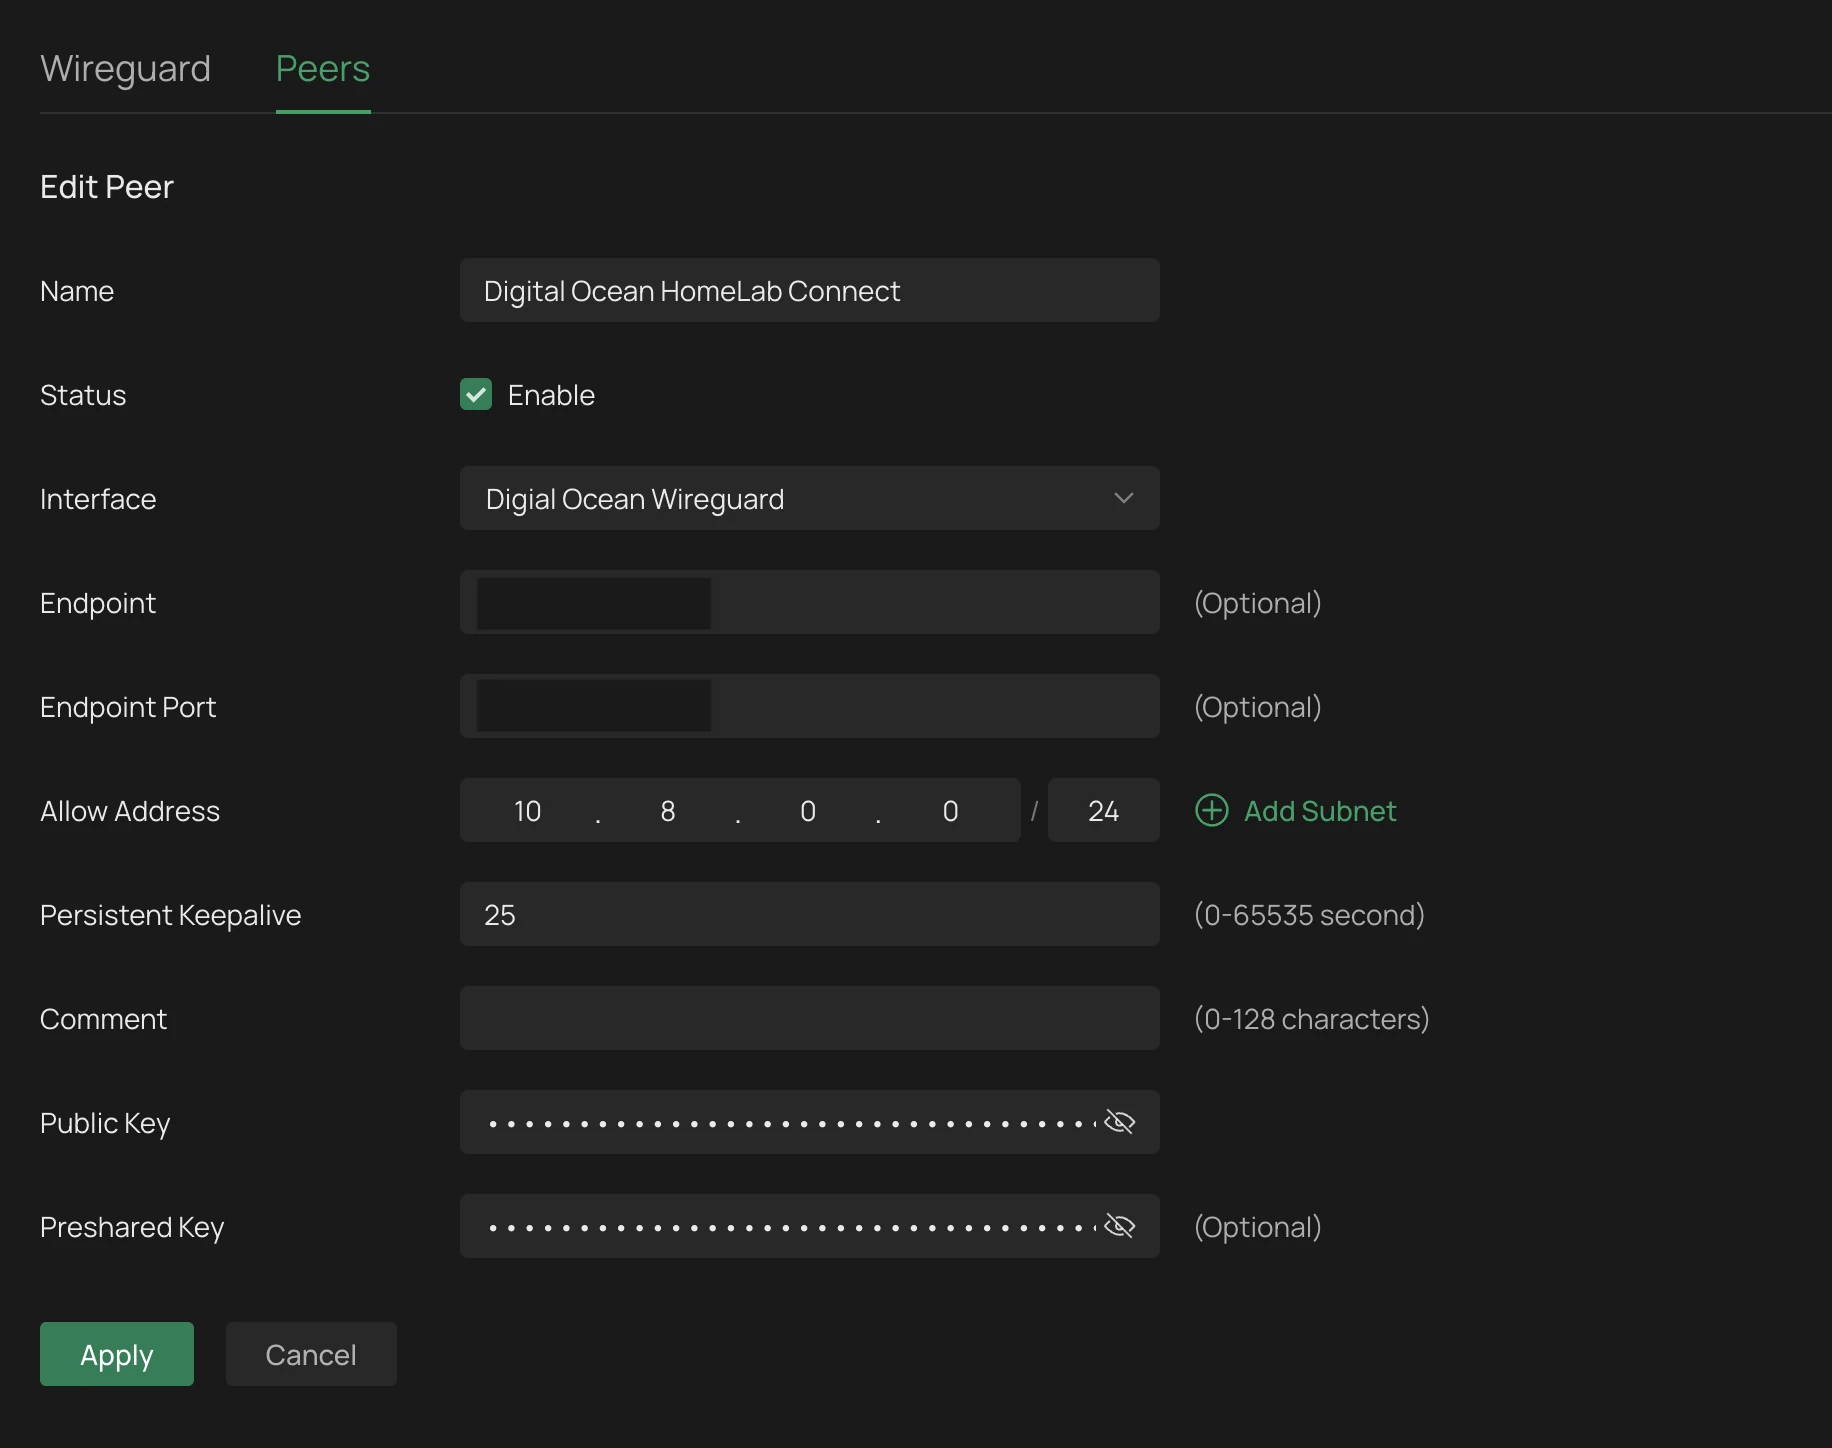
5.2 Create a Peer
Go to the Peers tab and create a new peer:
| Field | Value | Notes |
|---|---|---|
| Name | VPS |
Any name you like |
| Status | Enable | ✅ |
| Interface | wg-vps |
Select the interface you just created |
| Endpoint | Your VPS public IP | e.g. 1.2.3.4 |
| Endpoint Port | 51820 |
|
| Allow Address | 10.8.0.0 / 24 |
The WireGuard VPN subnet. Click Add Subnet if you need to add more. Do not add 0.0.0.0/0. |
| Persistent Keepalive | 25 |
Critical for CGNAT to keeps the tunnel alive |
| Comment | (optional) | |
| Public Key | Copy from downloaded config | The PublicKey from [Peer] section |
| Preshared Key | Copy from downloaded config | The PresharedKey from [Peer] section |
Note: Do not set Allow Address to 0.0.0.0/0 as that would route all your home internet through the VPS
Click Apply. The router will establish the tunnel outbound to the VPS.

6. Verify
6.1 Check the tunnel on wg-easy
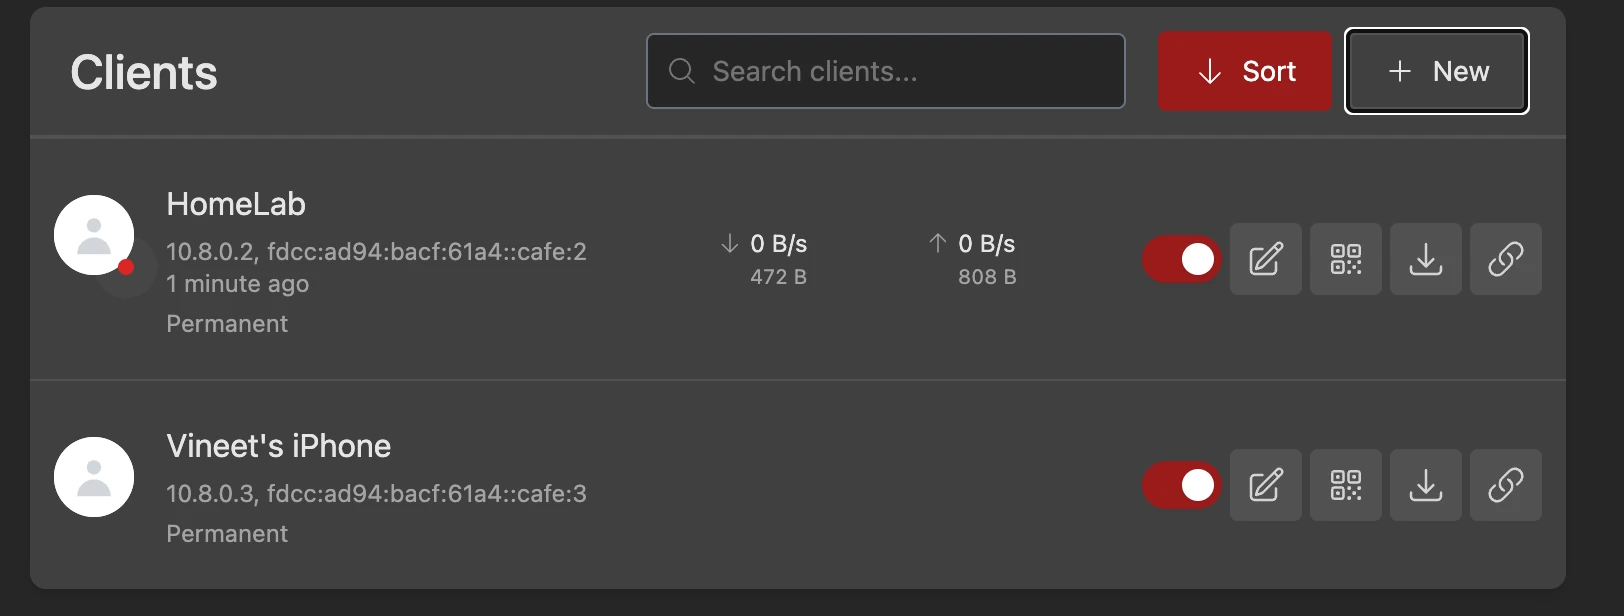
Open the wg-easy Web UI. The HomeLab client should show as connected with a recent handshake.
6.2 Test from VPS
From inside the container, try pinging your homelab WireGuard IP and a device on your homelab VLAN.
# Omada Router WireGuard IP
sudo docker exec wg-easy ping -c 3 10.8.0.2

# Omada Router VLAN 10
sudo docker exec wg-easy ping -c 3 172.16.10.1
6.3 Test from other devices
# VPS WireGuard IP
ping 10.8.0.1

# Omada Router WireGuard IP
ping 10.8.0.2

# Omada Router VLAN 10 gateway
ping 172.16.10.1

# Any device on VLAN 10
ping 172.16.10.100
If all pings work, you have full access to your HomeLab from anywhere.
7. Troubleshooting
7.1 Tunnel won't establish
-
Check if VPS firewall allows UDP connection on port 51820.
-
Make sure the endpoint IP and port are correct.
-
Cross-check all public and private keys in the Omada WireGuard interface and peer configuration with the keys generated by wg-easy.
7.2 Tunnel is up but can't reach Homelab VLANs from other devices
-
Make sure Server Allowed IPs are set correctly in wg-easy and include your VLAN subnets. Also, restart the container after making changes.
-
Verify route exists:
sudo docker exec wg-easy ip route | grep 172. It should show172.16.x.x dev wg0. -
Other devices AllowedIPs must includes
172.16.0.0/16.
7.3 VPS can ping 10.8.0.2 but not 172.16.x.x
This means Server Allowed IPs were added via the Web UI but system routes are missing. Restart the container:
sudo docker compose down && sudo docker compose up -d
7.4 Device shows connected but can't reach anything
Check the AllowedIPs in your device's WireGuard config:
- Full tunnel:
0.0.0.0/0, ::/0 - Split tunnel:
10.8.0.0/24, 172.16.0.0/16
8. Optional: Access HomeLab from VPS Host
By default, only the wg-easy container can reach HomeLab through the tunnel. If you want to ping or access HomeLab services from the VPS host itself (e.g., ssh 172.16.10.11 from the VPS CLI), you need three things:
8.1. Add routes on the VPS host
sudo ip route add 10.8.0.0/24 via 10.42.42.42
sudo ip route add 172.16.0.0/16 via 10.42.42.42
8.2. Allow forwarding through Docker
Docker's DOCKER-USER chain needs to allow WireGuard return traffic:
sudo iptables -I DOCKER-USER -i wg0 -j ACCEPT
8.3. Masquerade inside the container
sudo docker exec wg-easy iptables -t nat -A POSTROUTING -o wg0 -s 10.42.42.0/24 -j MASQUERADE
Test it:
# HomeLab WireGuard IP
ping 10.8.0.2

# HomeLab device
ping 172.16.10.11
8.4 Why it doesn't work out of the box
When you add a static route on the VPS host (ip route add 172.16.0.0/16 via 10.42.42.42), the traffic reaches the wg-easy container and goes through the tunnel. But the source IP is 10.42.42.1 (the Docker bridge gateway), which isn't in HomeLab's WireGuard AllowedIPs (10.8.0.0/24). So HomeLab receives the packet but the reply has nowhere to go and WireGuard drops it because 10.42.42.1 doesn't match any allowed route.
So, masquerade Docker bridge traffic inside the wg-easy container so it appears to come from 10.8.0.1 (the VPS's WireGuard IP, which is in AllowedIPs).
8.5 Making it persistent
Routes and DOCKER-USER rule — create a systemd service:
cat <<'EOF' | sudo tee /etc/systemd/system/wg-routes.service
[Unit]
Description=Routes to HomeLab via wg-easy container
After=docker.service
Requires=docker.service

[Service]
Type=oneshot
RemainAfterExit=yes
ExecStartPre=/bin/sleep 5
ExecStart=/sbin/ip route add 10.8.0.0/24 via 10.42.42.42
ExecStart=/sbin/ip route add 172.16.0.0/16 via 10.42.42.42
ExecStart=/sbin/iptables -I DOCKER-USER -i wg0 -j ACCEPT
ExecStop=/sbin/ip route del 10.8.0.0/24 via 10.42.42.42
ExecStop=/sbin/ip route del 172.16.0.0/16 via 10.42.42.42
ExecStop=/sbin/iptables -D DOCKER-USER -i wg0 -j ACCEPT

[Install]
WantedBy=multi-user.target
EOF

sudo systemctl daemon-reload
sudo systemctl enable --now wg-routes.service
Masquerade rule — persist via wg-easy Hooks. In the Web UI, go to Admin → Hooks:
- Post Up:
iptables -t nat -A POSTROUTING -o wg0 -s 10.42.42.0/24 -j MASQUERADE - Post Down:
iptables -t nat -D POSTROUTING -o wg0 -s 10.42.42.0/24 -j MASQUERADE
This ensures the masquerade rule is applied every time wg-easy starts.
9. Optional: Access HomeLab From Other Docker Compose Stacks on Your VPS
Now if you want other Docker containers on the same VPS to reach your HomeLab services (172.16.x.x) through the tunnel, this can be achive by sharing a Docker network between wg-easy and your other stacks. Containers route HomeLab traffic to the wg-easy container, which forwards it through the tunnel.
┌──────────────────────────────────────────────────┐
│  VPS Host                                        │
│                                                  │
│  ┌────────────── wg-shared network ───────────┐  │
│  │                 10.42.42.0/24              │  │
│  │                                            │  │
│  │  wg-easy         app1          app2        │  │
│  │  10.42.42.42     10.42.42.x    10.42.42.y  │  │
│  │  (has wg0)                                 │  │
│  └────────────────────────────────────────────┘  │
│                                                  │
│  app-1 & app-2 route 172.16.0.0/16               │
│  via 10.42.42.42 → wg0 tunnel → HomeLab          │
└──────────────────────────────────────────────────┘
9.1. Create a Shared Docker Network
Create it manually so it exists independently of any Compose stack:
docker network create \
  --driver bridge \
  --subnet 10.42.42.0/24 \
  --gateway 10.42.42.1 \
  --ipv6 --subnet fdcc:ad94:bacf:61a3::/64 \
  wg-shared
9.2. Update the wg-easy Compose File
services:
  wg-easy:
    container_name: wg-easy
    ...
    networks:
      wg:
        ipv4_address: 10.42.42.42
        ipv6_address: fdcc:ad94:bacf:61a3::2a

networks:
  wg:
    external: true
    name: wg-shared
Restart wg-easy:
sudo docker compose down && sudo docker compose up -d
9.3. Add the Masquerade Rule in wg-easy
Traffic from other containers has source IPs like 10.42.42.x. The HomeLab's WireGuard only accepts traffic from 10.8.0.0/24. A masquerade rule makes the traffic appear as 10.8.0.1 (the WireGuard server IP).
Add this via the wg-easy Web UI:
- Go to Admin → Hooks
- In PostUp, append:
iptables -t nat -A POSTROUTING -o wg0 -s 10.42.42.0/24 -j MASQUERADE; - In PostDown, append:
iptables -t nat -D POSTROUTING -o wg0 -s 10.42.42.0/24 -j MASQUERADE; - Save
9.4. Join Other Stacks to the Shared Network
In any Compose stack that needs HomeLab access, add the wg-shared network:
services:
  app1:
    ...
    cap_add:
      - NET_ADMIN
    networks:
      wg:
        ipv4_address: 10.42.42.10

  app2:
    ...
    cap_add:
      - NET_ADMIN
    networks:
      wg:
        ipv4_address: 10.42.42.11

networks:
  wg:
    external: true
    name: wg-shared
Key points:
- You can add
defaultnetwork as well, so the containers can still talk to each other within their own stack. Addwgas a second network for HomeLab routing. - Add
cap_add: NET_ADMINto add routes inside the container.
9.5. Add Routes Inside the Containers
Containers need to know that HomeLab traffic goes via 10.42.42.42. Override the entrypoint to add routes before starting the app:
services:
  app1:
    ...
    cap_add:
      - NET_ADMIN
    networks:
      wg:
        ipv4_address: 10.42.42.10
    entrypoint: >
      /bin/sh -c "
        ip route add 10.8.0.0/24 via 10.42.42.42 || true;
        ip route add 172.16.0.0/16 via 10.42.42.42 || true;
        exec your-original-command
      "
Replace your-original-command with the container's default CMD. Find it with:
docker inspect your-app-image --format '{{json .Config.Cmd}}'
The || true prevents failure if the route already exists. exec replaces the shell so signals (SIGTERM, etc.) reach the app correctly.
9.6. Verify
# Check routes inside the container
docker exec my-app ip route | grep -E "10.8|172.16"
# Should show:
# 10.8.0.0/24 via 10.42.42.42 dev eth1
# 172.16.0.0/16 via 10.42.42.42 dev eth1

# From any container on wg-shared network

# wg-easy container
docker exec my-app ping -c 3 10.42.42.42

# HomeLab WireGuard IP
docker exec my-app ping -c 3 10.8.0.2

# HomeLab device
docker exec my-app ping -c 3 172.16.10.11