
If you're running Beszel Hub and want to monitor your Home Assistant system, this Home Assistant Beszel Agent add-on makes it easy. This guide covers the installation and setup process.
Prerequisites
Before you begin, make sure you have:
- A running Home Assistant instance
- Supervisor access to install add-ons
- A Beszel Hub instance (for collecting metrics)
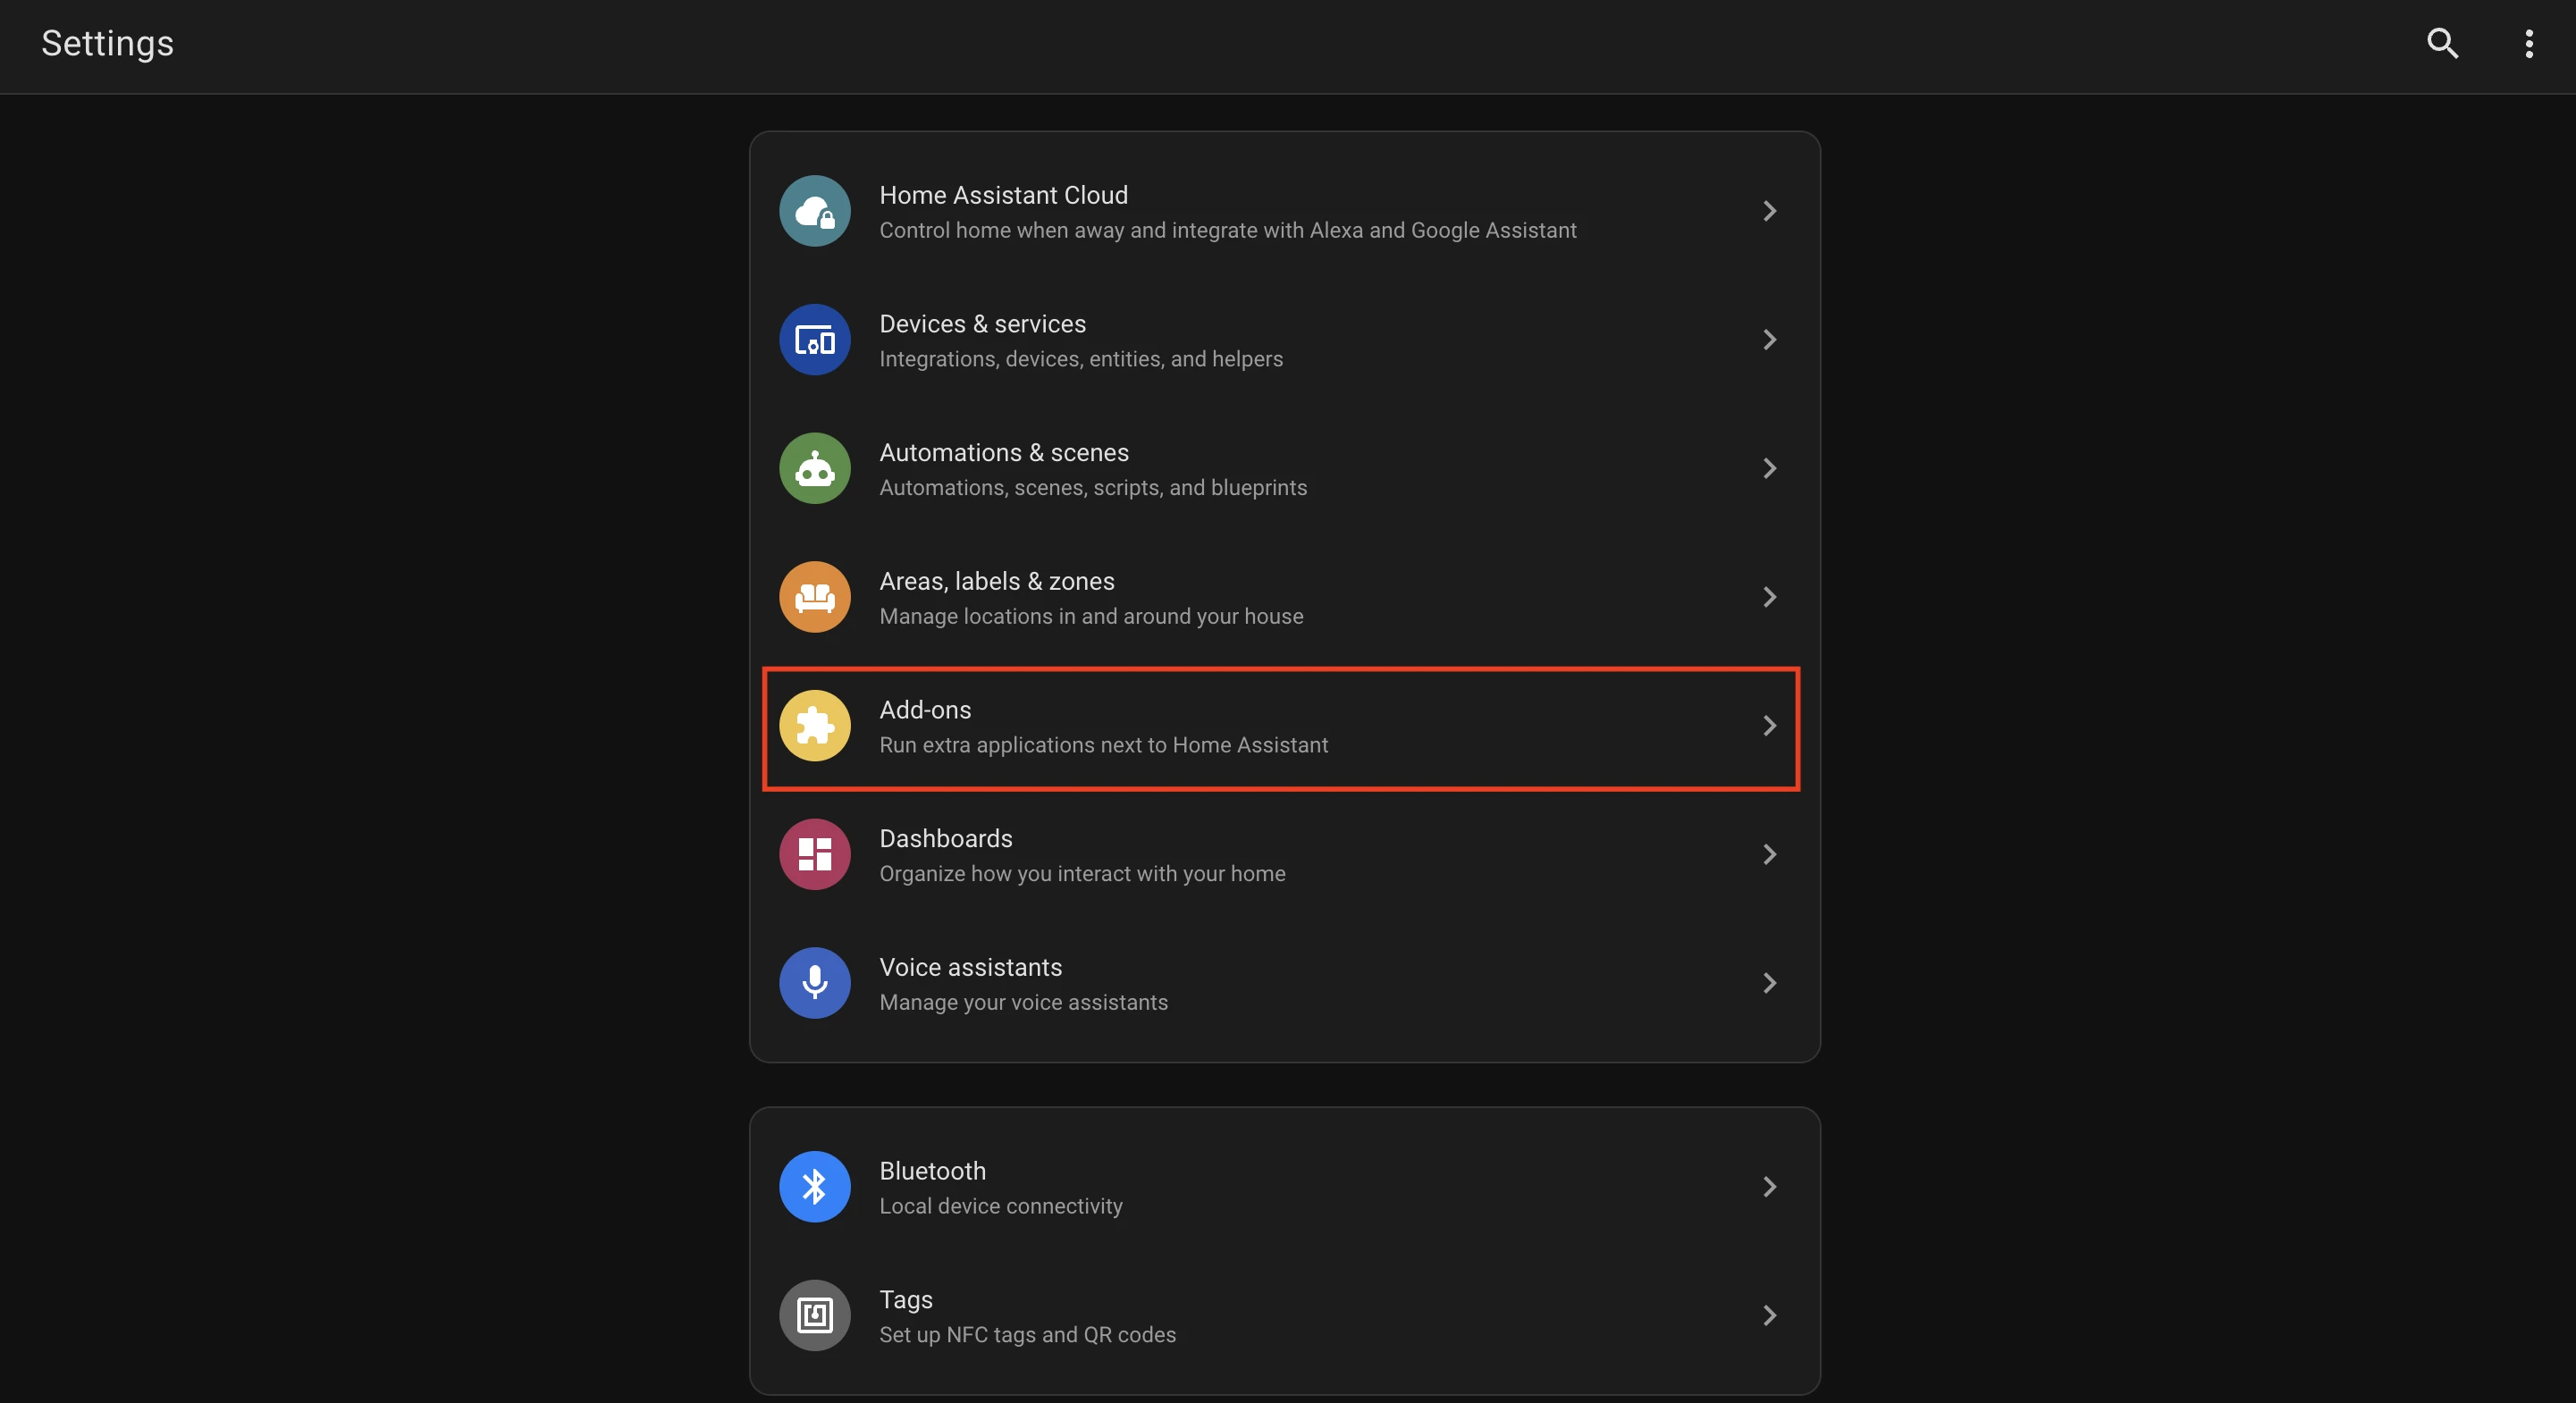
1. Open Home Assistant Add-ons
Open your Home Assistant, go to Settings, and click on "Add-ons".
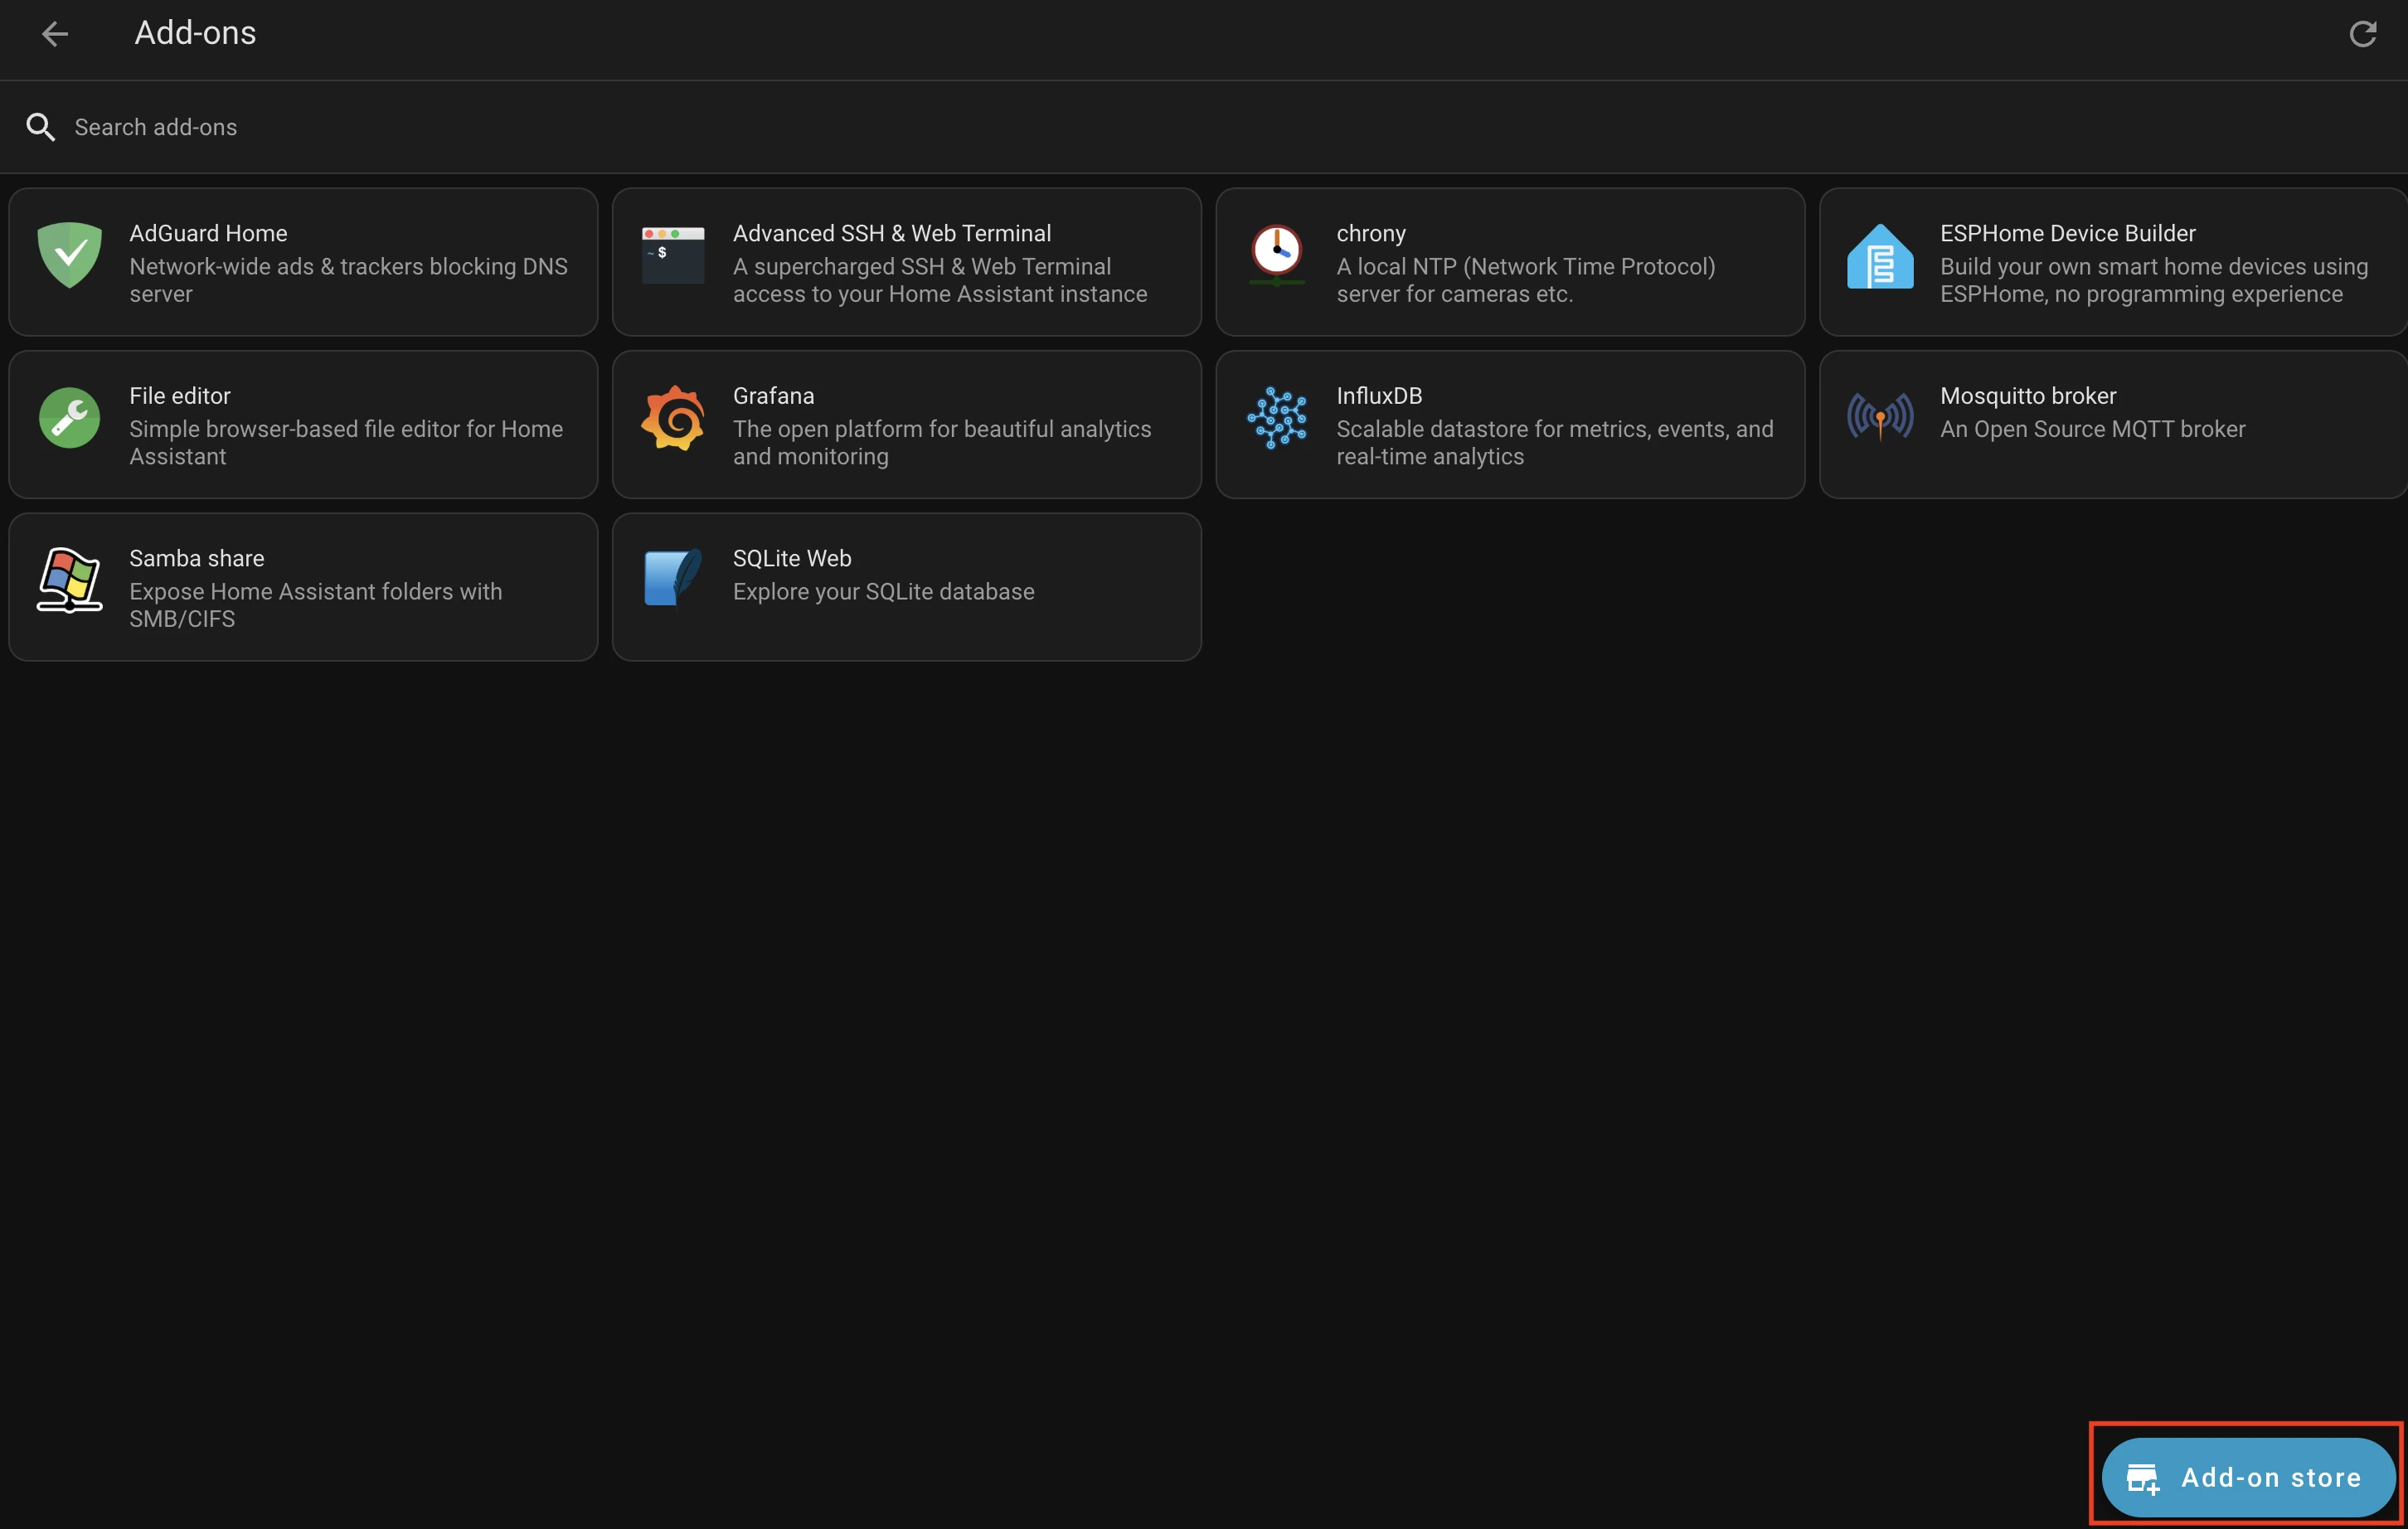
2. Open Add-ons Store
Click on "Add-on Store" button on bottom right:
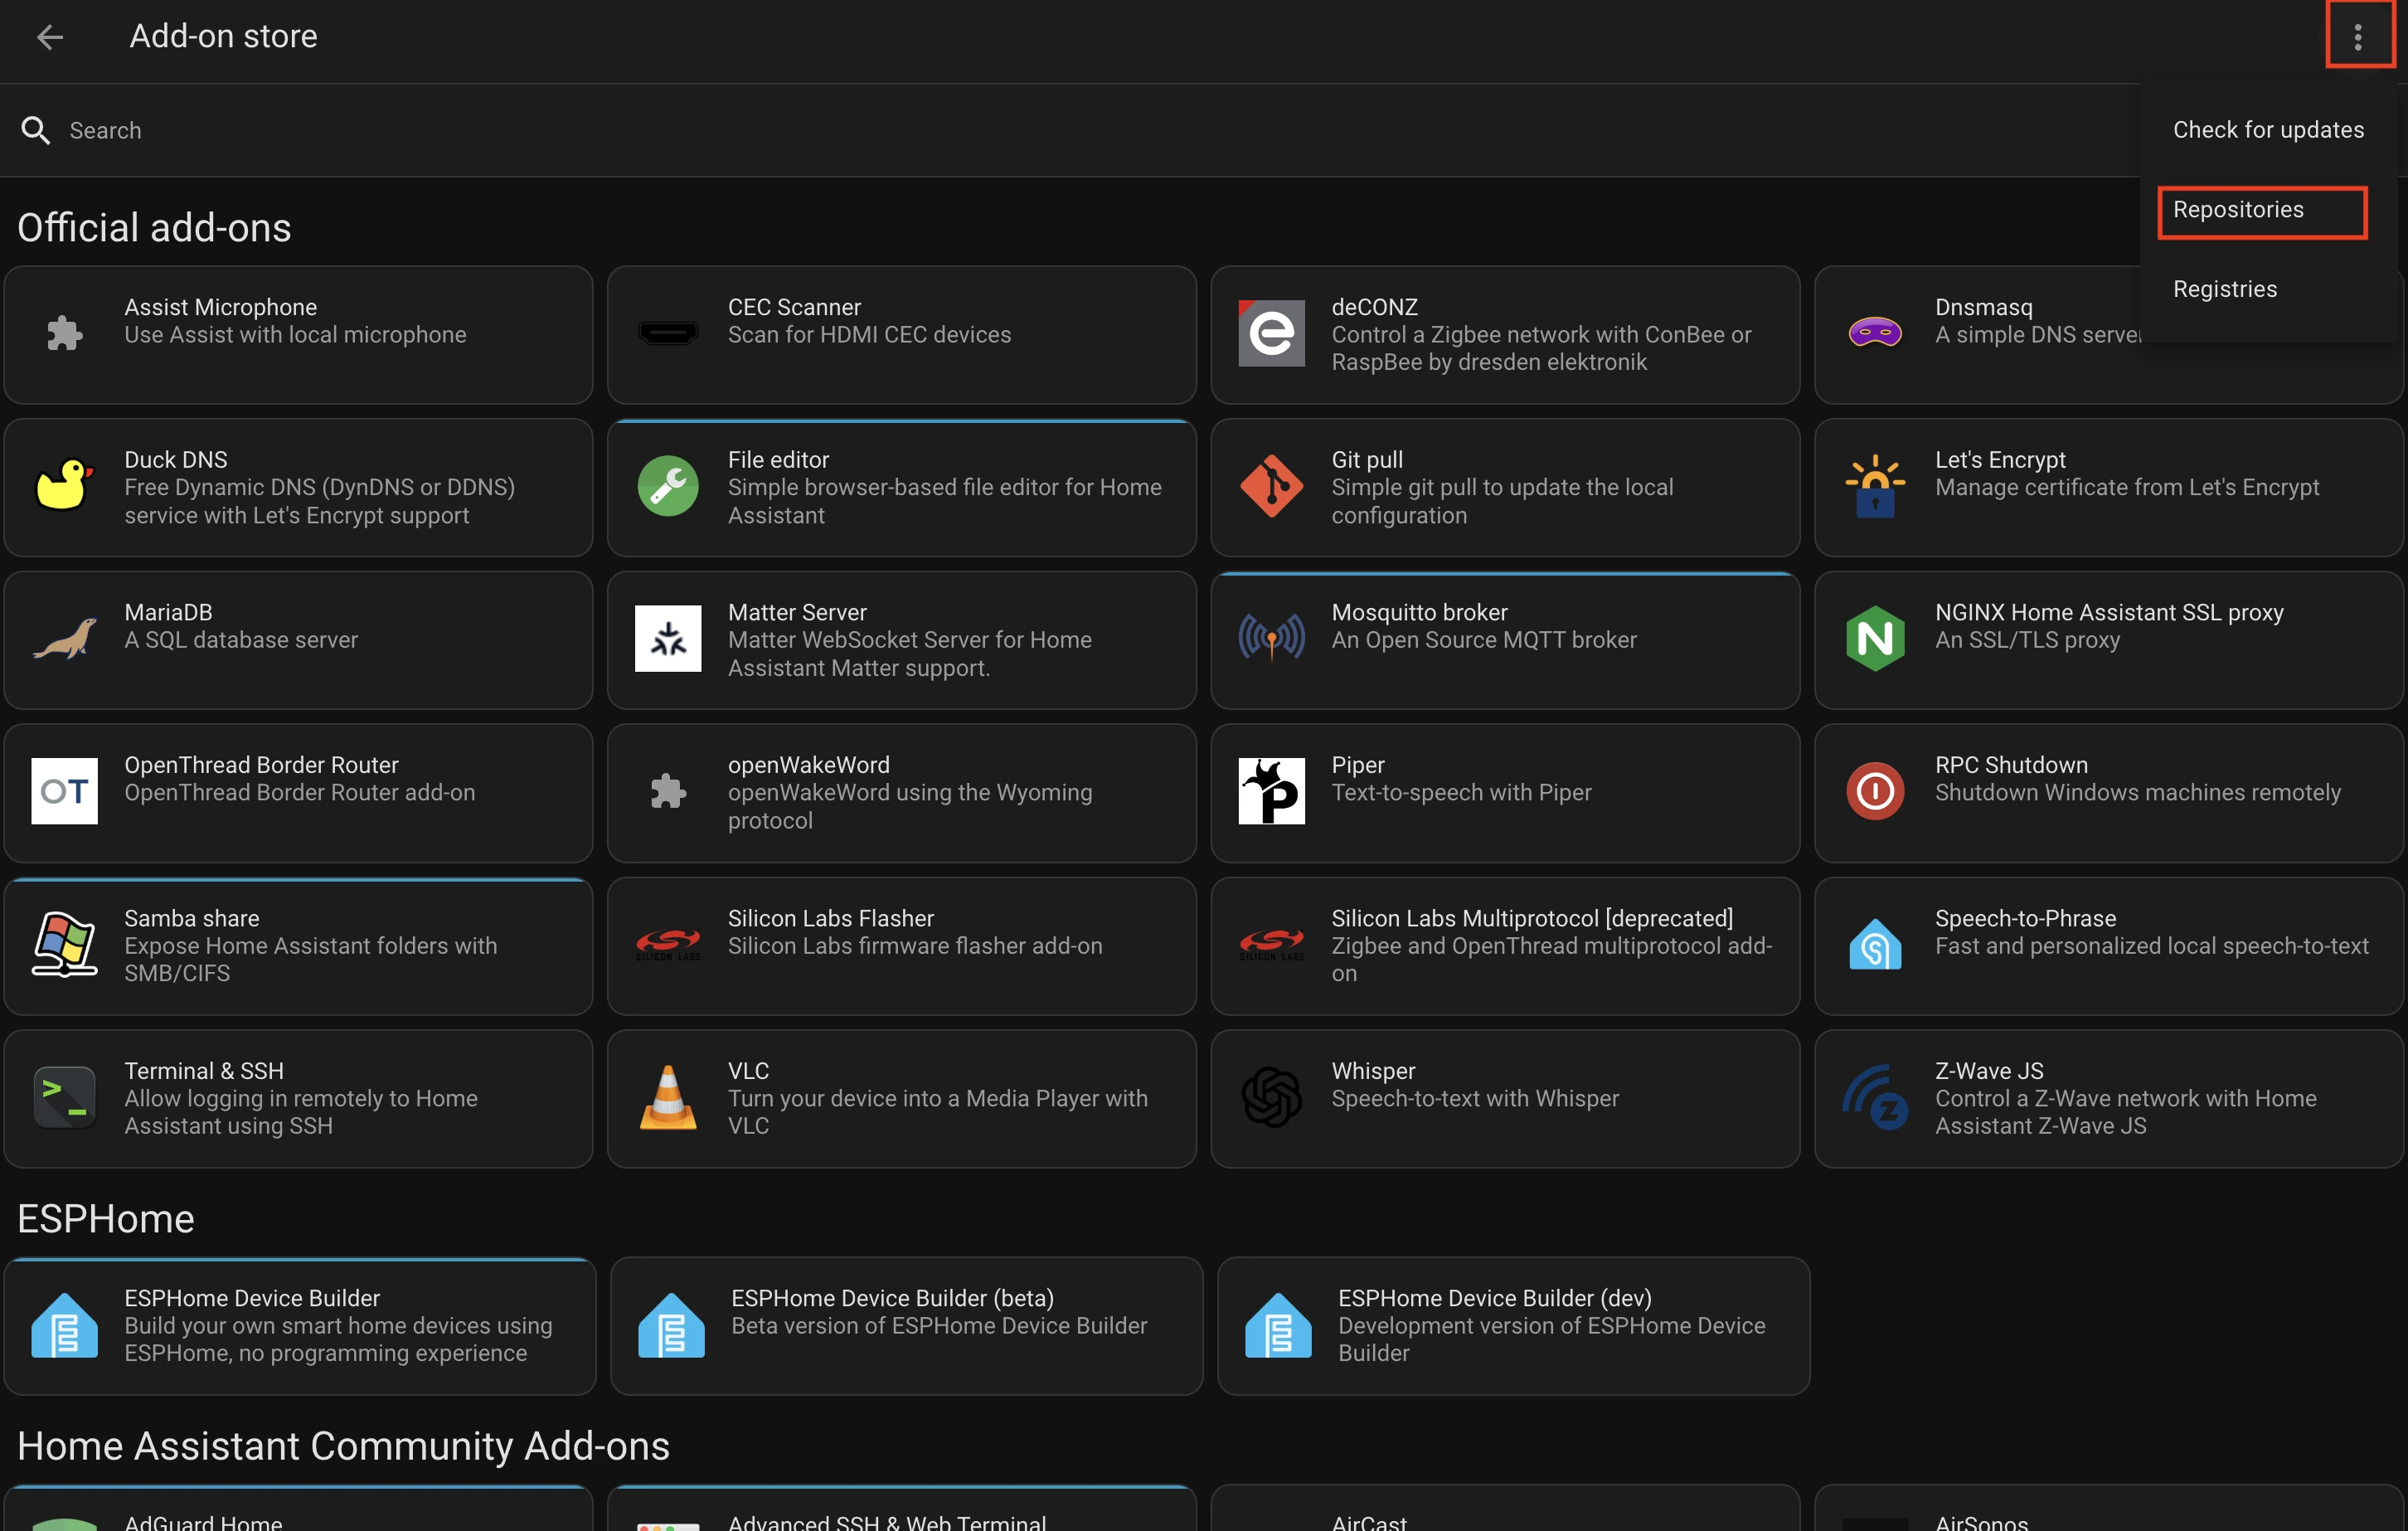
3. Open Add-ons Store Repositories
Click on the three dots in the top right and select "Repositories":
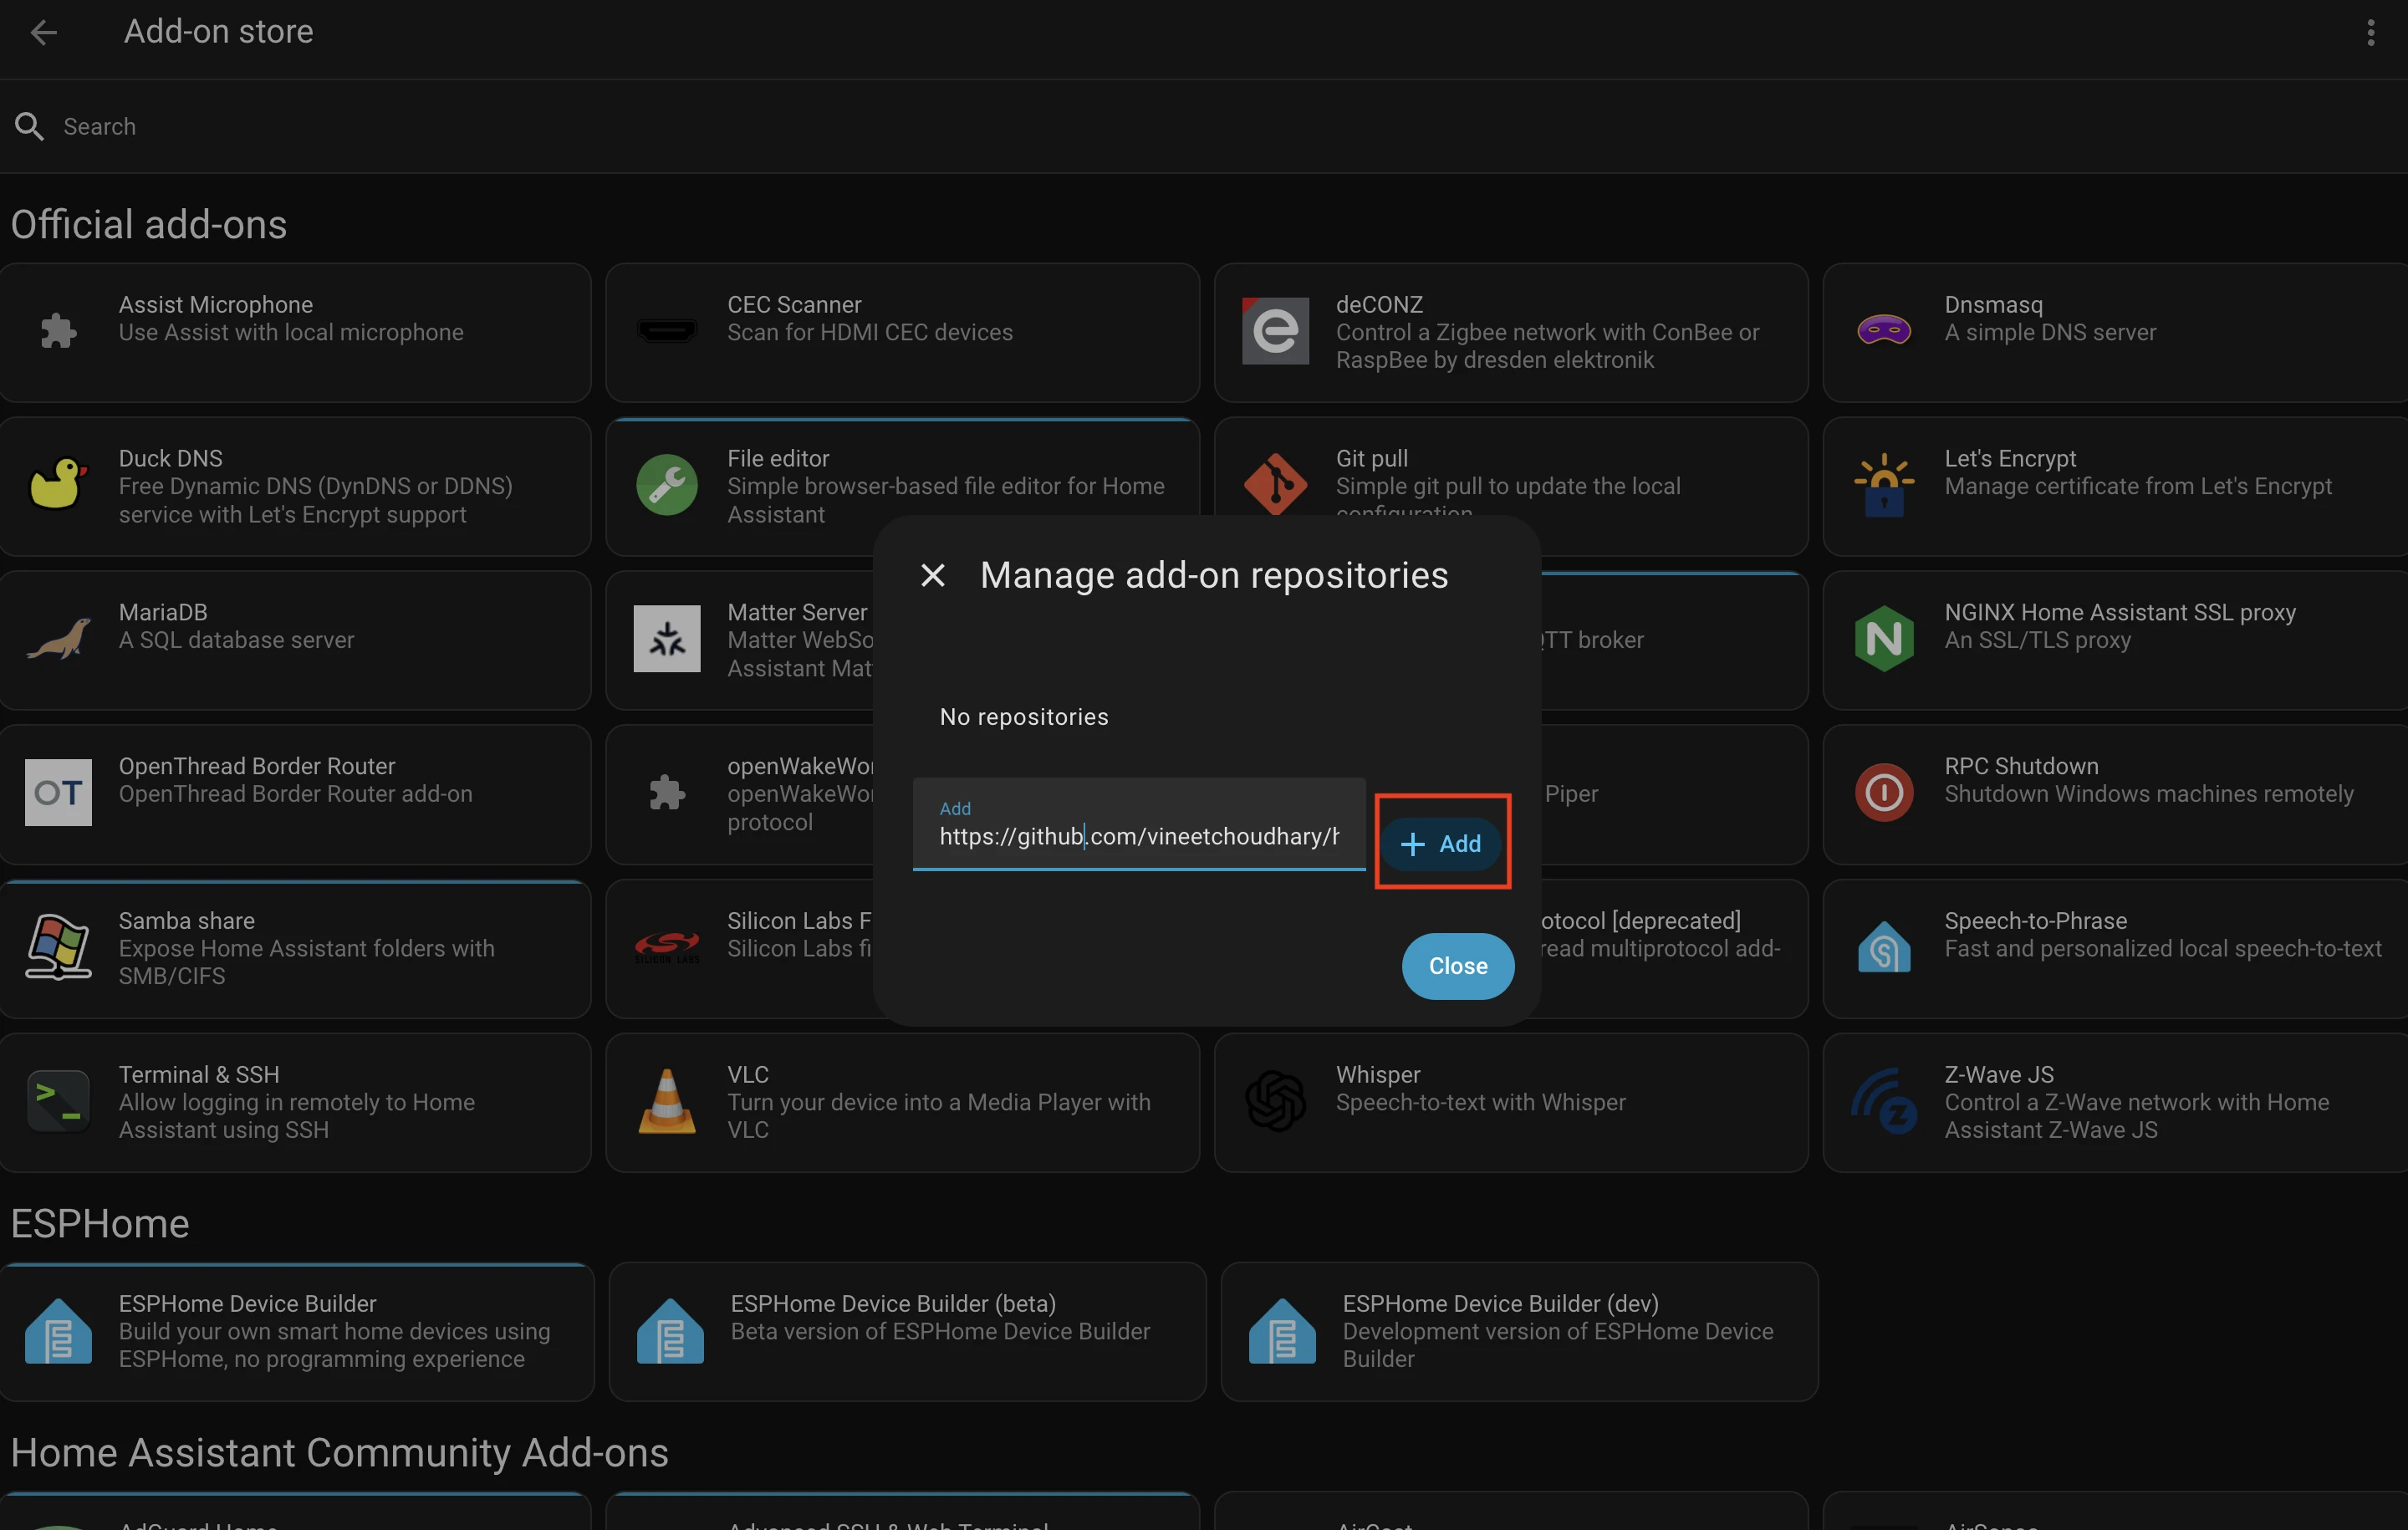
4. Add Custom Repository
Paste following URL and click "Add" button:
https://github.com/vineetchoudhary/home-assistant-beszel-agent
5. Confirm Repository Added
You should see the Beszel Agent repository listed:
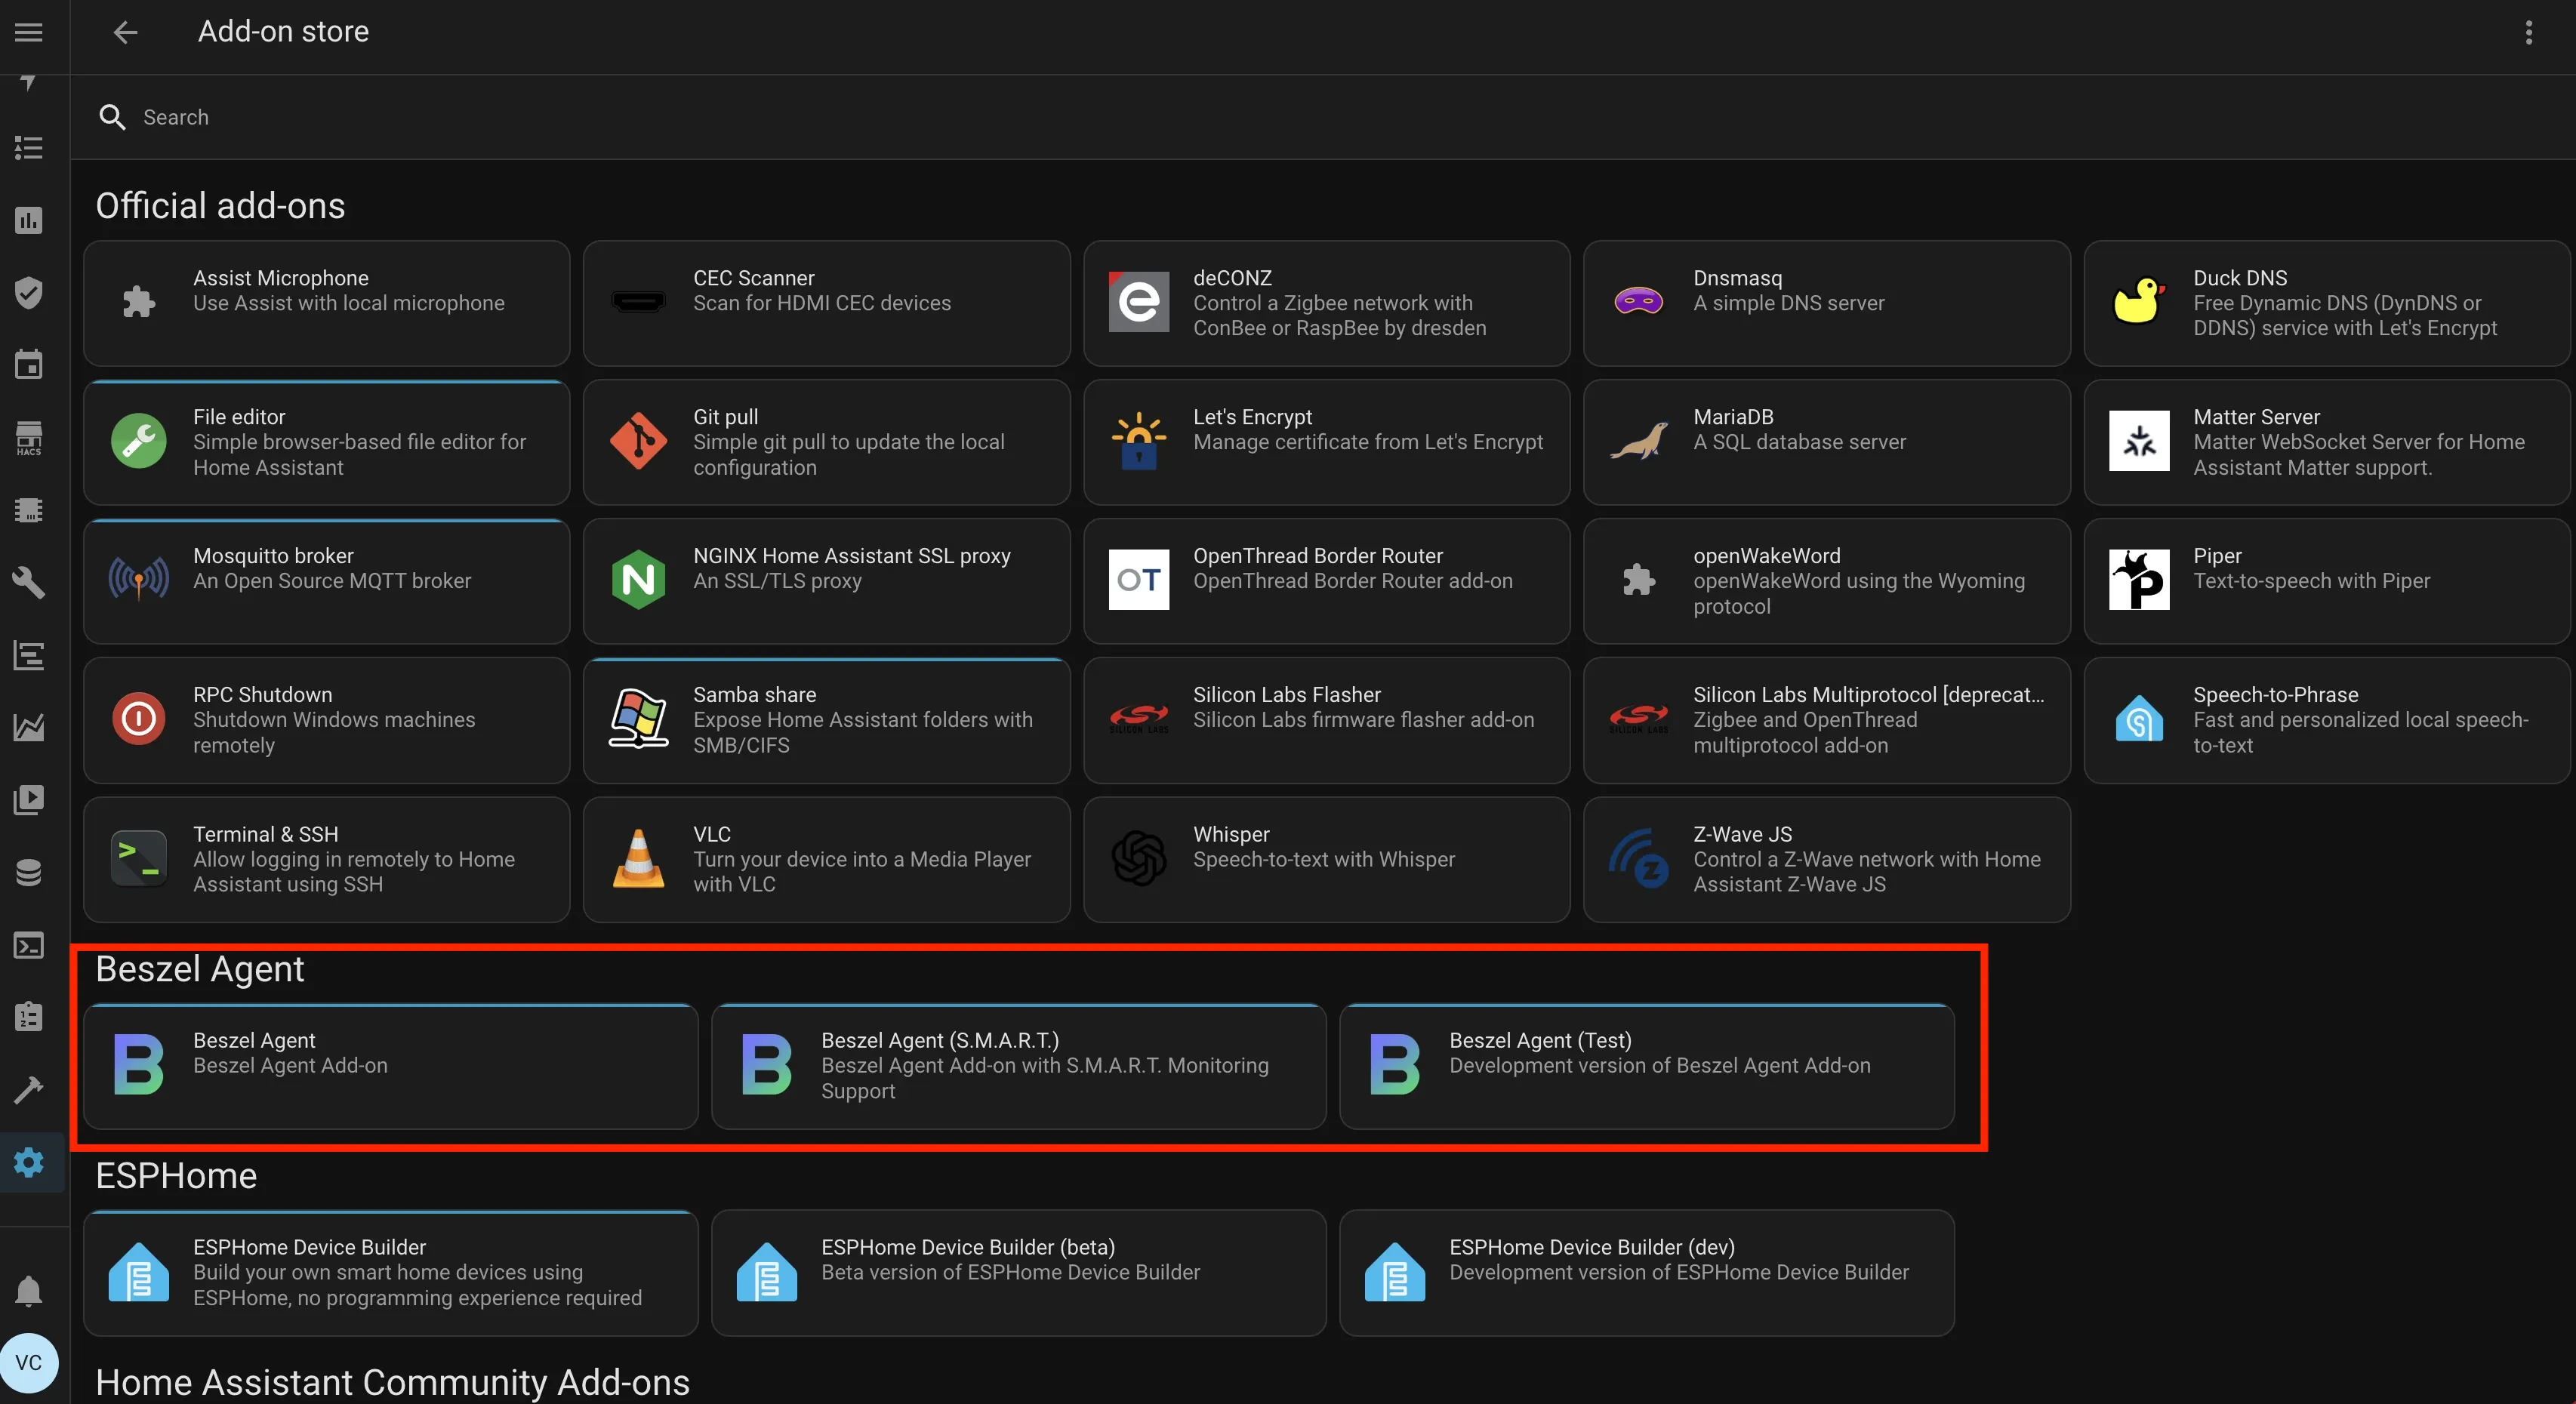
This repository provides three add-on variants (setup process is same for all variants):
5.1 Beszel Agent
For standard monitoring
5.2 Beszel Agent (S.M.A.R.T.)
For monitoring with S.M.A.R.T. disk health checks.

5.3 Beszel Agent (Test)
Development/testing version
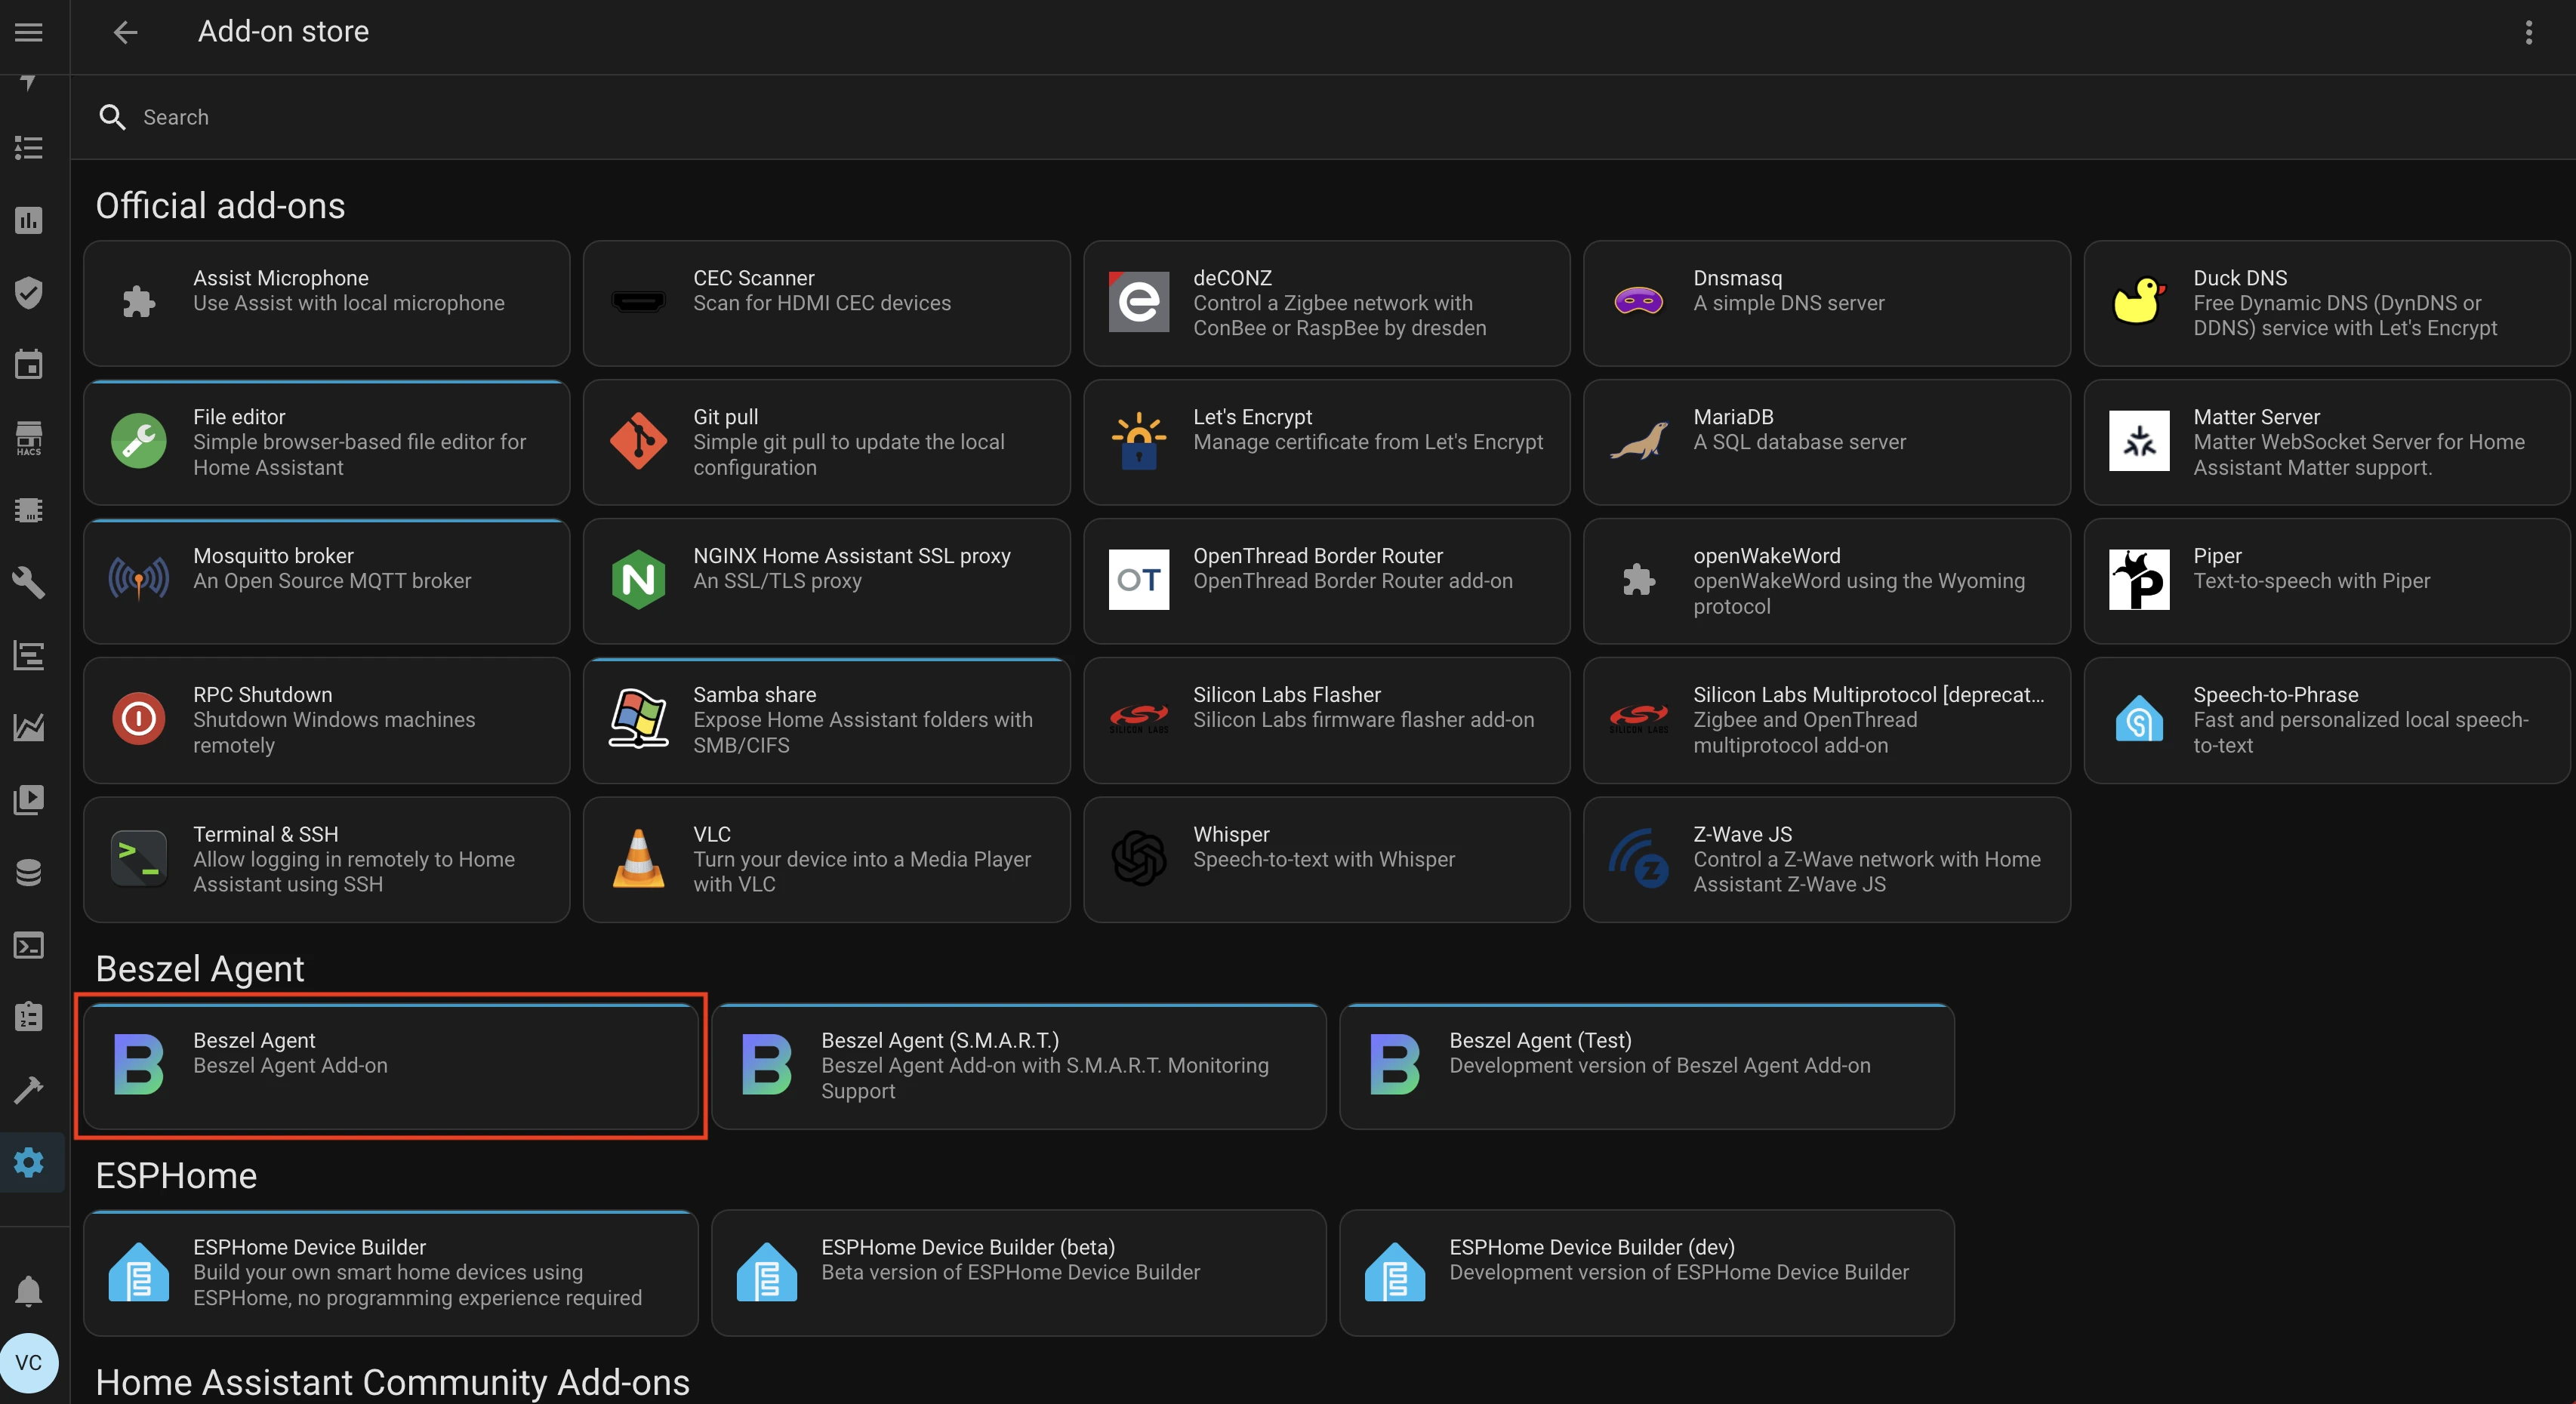
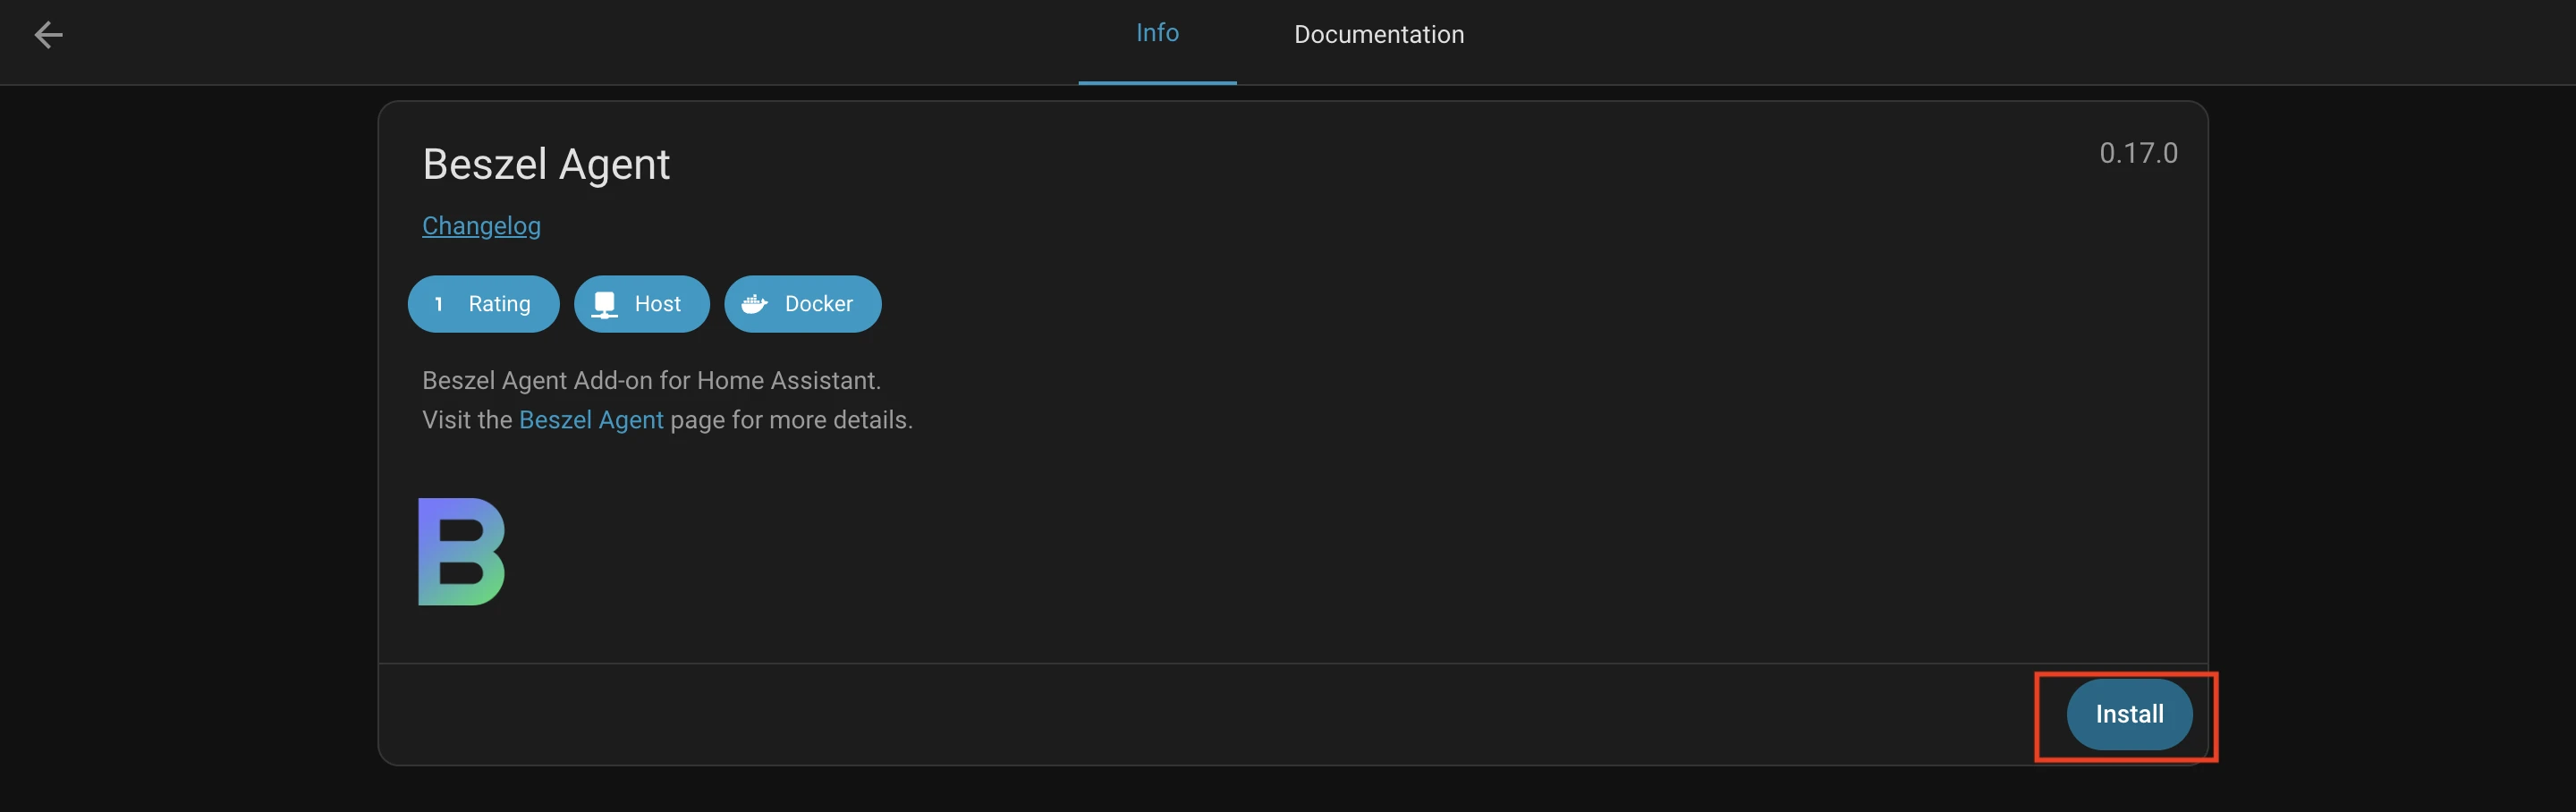
6. Install Beszel Agent Add-on
Click on the "Beszel Agent" add-on you want to install and then click "Install":
7. Open Add-on Configuration
After installation, open the configuration tab:
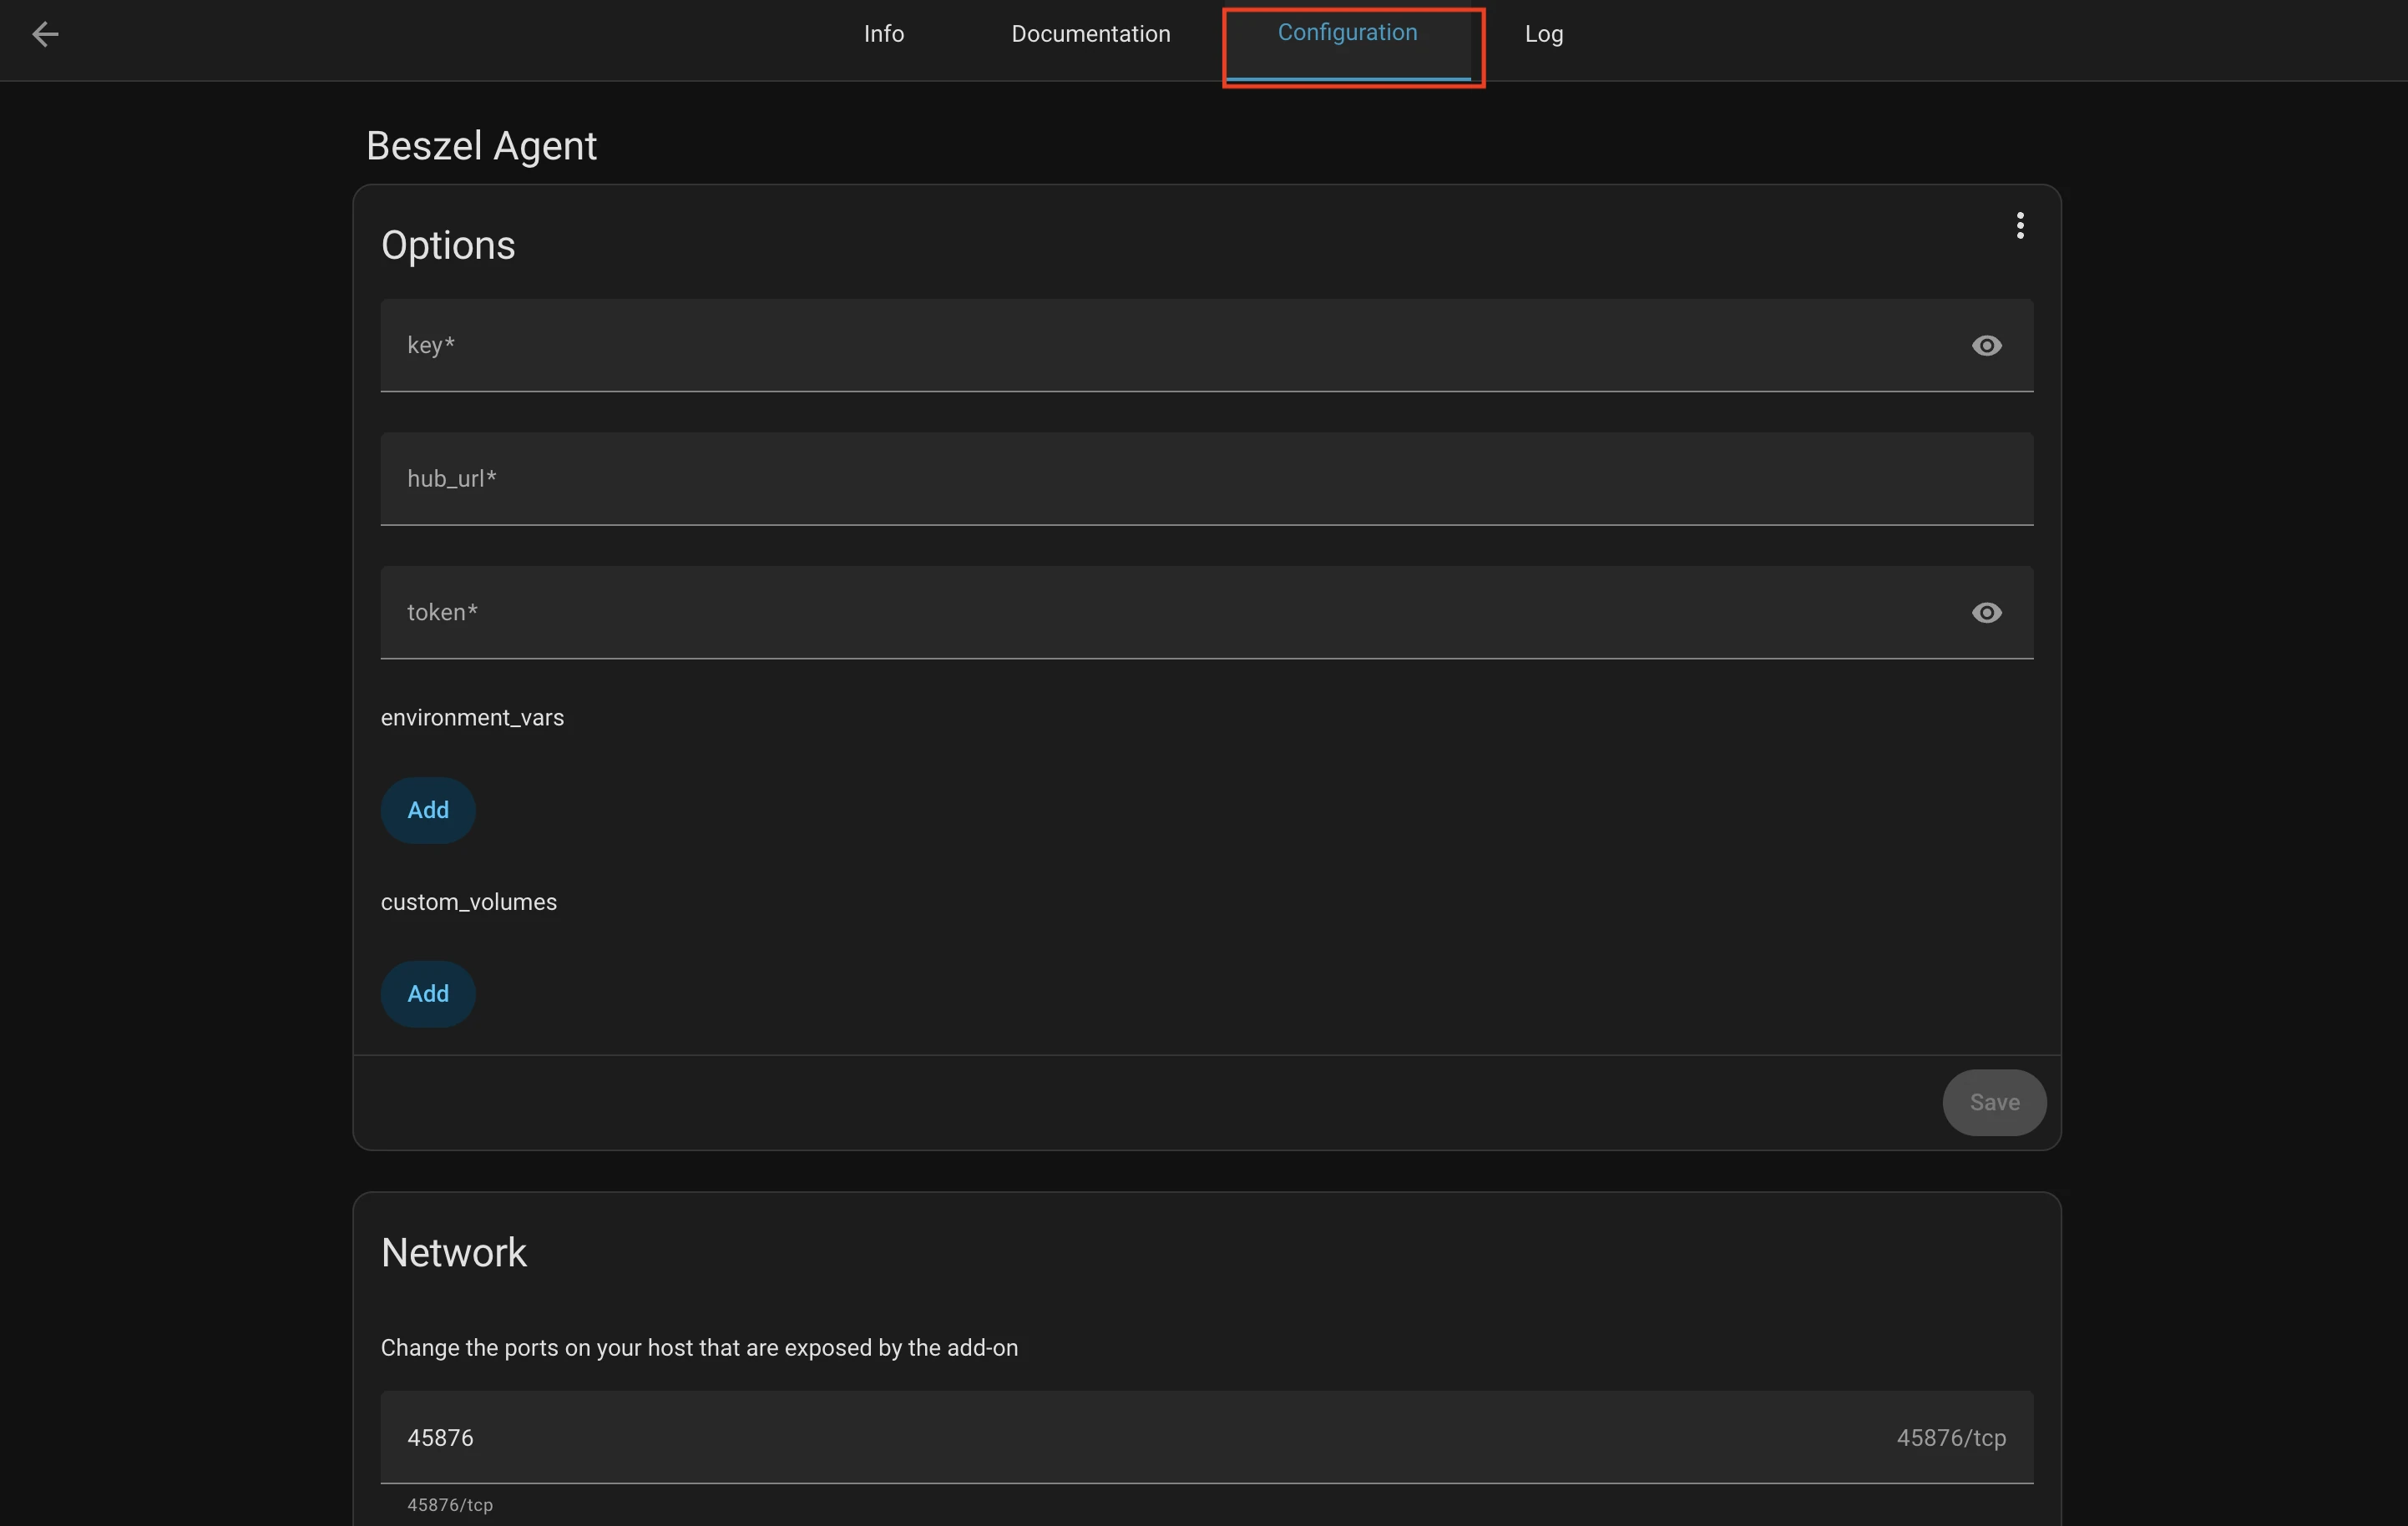
8. Fill in Required Configuration
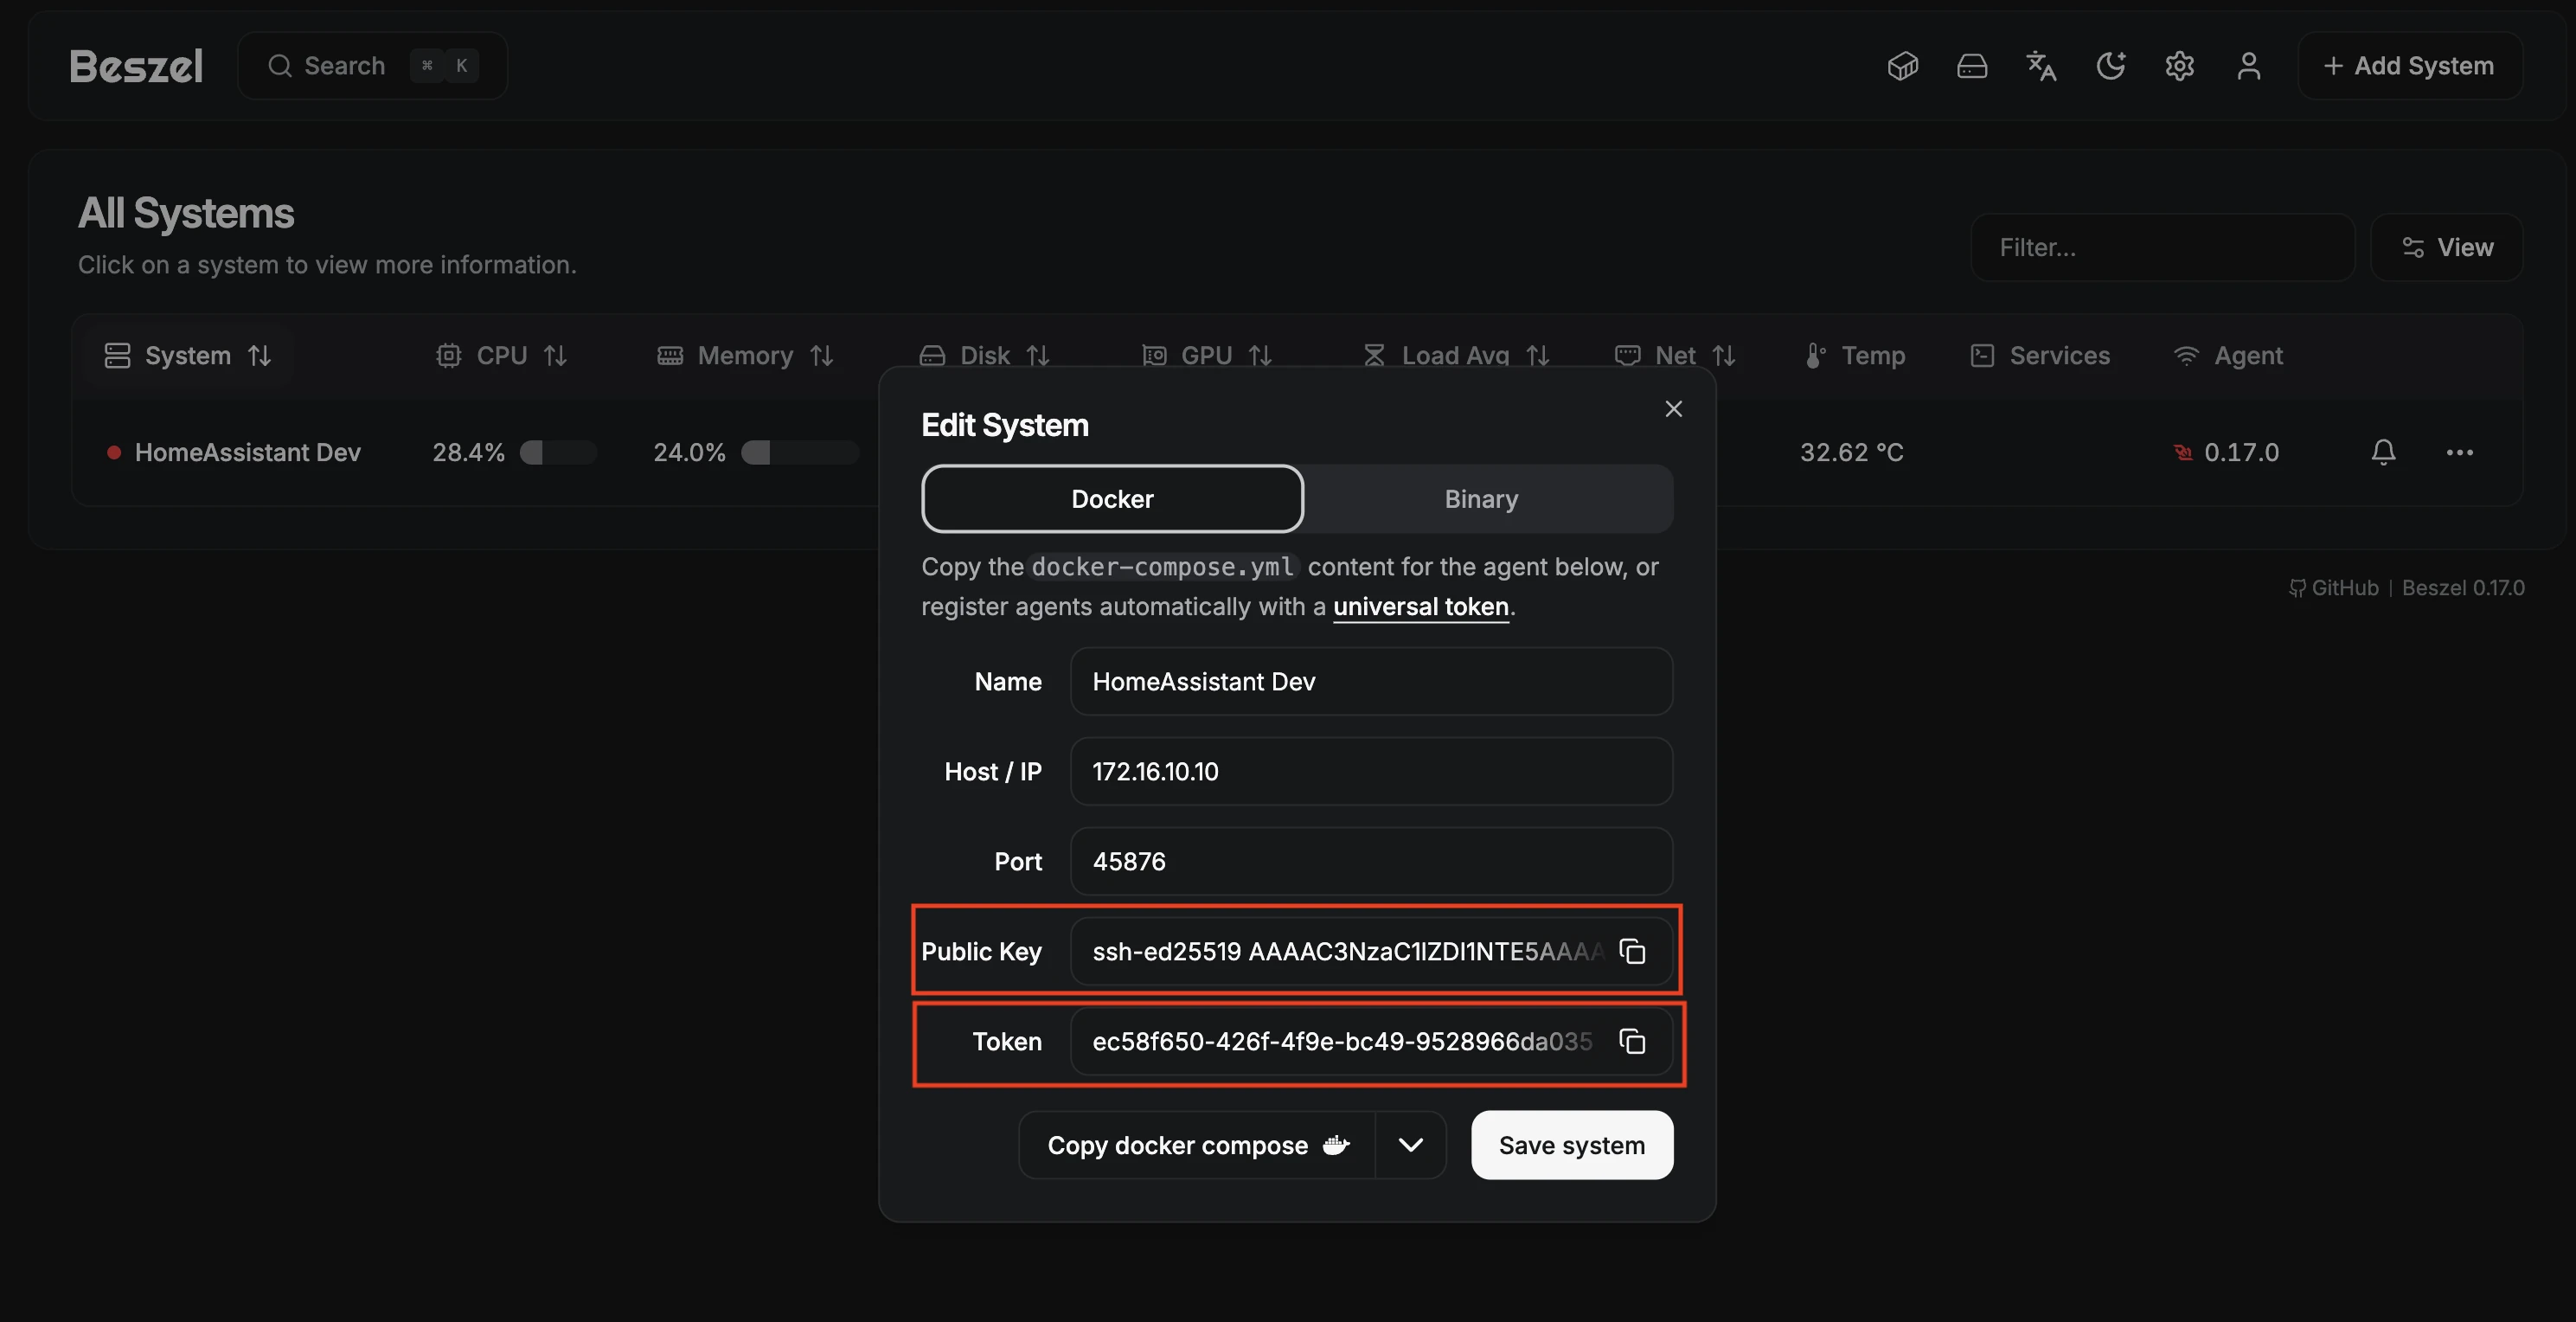
key - SSH public key
Grab this from your Beszel Hub when you're adding a new system to monitor.
key: "ssh-ed25519 AAAAC3NzaC1lZDI1NTE5AAAAIExample..."
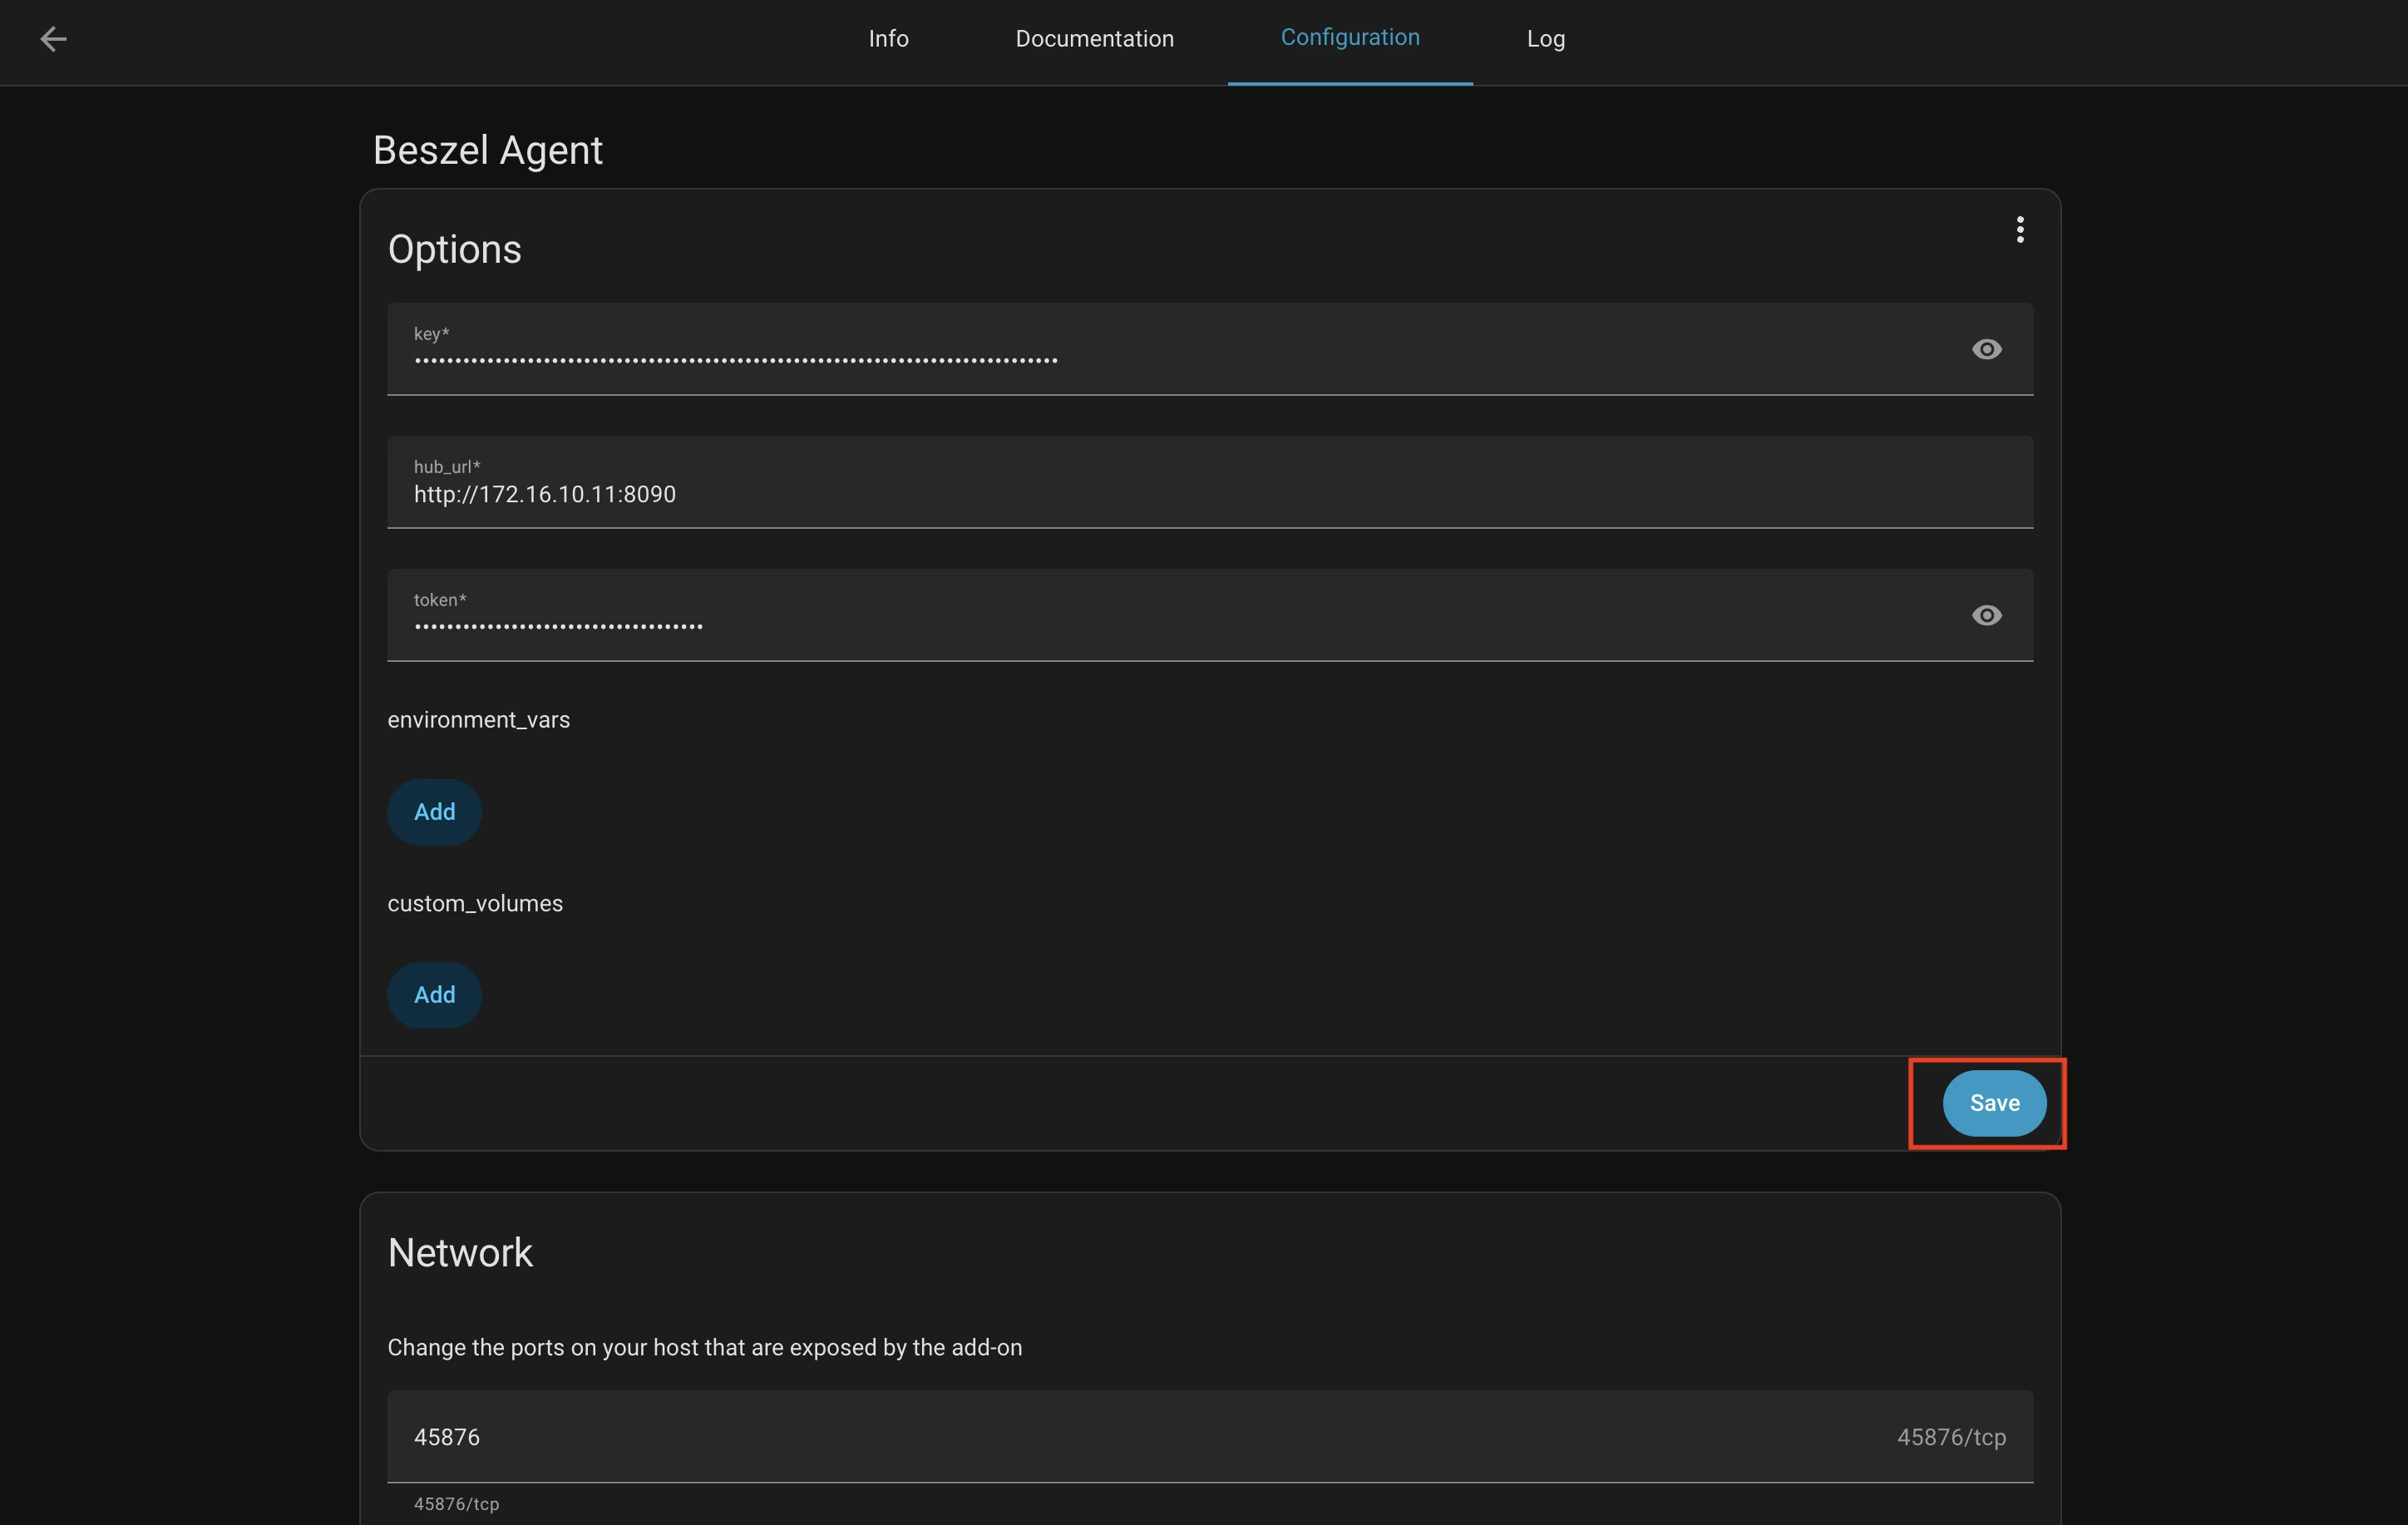
hub_url - Beszel Hub URL
Where your Beszel Hub is running.
hub_url: "http://192.168.1.100:8090"
token - Authentication token
Grab this from your Beszel Hub when you're adding a new system to monitor.
token: "your-secret-token"
Beszel Hub:
Enter your SSH key, Hub URL, and Token:
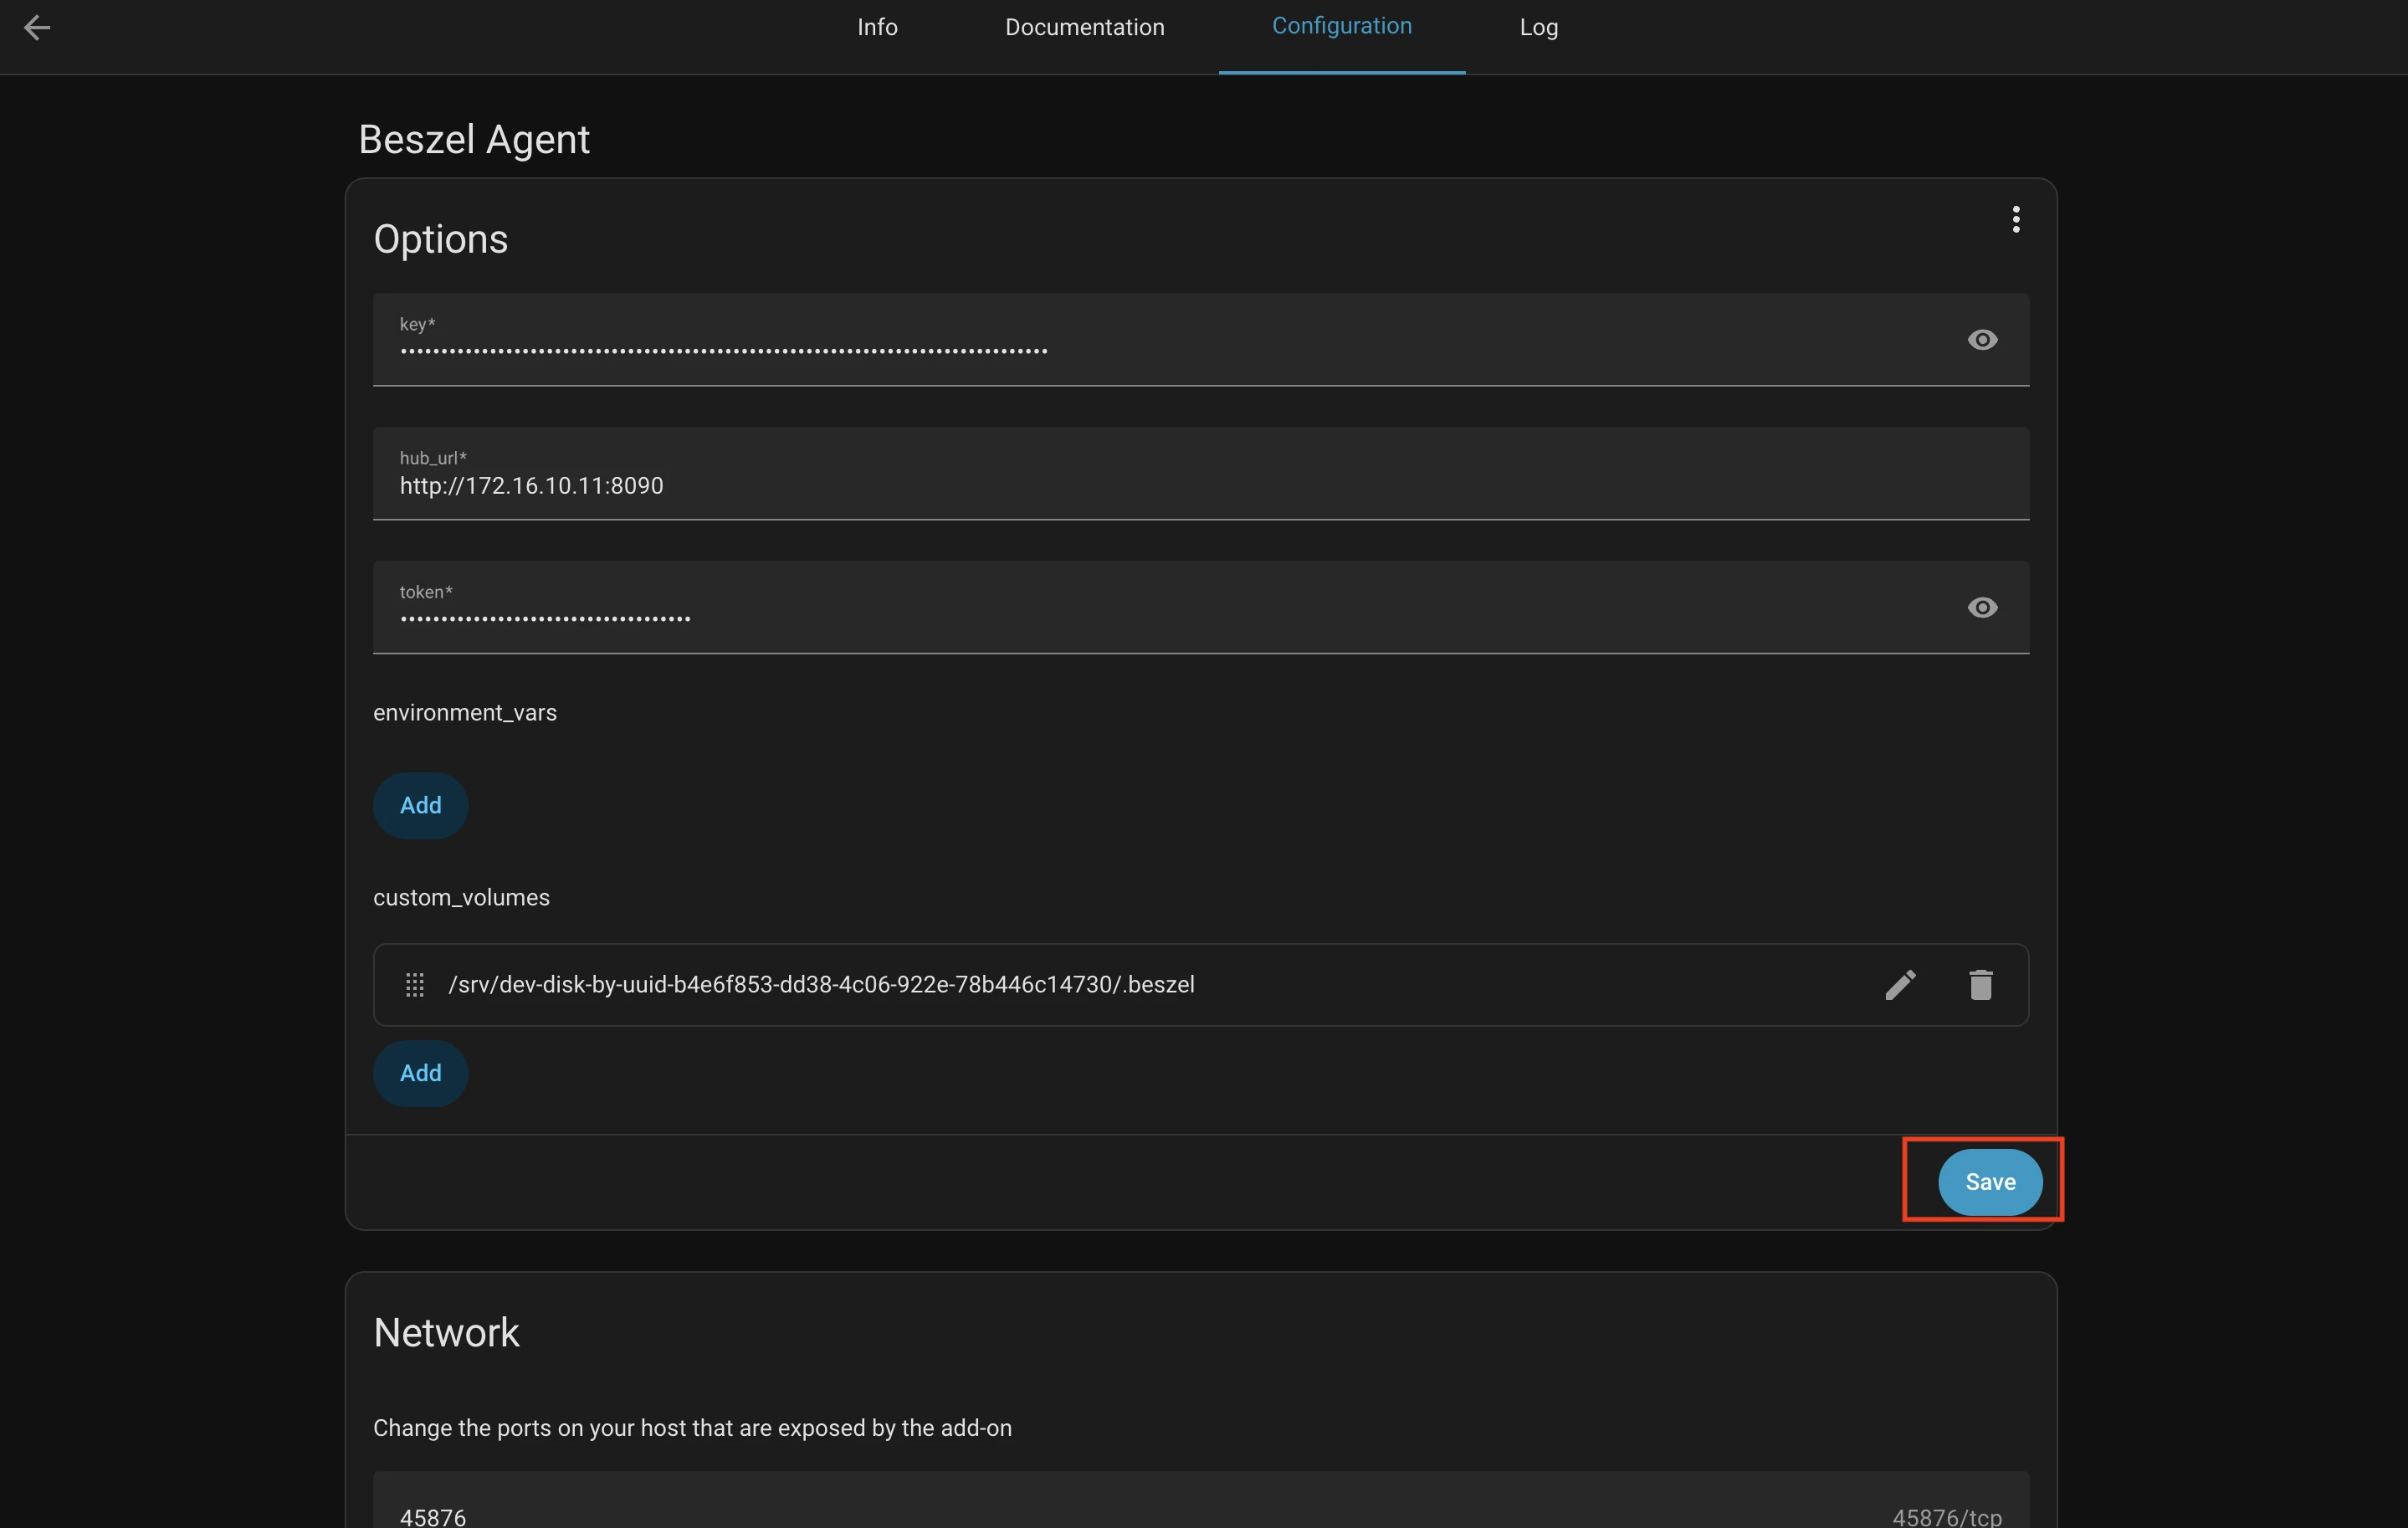
9. (Optional) Configure Custom Enviromnent Variables and Volumes
If you want to add custom environment variables and volume mappings you can do that here.
environment_vars - Extra environment variables
Need to pass custom environment variables? Add them here:
environment_vars:
  - name: "LOG_LEVEL"
    value: "debug"
  - name: SMART_DEVICES
    value: "/dev/nvme0:nvme,/dev/sda:sat"
Check available beszel agent environment variables here.
custom_volumes - Mount additional paths
custom_volumes:
  - host_path: "/mnt/data"
    container_path: "/mnt/data:ro"
Add :ro for read-only, :rw (or nothing) for read-write.
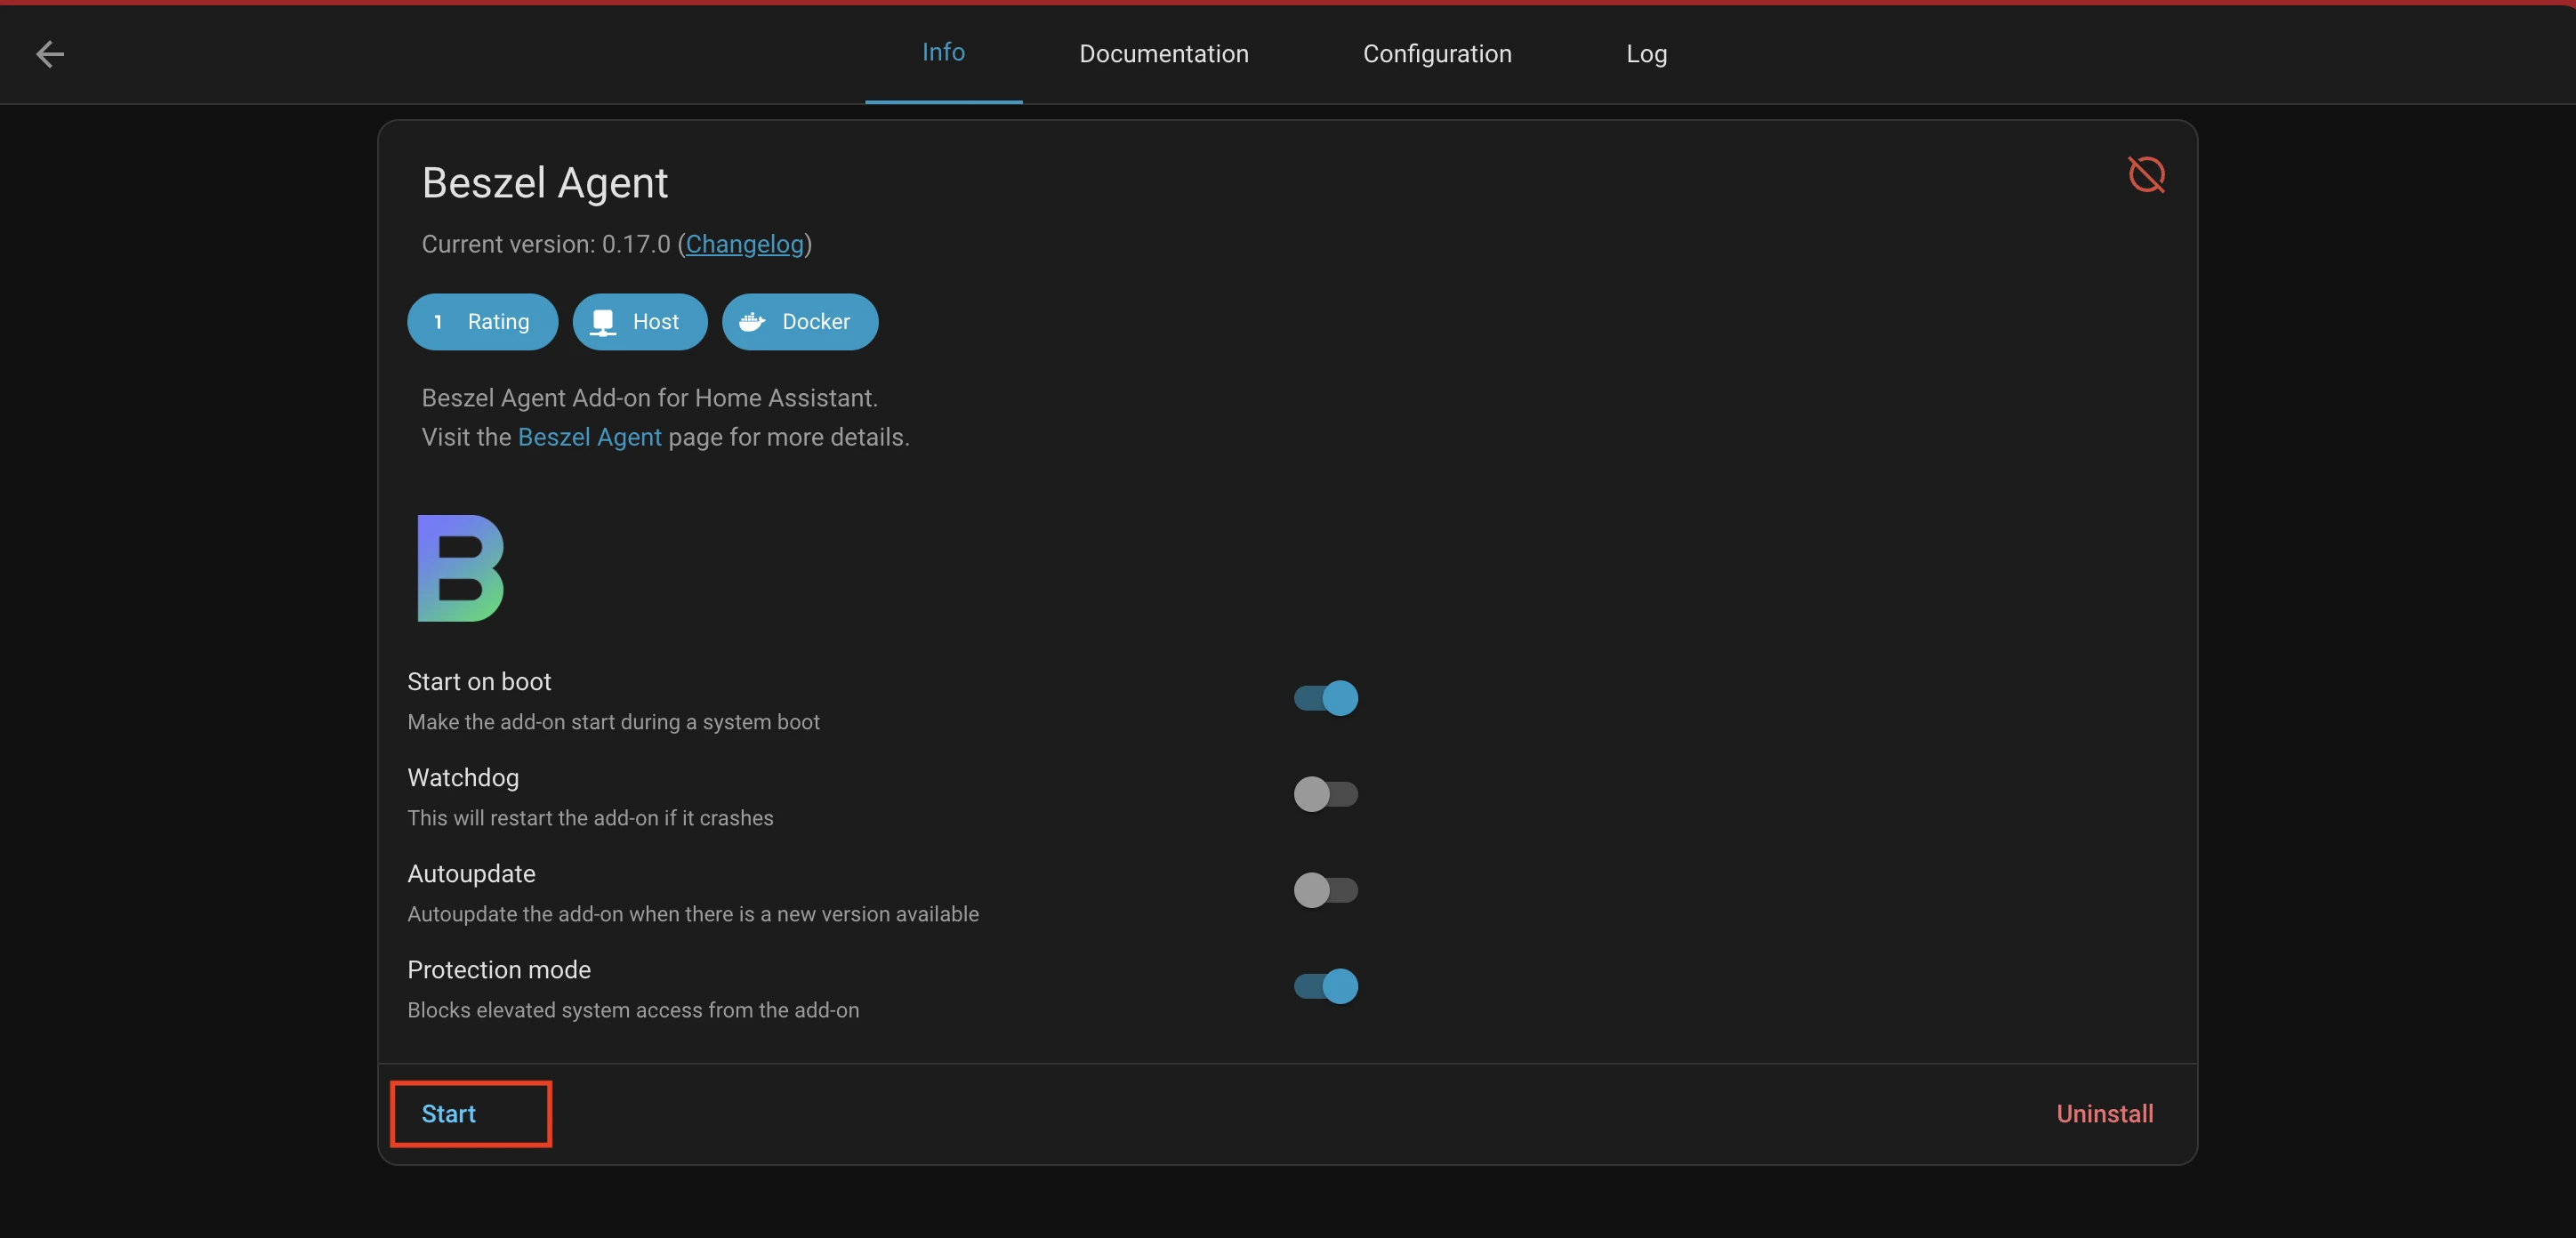
10. Start the Add-on
Navigate back to the "Info" tab and click "Start":
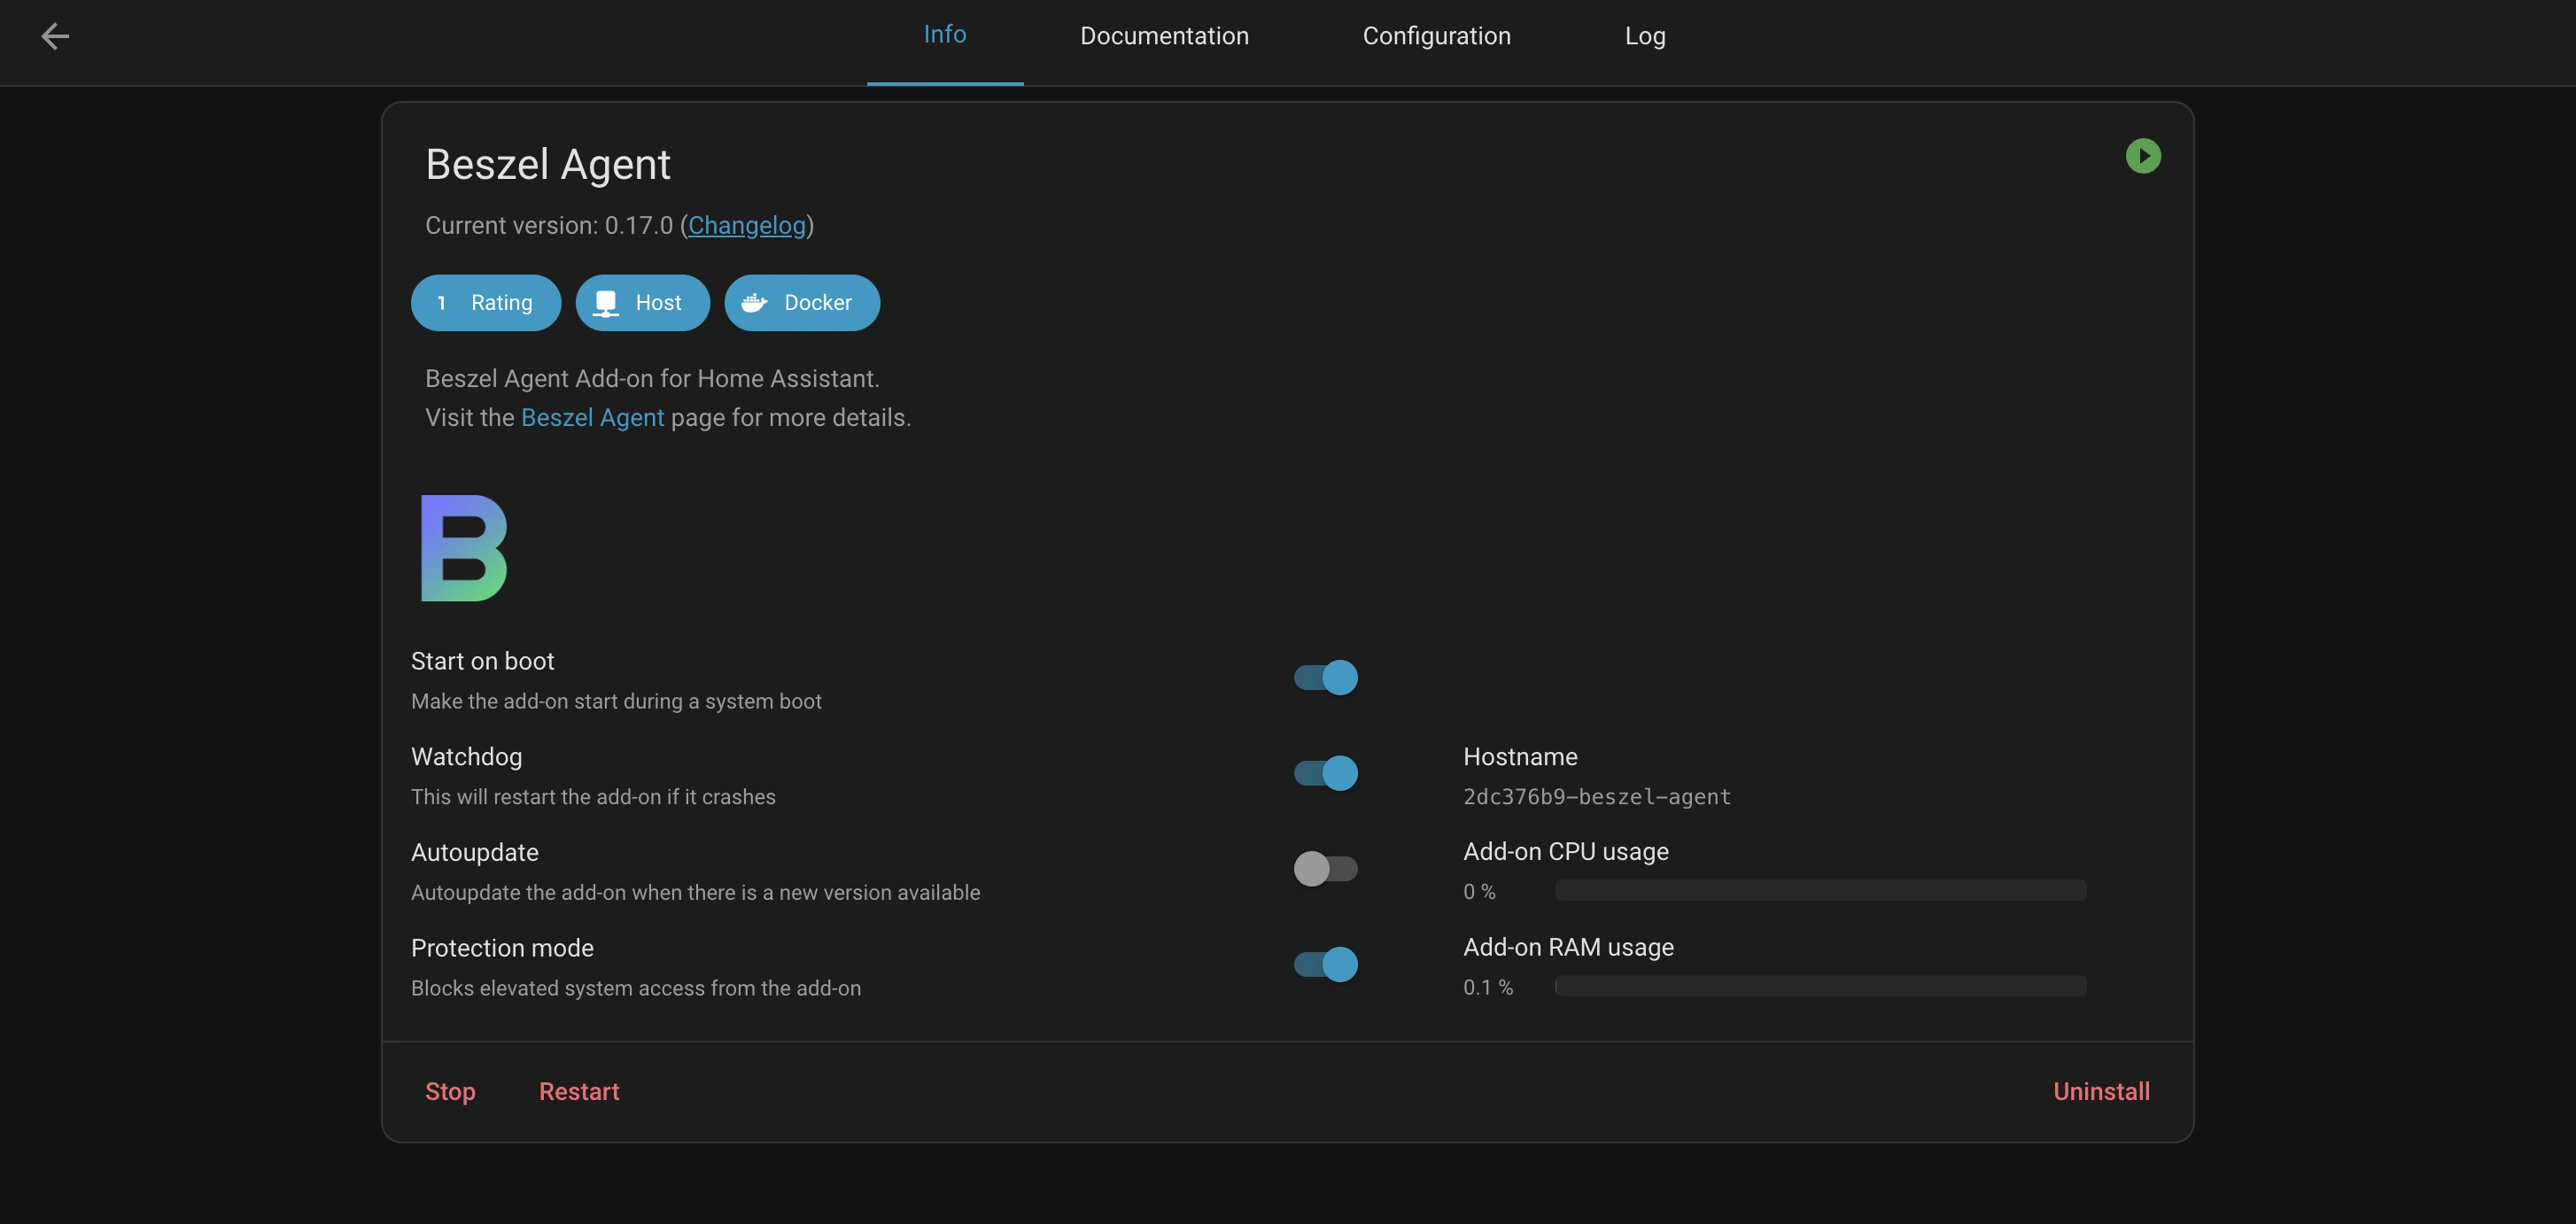
11. Observe Add-on Running
You should see the add-on running successfully (You can check the logs for connection status).
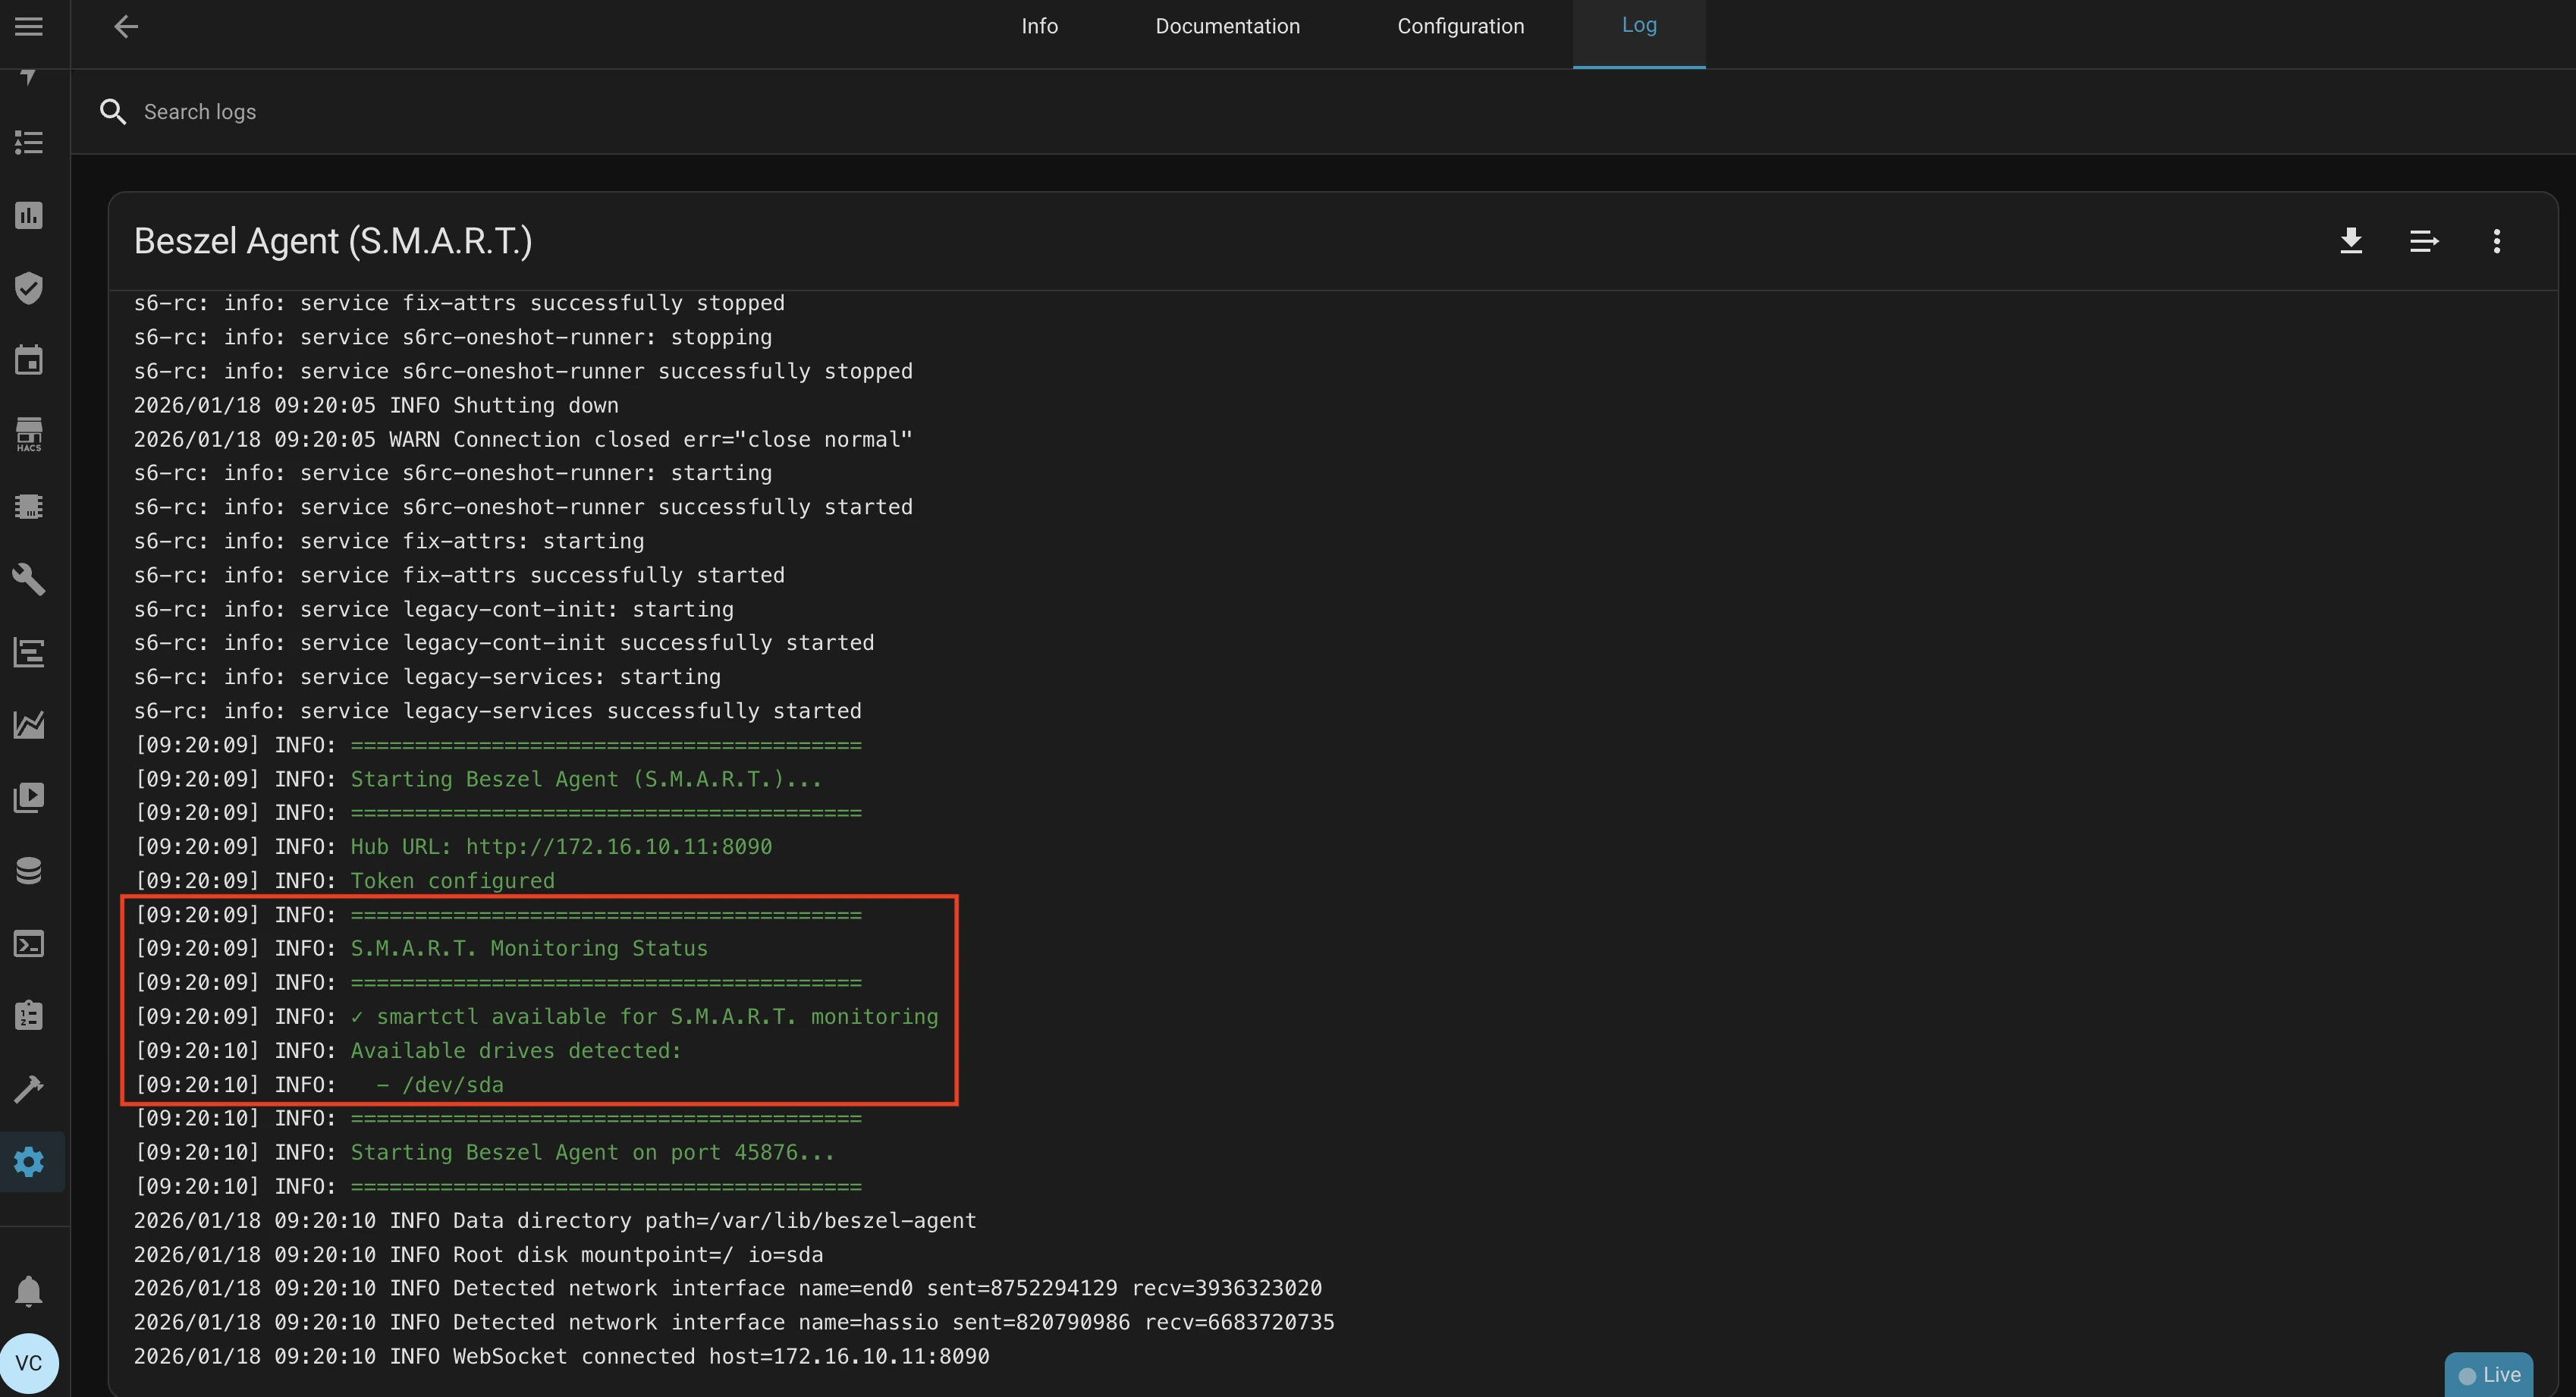
For S.M.A.R.T. monitoring, addon logs will show detected disks:
12. (Optional) Disable Protection Mode
If you are not seeing expected metrics, try disabling protection mode. This is mostly required for other Add-ons stats (docker stats) and S.M.A.R.T. monitoring.
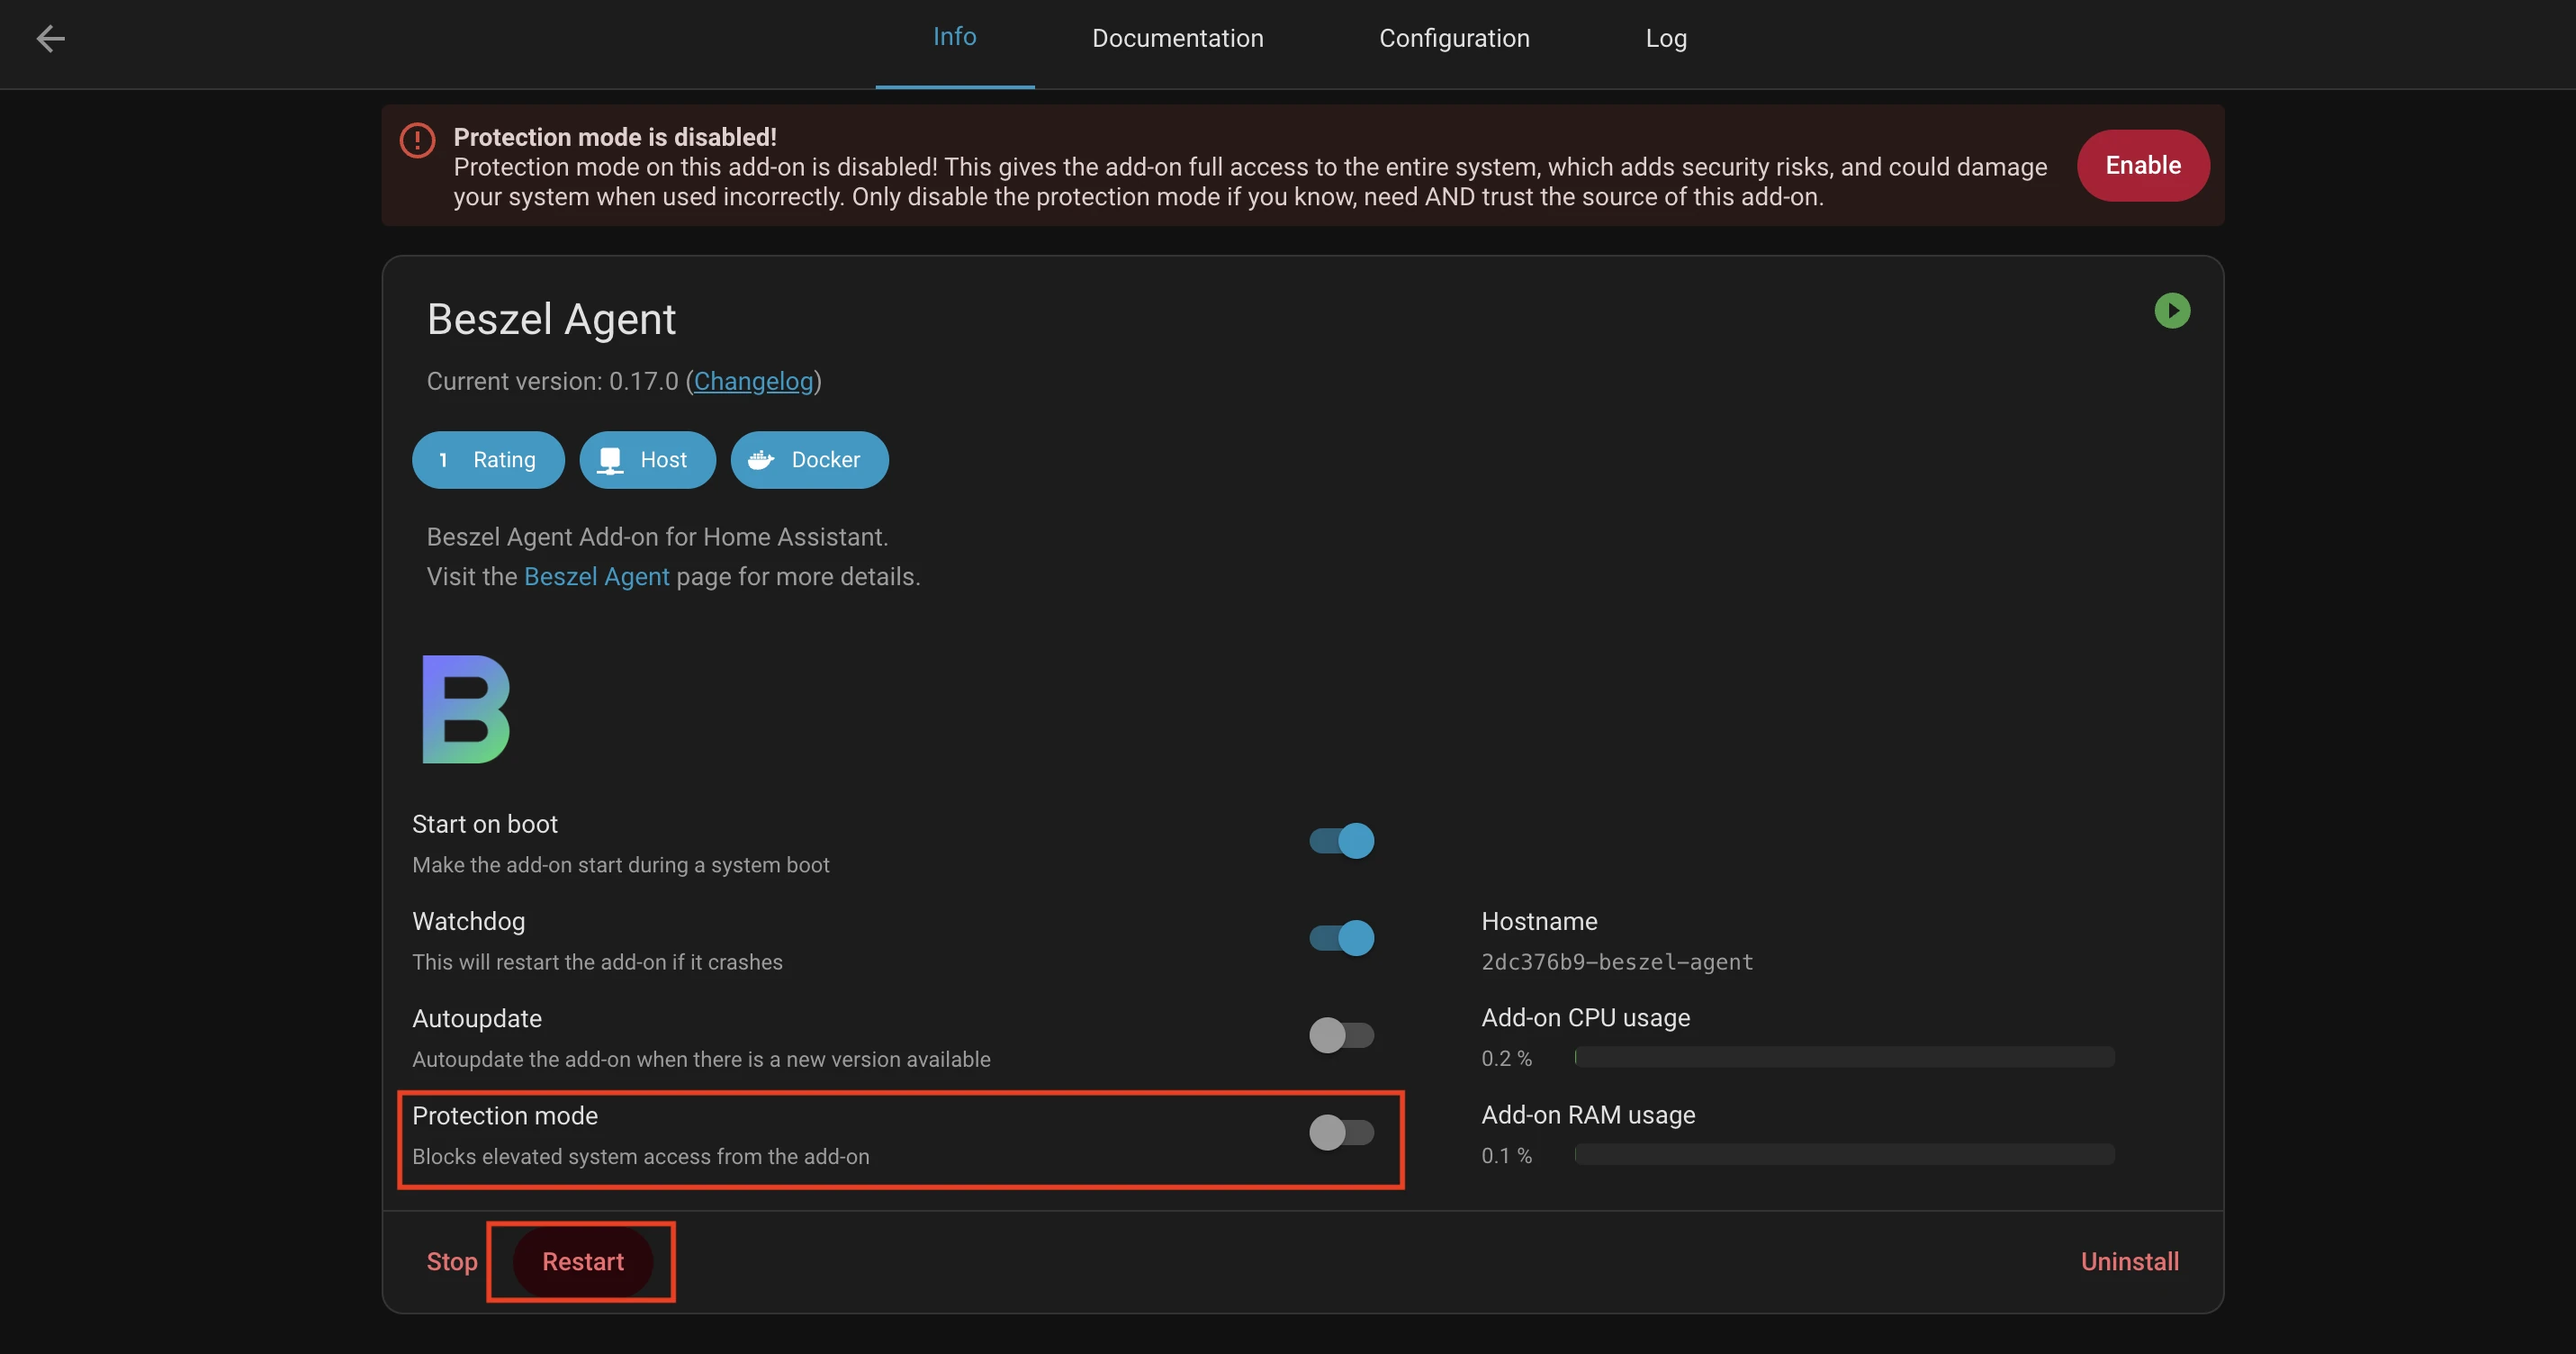
Protection Mode restricts add-on access to the host system. It's a security feature, but it limits what metrics Beszel can collect. Only disable it if you trust the add-on and beszel agent - it's open source, but disabling protection does give it broader system access.
13. Verify Metrics in Beszel Hub
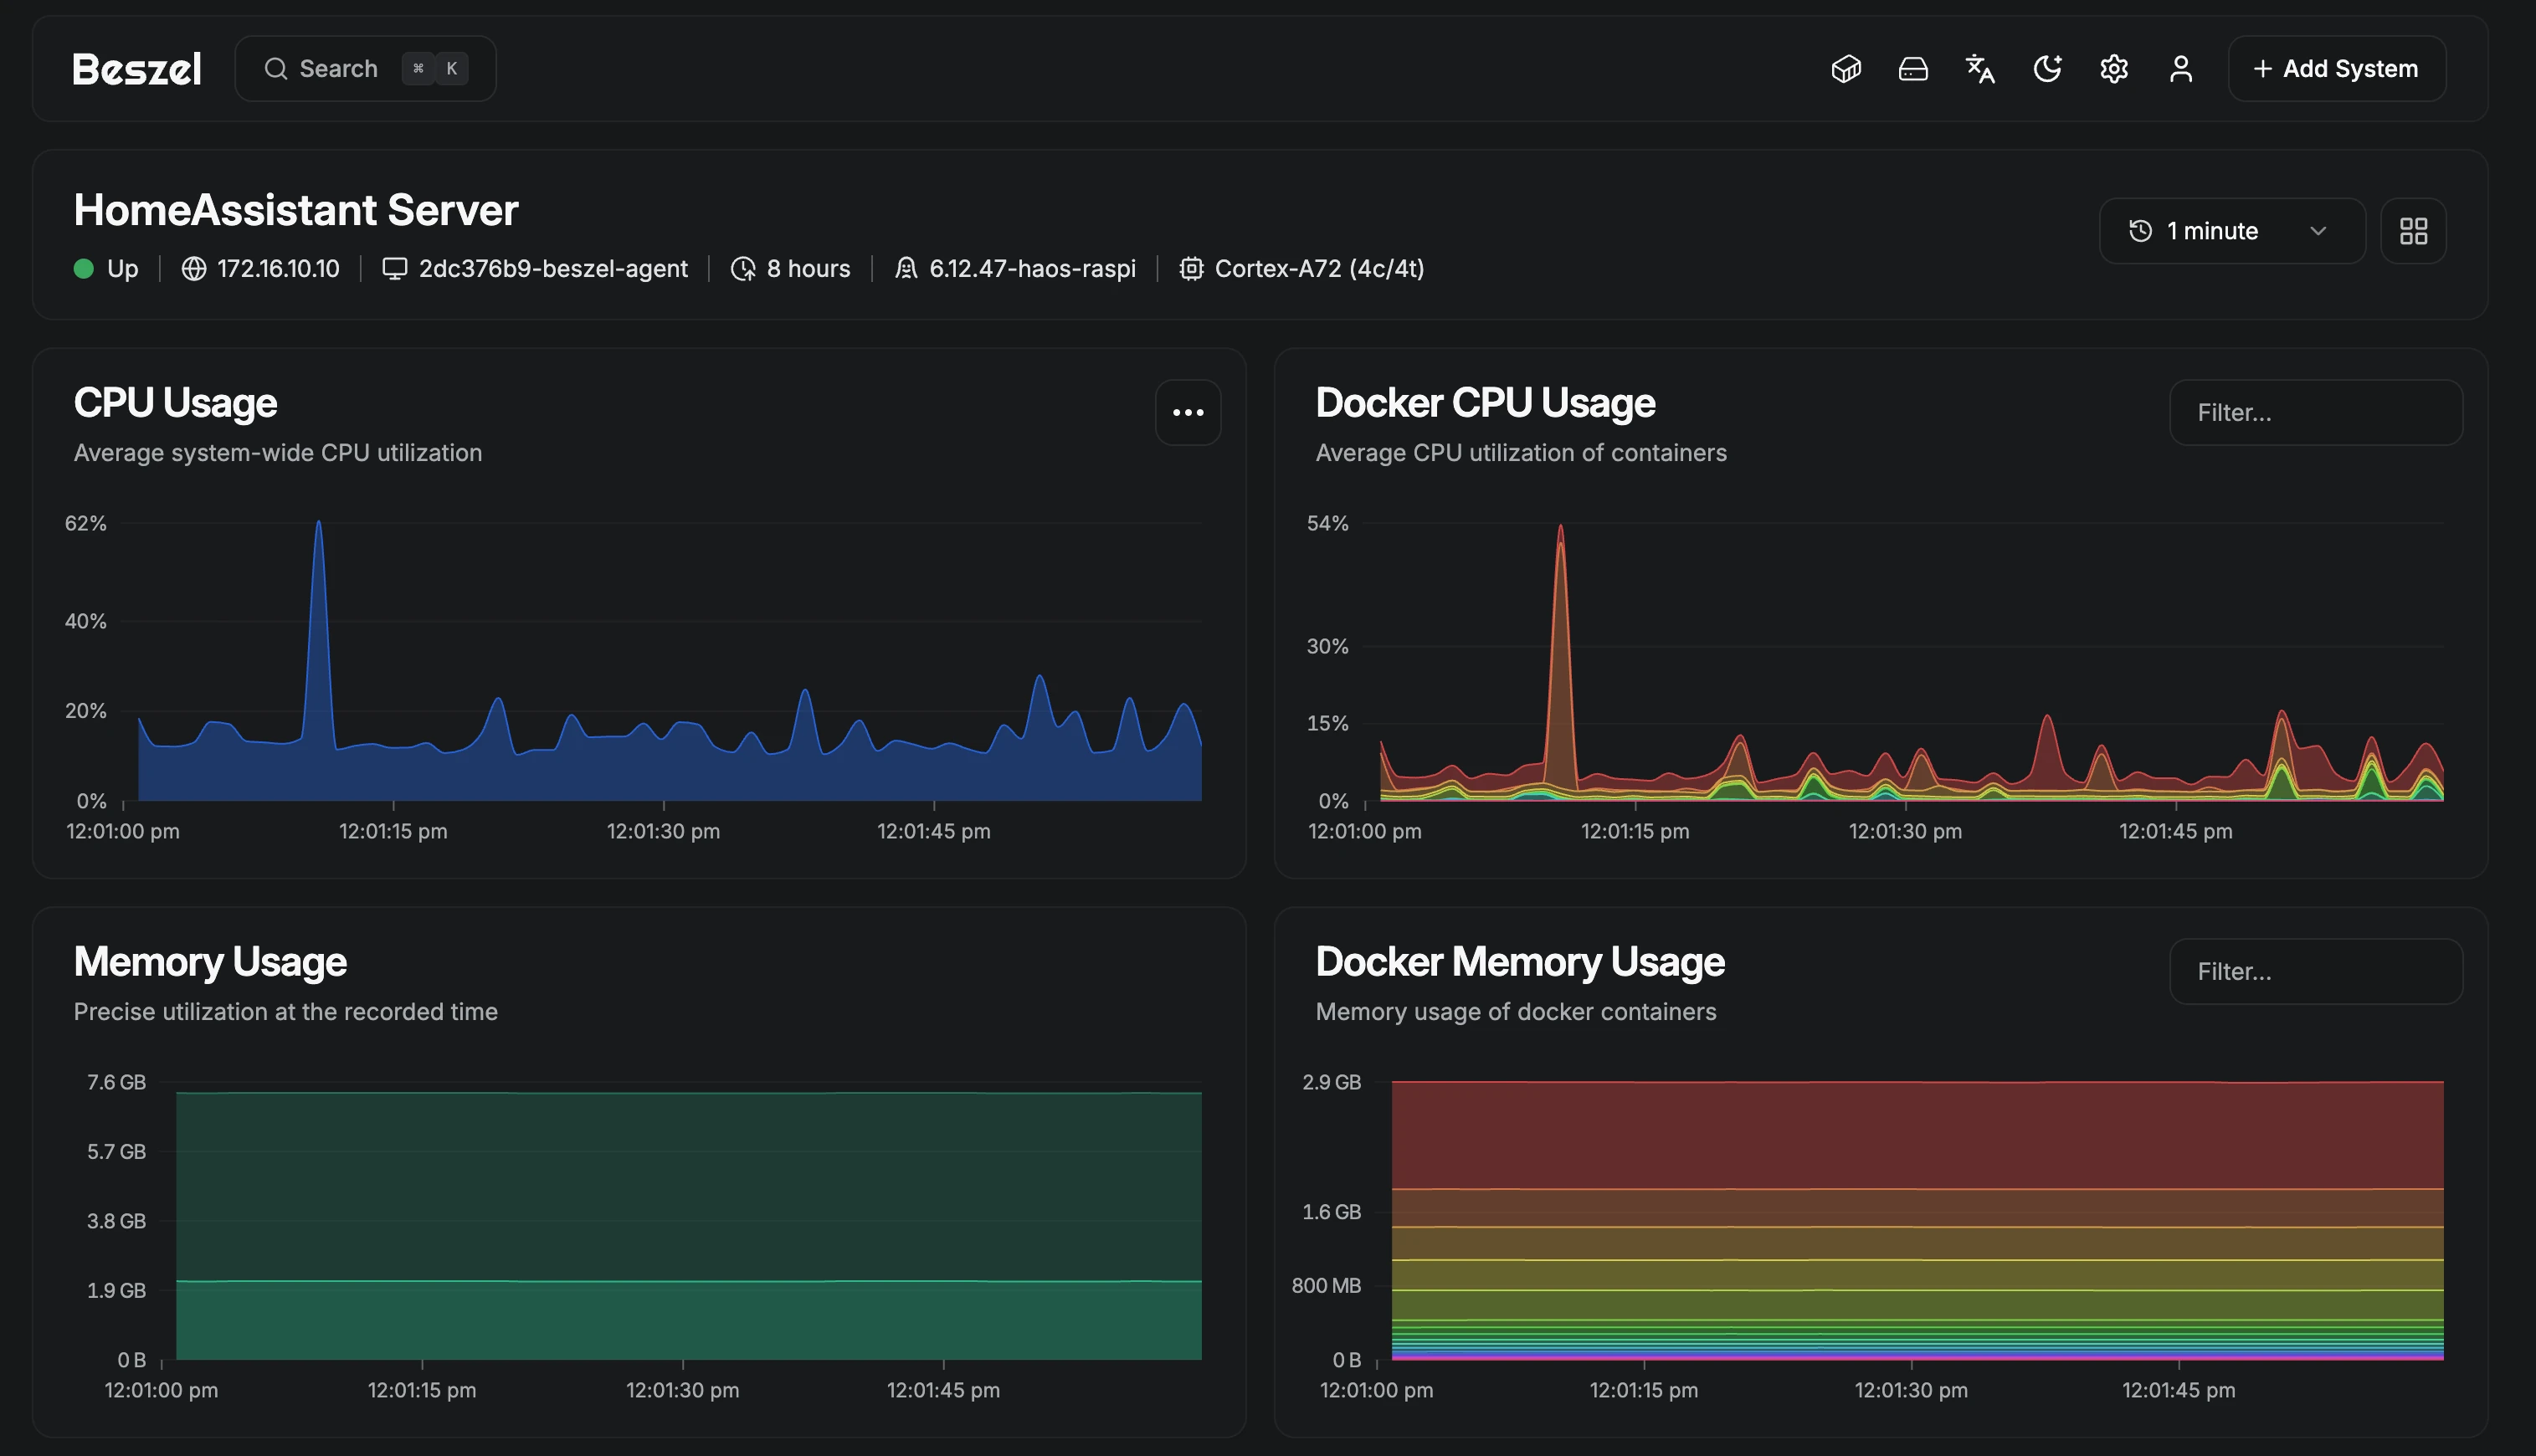
Log in to your Beszel Hub instance and verify that metrics from your Home Assistant instance are being received:
For S.M.A.R.T. monitoring, you should see disk health metrics:

Troubleshooting & Support
- If you encounter issues, check the add-on logs for errors.
- For advanced configuration, see the main beszel documentation or open an issue on GitHub.
Enjoy monitoring your Home Assistant system with Beszel Agent!